MSI 890GXM driver and firmware

Related MSI 890GXM Manual Pages
Download the free PDF manual for MSI 890GXM and other MSI manuals at ManualOwl.com
User Guide - Page 2

.... ■ Windows® is registered...version
Date February 2010
Technical Support
If a problem arises with your system and no solution can be obtained from the user's manual, please contact your place of purchase or local distributor. Alternatively, please try the following help resources for further guidance.
◙ Visit the MSI website for FAQ, technical guide, BIOS updates, driver updates...
User Guide - Page 4
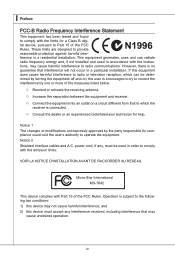
... the user's authority to operate the equipment. Notice 2 Shielded interface cables and A.C. power cord, if any, must be used in order to comply with the emission limits.
VOIR LA NOTICE D'INSTALLATION AVANT DE RACCORDER AU RESEAU.
Micro-Star International MS-7642
This device complies with Part 15 of the FCC Rules. Operation is subject...
User Guide - Page 8

... Equipment) Statement v English En-1
Mainboard Specifications En-2 Quick Components Guide En-4 CPU (Central Processing Unit En-5 Memory En-8 Power Supply En-10 Back Panel En-11 Connectors En-13 Jumpers En-20 Switch En-21 Slots En-22 LED Status Indicators En-25 BIOS Setup En-26 Software Information En-36 Deutsch De-1 Spezificationen De-2 Komponenten-Ü...
User Guide - Page 13

...Back panel
- 1 Optical S/PDIF-Out port - 1 PS/2 keyboard/ mouse combo port - 1 VGA port - 1 DVI-D port ** - 4 USB 2.0 ports - 2 USB 3.0 blue ports - 1 HDMI port ** - 1 E-SATA port - 1 LAN port - 6 flexible audio ports **(The HDMI and DVI-D ports can not work simultaneously) ■ On-Board - 4 USB 2.0 connectors - 1 Chassis Intrusion connector - 1 Serial port connector - 1 Parallel port connector...
User Guide - Page 15

... heat dissipation. Replacing the CPU While replacing the CPU, always turn off the ATX power supply or unplug the power supply's power cord from the grounded outlet first to ensure the safety of CPU. Overclocking This mainboard is designed to support overclocking. However, please make sure your components are able to tolerate such abnormal setting, while doing overclocking...
User Guide - Page 16

... to prevent overheating. Meanwhile, do not forget to apply some thermal paste on CPU before installing the heat sink/cooler fan for better heat dispersion.
Follow the steps below to install the CPU & cooler correctly. Wrong installation will cause the damage of your CPU & mainboard
1. Pull the lever sideways away from the socket. Make sure to...
User Guide - Page 18

... are used for installing memory modules. For more information on compatible components, please visit http://www.msi.com/index.php?func=testreport
DDR3
240-pin, 1.5V
72x2=144 pin
48x2=96 pin
Dual-Channel mode Population Rule
In Dual-Channel mode, the memory modules can transmit and receive data with two data bus lines simultaneously...
User Guide - Page 19

...Installing Memory Modules
1. The memory module has only one notch on the center and will only fit in the right orientation.
2. Insert the memory module vertically into the DIMM slot. Then push it in until the golden finger on the memory... of the DIMM slot will automatically close when the memory module is properly seated.
3. Manually check if the memory module has been locked in place by the DIMM ...
User Guide - Page 23

...: IDE1
This connector supports IDE hard disk drives, optical disk drives and other IDE devices.
* The MB layout in this figure is for reference only.
Important
If you install two IDE devices on the same cable, you must configure the drives separately to master / slave mode by setting jumpers. Refer to IDE device's documentation supplied by the vendors for jumper setting instructions.
En-13
User Guide - Page 25

...
Important
• Please refer to the recommended CPU fans at processor's official website or consult the vendors for proper CPU cooling fan.
• CPUFAN supports fan control. You can install Control Center utility that will automatically control the CPU fan speed according to the actual CPU temperature.
• Fan cooler set with 3 or 4 pins power connector are both available for CPUFAN.
CD...
User Guide - Page 32
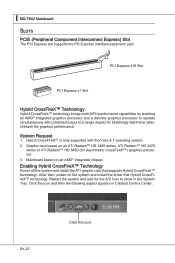
...™ HD 5450 (for Asymmetric CrossFireX™) graphics processor. 3. Mainboard based on an AMD® integrated chipset.
Enabling Hybrid CrossFireX™ Technology
Power off the system and install the ATI graphic card that supports Hybrid CrossFireX™ technology. After then, power on the system and install the driver that Hybrid CrossFireX™ technology. Restart the system and...
User Guide - Page 34
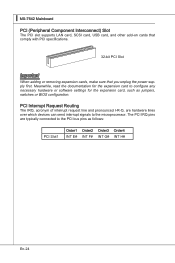
... PCI slot supports LAN card, SCSI card, USB card, and other add-on cards that comply with PCI specifications.
32-bit PCI Slot
Important
When adding or removing expansion cards, make sure that you unplug the power supply first. Meanwhile, read the documentation for the expansion card to configure any necessary hardware or software settings for the expansion card, such as jumpers, switches or BIOS...
User Guide - Page 36
...; Upon boot-up, the 1st line appearing after the memory count is the BIOS version. It is usually in the format: A7642AMS V1.0 020510 where: 1st digit refers to BIOS maker as A = AMI, W = AWARD, and P = PHOENIX. 2nd - 5th digit refers to the model number. 6th digit refers to the chipset as I = Intel, N = NVIDIA, A = AMD and V = VIA. 7th - 8th...
User Guide - Page 42
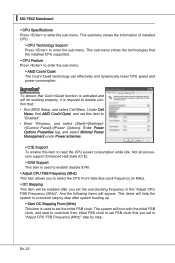
... BIOS Setup, and select Cell Menu. Under Cell
Menu, find AMD Cool'n'Quiet, and set this item to "Enabled". • Enter Windows, and select [Start]->[Settings]>[Control Panel]->[Power Options]. Enter Power Options Properties tag, and select Minimal Power Management under Power schemes.
▶ C1E Support To enable this item to read the CPU power consumption while idle. Not all processors support...
User Guide - Page 43

... sub-menu displays the information of installed memory. ▶ Advance DRAM Configuration Press to enter the sub-menu. ▶ DRAM Timing Mode This field has the capacity to automatically detect all of the DRAM timing. ▶ DRAM Drive Strength This item allows you to control the memory data bus' signal strength. Increasing the drive strength of the memory bus can...
User Guide - Page 46

...-up screen to complete the installation. The Driver/Utility DVD contains the:
- Driver menu : The Driver menu shows the available drivers. Install the driver by your desire and to activate the device.
- Utility menu : The Utility menu shows the software applications that the mainboard supports.
Important
Please visit the MSI website to get the latest drivers and BIOS for better system performance...