Nikon COOLPIX L830 driver and firmware
Related Nikon COOLPIX L830 Manual Pages
Download the free PDF manual for Nikon COOLPIX L830 and other Nikon manuals at ManualOwl.com
Product Manual - Page 7
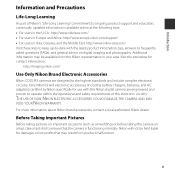
... below for contact information:
http://imaging.nikon.com/
Use Only Nikon Brand Electronic Accessories
Nikon COOLPIX cameras are designed to the highest standards and include complex electronic circuitry. Only Nikon brand electronic accessories (including battery chargers, batteries, and AC adapters) certified by Nikon specifically for use with this Nikon digital camera are engineered and proven to...
Product Manual - Page 8
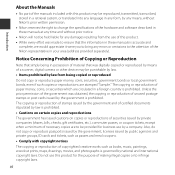
... manuals is accurate and
complete, we would appreciate it were you to bring any errors or omissions to the attention of the Nikon representative in your area (address provided separately).
Notice Concerning Prohibition of Copying or Reproduction
Note that simply being in possession of material that was digitally copied or reproduced by means of a scanner, digital camera or other device...
Product Manual - Page 9
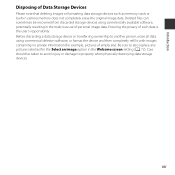
Introduction
Disposing of Data Storage Devices
Please note that deleting images or formatting data storage devices such as memory cards or built-in camera memory does not completely erase the original image data. Deleted files can sometimes be recovered from discarded storage devices using commercially available software, potentially resulting in the malicious use of personal image data. Ensuring...
Product Manual - Page 13
...
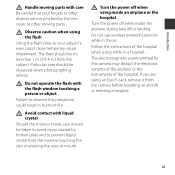
Do not operate the flash with the flash window touching a person or ...wireless network functions while in the air.
Follow the instructions of the hospital when using while in a hospital.
The electromagnetic waves emitted by this camera may disrupt the electronic systems of the airplane or the instruments of the hospital. If you are using an Eye-Fi card, remove it from the camera before boarding...
Product Manual - Page 14
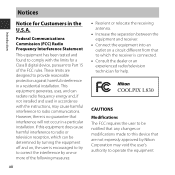
... a Class B digital device, pursuant to Part 15 of the FCC rules. These limits are designed to provide reasonable protection against harmful interference in a residential installation. This equipment generates...television technician for help.
CAUTIONS Modifications The FCC requires the user to be notified that any changes or modifications made to this device that are not expressly approved by Nikon...
Product Manual - Page 18
... Set Using the Multi Selector 43
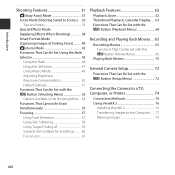
Using the Flash 44 Using...Recording and Playing Back Movies ... 65
Recording Movies 65 Functions That Can Be Set with the d Button (Movie Menu 69
Playing Back Movies 70
General Camera Setup 72
Functions That Can Be Set with the d Button (Setup Menu 72
Connecting the Camera to a TV, Computer, or Printer 74
Connection Methods 74 Using ViewNX 2 76
Installing...
Product Manual - Page 20
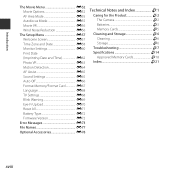
... Off E66 Format Memory/Format Card E67 Language E68 TV Settings E68 Blink Warning E69 Eye-Fi Upload E70 Reset All E71 Battery Type E72 Firmware Version E72 Error Messages E73 File Names E77 Optional Accessories E78
Technical Notes and Index F1
Caring for the Product F2 The Camera F2 Batteries F3 Memory Cards F5
Cleaning and Storage F6 Cleaning F6...
Product Manual - Page 39
... are inserted into the camera or when the camera is connected to an optional AC adapter, and it can run the clock for several days after about ten hours of charging.
• If the camera's backup battery becomes exhausted, the date and time setting screen is displayed when the camera is turned on. Set the date and time...
Product Manual - Page 80
... is standing in front of a white wall) • Several objects are at different distances from the camera (e.g. the subject is inside a cage) • Subjects with repeating patterns (window blinds, buildings with multiple rows of similarly
shaped windows, etc.) • Subject is moving rapidly In the situations noted above, try pressing the shutter-release...
Product Manual - Page 86
... being saved or while a movie is being recorded. Do not open the battery-chamber/memory card slot cover or remove the batteries or memory card while an indicator is flashing. Doing this could result in loss of data, or in damage to the camera or the memory card.
B Notes About Movie Recording
• Memory cards with an SD Speed Class rating of...
Product Manual - Page 93
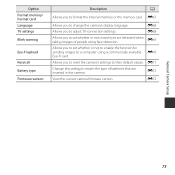
Option Format memory/ Format card Language TV settings Blink warning
Eye-Fi upload
Reset all Battery type Firmware version
Description
A
Allows you to format the internal memory or the memory card. E67
Allows you to change the camera's display language.
E68
Allows you to adjust TV-connection settings.
E68
Allows you to set whether or not closed eyes are detected when taking images of ...
Product Manual - Page 95
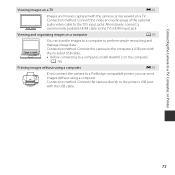
...connect a commercially available HDMI cable to the TV's HDMI input jack.
Viewing and organizing images on a computer
A 76
You can transfer images to a computer to perform simple retouching and
manage image data.
Connection method: Connect the camera to the computer's USB port with
the included USB cable. • Before connecting to a computer, install ViewNX 2 on the computer
(A 76).
Printing...
Product Manual - Page 96
...the Camera to a TV, Computer, or Printer
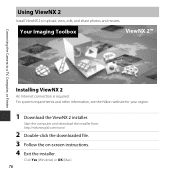
Installing ViewNX 2
An Internet connection is required. For system requirements and other information, see the Nikon website for your region.
1 Download the ViewNX 2 installer.
Start the computer and download the installer from: http://nikonimglib.com/nvnx/
2 Double-click the downloaded file. 3 Follow the on-screen instructions. 4 Exit the installer.
Click...
Product Manual - Page 98
... may take a while for Nikon Transfer 2 to start. Wait until Nikon Transfer 2 starts.
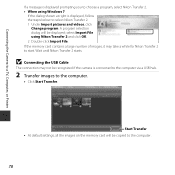
B Connecting the USB Cable
The connection may not be recognized if the camera is connected to the computer via a USB hub.
2 Transfer images to the computer.
• Click Start Transfer.
Start Transfer • At default settings, all the images on the memory card will be copied to the computer.
78
Product Manual - Page 99
...the Camera to a TV, Computer, or Printer
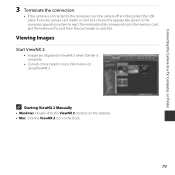
3 Terminate the connection.
• If the camera is connected to the computer, turn the camera off and disconnect the USB cable. If you are using a card reader or card slot, choose the appropriate option in the computer operating system to eject the removable disk corresponding to the memory card, and then remove the card from the card reader or card slot...
Product Manual - Page 130
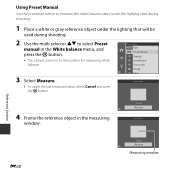
... k button.
• The camera zooms in to the position for measuring white balance.
3 Select Measure.
• To apply the last measured value, select Cancel and press the k button.
White balance Auto Preset manual Daylight Incandescent Fluorescent Cloudy Flash
Preset manual
4 Frame the reference object in the measuring
window.
Cancel Measure
Preset manual
Reference Section
E30
Cancel...
Product Manual - Page 172
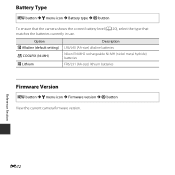
... that matches the batteries currently in use.
Option k Alkaline (default setting) l COOLPIX (Ni-MH) m Lithium
Description LR6/L40 (AA-size) alkaline batteries Nikon EN-MH2 rechargeable Ni-MH (nickel metal hydride) batteries FR6/L91 (AA-size) lithium batteries
Firmware Version
d button M z menu icon M Firmware version M k button View the current camera firmware version.
Reference Section
E72
Product Manual - Page 189
... 54, E34 35, 44
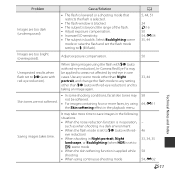
Images are too bright (overexposed).
Adjust exposure compensation.
50
Unexpected results when flash set to V (auto with
red-eye reduction).
When taking images using the flash with V (auto with red-eye reduction), In-Camera Red Eye Fix may be applied to areas not affected by red-eye in rare cases...
Product Manual - Page 198
...-Definition Multimedia Interface are trademarks or registered
trademarks of HDMI Licensing LLC.
• All other trade names mentioned in this manual or the other documentation provided with your Nikon product are trademarks or registered trademarks of their respective holders.
FreeType License (FreeType2) Portions of this software are copyright © 2014 The FreeType Project (http...
Product Manual - Page 200
... 71, E26 Eye-Fi upload 73, E70 Eyelet for camera strap 1
F
Face detection 57 Face priority E36, E55 File name E77 Fill flash 45 Filter effects 64, E12 Fireworks show m 32, 35 Firmware version 73, E72 Fixed range auto E34 Flash 1, 5, 44 Flash lamp 3, 46 Flash mode 44 Flash pop-up button 1, 5, 44 Focus 26, 57 Focus area...