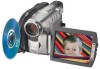
Sony DCR DVD301 - 1MP DVD Handycam Camcorder driver and firmware
Drivers and firmware downloads for this Sony item
Related Sony DCR DVD301 Manual Pages
Download the free PDF manual for Sony DCR DVD301 and other Sony manuals at ManualOwl.com
Operating Instructions - Page 3

... from that to which the receiver is connected. - Consult the dealer or an experienced radio/ TV technician for help. The supplied interface cable must be used with the equipment in order to comply with the limits for a digital device pursuant to Subpart B of Part 15 of FCC Rules.
Certain countries or regions may regulate...
Operating Instructions - Page 5

... play back a disc recorded with your DVD Handycam on your DVD player.
You can play back a disc recorded with your DVD Handycam on DVD players that can play back DVD-R/DVD-RW.
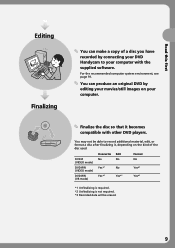
You can edit and copy a disc easily by connecting your DVD Handycam to your computer.
You can edit and copy a disc easily on your computer using the supplied ImageMixer Ver.1.5 for Sony DVD Handycam software. It also enables...
Operating Instructions - Page 7

...in VR mode.
DVD player/ DVD recorder
Computer with a DVD drive installed
DVD player/ DVD recorder
Computer with a DVD drive installed
Choosing a disc
For long-term storage
To use the same disc over and over
To play back on a DVD player
To edit with a DVD Handycam
DVD-R Use a DVD-RW in Video mode
Use a DVD-RW in VR mode
*1 DVD-R/RW discs recorded by Sony DVD Handycam camcorders are designed...
Operating Instructions - Page 9
...
You can make a copy of a disc you have recorded by connecting your DVD Handycam to your computer with the supplied software.
For the recommended computer system environment, see page 91.
You can produce an original DVD by editing your movies/still images on your computer.
Finalize the disc so that it becomes compatible with other DVD players.
You may not be...
Operating Instructions - Page 10

... during playback - Display 59 Magnifying recorded images - PB ZOOM (Playback zoom) .. 61 Playing still images automatically - Slide Show 62
Viewing recordings on TV 63
Finalizing a disc for other players
Finalizing a disc 64 Changing the disc title 67 Playing back a disc on a DVD player, etc 69 Playing back a disc on a computer with a DVD drive installed .... 70
Recording on a finalized...
Operating Instructions - Page 11

... discs/ editing the recordings on your computer
Connecting your camcorder to your computer - Introduction 91 System requirements 91 Installing the USB driver 92 Installing software 93 Connecting your camcorder to the computer 94 Consulting the on-line help .......... 98
Viewing scenes recorded on your computer 99 Viewing scenes on the disc 99
Making a disc copy - Disc Duplicating 101...
Operating Instructions - Page 71

..., the movie and sound may pause. In this
case, copy the data to the hard disk drive of your computer. •The disc may not be played back on some computers. For details, see operating
instructions of your computer. Tip You can play back the disc on a computer without a DVD drive, by connecting your camcorder to your computer using a USB cable (page 99).
71
Operating Instructions - Page 91

... scenes on your computer •Editing scenes copied to your computer •Duplicating a disc •Making an original DVD using recorded
scenes stored on your computer.
Notes •Scenes may not be transferred correctly
depending on your computer. If this happens, set [USB SPEED] to [FULL-SPEED] in (SETUP MENU) in the SETUP display. •Depending on your application software, the file...
Operating Instructions - Page 92

... the USB cable to your computer.
Install the USB driver to control your camcorder from your computer.
If you are using Windows 2000 Professional or Windows XP Home Edition/Professional Log on as administrator.
1 Turn on your computer and allow
Windows to load. When your computer is already turned on, close all the software.
2 Insert the supplied CD-ROM into the
CD-ROM drive of your computer. The...
Operating Instructions - Page 93

....1.5 for Sony DVD Handycam (hereinafter referred to as ImageMixer) software that manages movies and still images transferred from your camcorder on your computer, and the WINASPI software that manages writing data on CD-Rs/CD-RWs.
1 When the USB driver installation is
completed, click [ImageMixer] on the menu window. Install Wizard program starts up and the [Choose Setup Language] window appears...
Operating Instructions - Page 94

... [Next].
For Microsoft Windows XP users
1 Connect the AC adaptor to your
camcorder.
2 Set the mode dial to (Play/Edit). 3 Turn the power on your camcorder by
pressing the POWER button for a few seconds.
4 Connect the (USB) jack of the
camcorder and the (USB) port of the computer using the USB cable supplied with your camcorder.
USB port
6 Make sure that [Sony DVD Handycam]
is selected as the...
Operating Instructions - Page 95

... Storage Device] in [Universal Serial Bus controllers] respectively. When all the devices appear, the USB driver is installed correctly. If any of these devices are not shown, install the USB driver again following "If you cannot install the USB driver" (page 98).
For Microsoft Windows 2000 users
1 Connect the AC adaptor to your
camcorder.
2 Set the mode dial to
(Play/Edit).
3 Turn the power...
Operating Instructions - Page 96

... the USB driver installation 1 Click [Start] t [Settings] t [Control
Panel]. 2 Click [System].
[System Properties] window appears. 3 Click [Hardware] tab. 4 Click [Device Manager].
[Device Manager] window appears. 5 Make sure that [SONY DDX-A1010 USB
Device] appears in [DVD/CD-ROM drives], [Generic volume] in [Storage volumes], and [USB Mass Storage Device] in [Universal Serial Bus controllers...
Operating Instructions - Page 97

... your camcorder to your computer - Introduction
To confirm the USB driver installation 1 Click [Start] t [Settings] t [Control
Panel]. 2 Click [System].
[System Properties] window appears. 3 Click [Device Manager].
[Device Manager] window appears. 4 Make sure that [SONY DDX-A1010]
appears in [CDROM], [Sony DVD Handycam] in [Storage device], and [USB Mass Storage Device] in [Universal Serial Bus...
Operating Instructions - Page 98

...Connect your camcorder to the computer following "Connecting your camcorder to the computer" (page 94). The USB driver installation and the connection between your camcorder and the computer is completed.
Consulting the on-line help
An ImageMixer on-line help is available where you can find detailed operating instructions for ImageMixer software.
1 Click located at the top right of the
window. Or...
Operating Instructions - Page 99

... Ver.1.5 for Sony DVD Handycam] on your computer. The ImageMixer software starts and the title dialog box appears.
1 Turn on your computer and allow
Windows to load.
2 Connect the AC adaptor to your
camcorder.
3 Set the mode dial to (Play/Edit).
4 Turn the power on your camcorder by
pressing the POWER button for a few seconds.
5 Insert a recorded disc into your
camcorder.
6 Connect the (USB) jack...
Operating Instructions - Page 100

... computer.
To view the album
1 Click . 2 Double-click the scene to view from the
thumbnails. The selected scene is displayed. When you have selected a movie, click and start playback. To return to the thumbnails list, click
at the top right of the window.
Notes •If you connect the USB cable before USB
driver installation is complete, the USB driver...
Operating Instructions - Page 101

... a copy of a finalized disc.
1 Turn on your computer and allow
Windows to load.
2 Connect the AC adaptor to your
camcorder.
3 Set the mode dial to (Play/Edit). 4 Turn the power on your camcorder by
pressing the POWER button for a few seconds.
5 Insert a recorded and finalized disc into
your camcorder.
6 Connect the (USB) jack of the
camcorder and the (USB) port of the computer using the USB cable...
Operating Instructions - Page 104

... disc title
shown on the menu, click the tab. Change the settings such as the name and the font.
tab
Editing the contents
You...window. The [Album mode] window appears.
Tip
When you create a DVD on the DVD drive installed with your computer, you can change the "Disc Type" from [1.4G] to [4.7G] by clicking at the top right of the window. Selecting [4.7G] enables you to record data in 12 cm DVD-R/DVD...
Operating Instructions - Page 124

... your camcorder if the disc title has been made by another device.
• When too many still images are recorded, the remaining of the disc is reduced and still images cannot be converted to a movie. c Delete unnecessary scenes in the disc. (page 89)
• [DISPLAY] is set to [V-OUT/LCD] in (OTHERS) in the SETUP display. c Set it...