ASRock H610TM-ITX driver and firmware
Related ASRock H610TM-ITX Manual Pages
Download the free PDF manual for ASRock H610TM-ITX and other ASRock manuals at ManualOwl.com
User Manual - Page 4
...
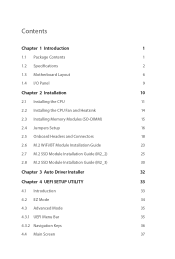
2
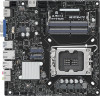
1.3 Motherboard Layout
6
1.4 I/O Panel
9
Chapter 2 Installation
10
2.1 Installing the CPU
11
2.2 Installing the CPU Fan and Heatsink
14
2.3 Installing Memory Modules (SO-DIMM)
15
2.4 Jumpers Setup
16
2.5 Onboard Headers and Connectors
18
2.6 M.2 WiFi/BT Module Installation Guide
23
2.7 M.2 SSD Module Installation Guide (M2_2)
25
2.8 M.2 SSD Module Installation Guide (M2_3...
User Manual - Page 6
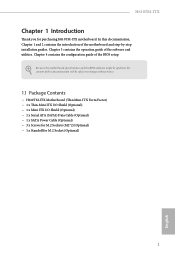
... guide of the BIOS setup.
Because the motherboard specifications and the BIOS software might be updated, the content of this documentation will be subject to change without notice.
1.1 Package Contents
• H610TM-ITX Motherboard (Thin Mini-ITX Form Factor) • 1 x Thin-Mini ITX I/O Shield (Optional) • 1 x Mini ITX I/O Shield (Optional) • 1 x Serial ATA (SATA) Data Cable...
User Manual - Page 9
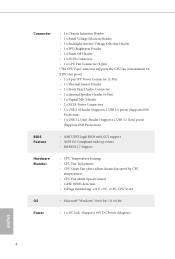
...; 1 x Front Panel Audio Connector • 1 x Internal Speaker Header (4-Pin) • 1 x Digital MIC Header • 2 x SATA Power Connectors • 1 x USB 2.0 Header (Supports 2 USB 2.0 ports) (Supports ESD
Protection) • 1 x USB 3.2 Gen1 Header (Supports 2 USB 3.2 Gen1 ports)
(Supports ESD Protection)
BIOS Feature
• AMI UEFI Legal BIOS with GUI support • ACPI 6.0 Compliant...
User Manual - Page 15
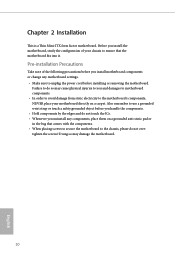
... Mini-ITX form factor motherboard. Before you install the motherboard, study the configuration of your chassis to ensure that the motherboard fits into it.
Pre-installation Precautions
Take note of the following precautions before you install motherboard components or change any motherboard settings. • Make sure to unplug the power cord before installing or removing the motherboard.
Failure...
User Manual - Page 16
H610TM-ITX
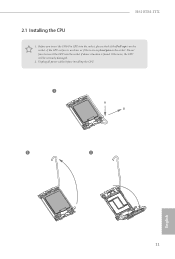
2.1 Installing the CPU
1. Before you insert the 1700-Pin CPU into the socket, please check if the PnP cap is on the socket, if the CPU surface is unclean, or if there are any bent pins in the socket. Do not force to insert the CPU into the socket if above situation is found. Otherwise, the...
User Manual - Page 19
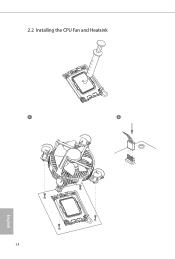
2.2 Installing the CPU Fan and Heatsink
1
14
2
CPU_FAN
English
User Manual - Page 20
H610TM-ITX
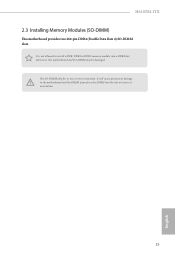
2.3 Installing Memory Modules (SO-DIMM)
This motherboard provides two 260-pin DDR4 (Double Data Rate 4) SO-DIMM slots.
It is not allowed to install a DDR, DDR2 or DDR3 memory module into a DDR4 slot; otherwise, this motherboard and SO-DIMM may be damaged.
The SO-DIMM only fits in one correct orientation. It will cause permanent damage to...
User Manual - Page 21
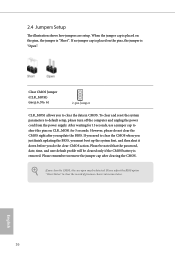
... reset the system parameters to default setup, please turn off the computer and unplug the power cord from the power supply. After waiting for 15 seconds, use a jumper cap to short the pins on CLR_MOS1 for 5 seconds. However, please do not clear the CMOS right after you update the BIOS. If you need to clear the...
User Manual - Page 25

... Sensing, but the panel wire on the chassis must support HDA to function correctly. Please follow the instructions in our manual and chassis manual to install your system.
2. If you use an AC'97 audio panel, please install it to the front panel audio header by the steps below: A. Connect Mic_IN (MIC) to MIC2_L. B. Connect Audio_R (RIN) to...
User Manual - Page 28
H610TM-ITX
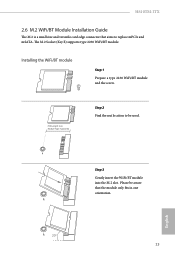
2.6 M.2 WiFi/BT Module Installation Guide
The M.2 is a small size and versatile card edge connector that aims to replace mPCIe and mSATA. The M.2 Socket (Key E) supports type 2230 WiFi/BT module.
Installing the WiFi/BT module
Step 1
Prepare a type 2230 WiFi/BT module and the screw.
PCB Length: 3cm Module Type: Type2230
Step 2 Find the nut location to be used.
A
Step...
User Manual - Page 30
H610TM-ITX
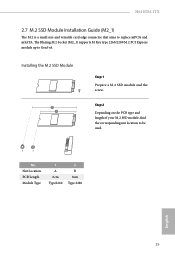
2.7 M.2 SSD Module Installation Guide (M2_1)
The M.2 is a small size and versatile card edge connector that aims to replace mPCIe and mSATA. The Blazing M.2 Socket (M2_1) supports M Key type 2260/2280 M.2 PCI Express module up to Gen5 x4.
Installing the M.2 SSD Module
2 1
Step 1 Prepare a M.2 SSD module and the screw.
Step 2 Depending on the PCB type and length of...
User Manual - Page 35
...)
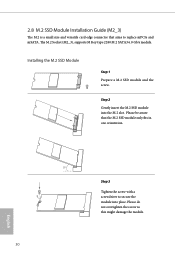
The M.2 is a small size and versatile card edge connector that aims to replace mPCIe and mSATA. The M.2 Socket (M2_3), supports M Key type 2280 M.2 SATA3 6.0 Gb/s module.
Installing the M.2 SSD Module
Step 1 Prepare a M.2 SSD module and the screw.
Step 2 Gently insert the M.2 SSD module into the M.2 slot. Please be aware that the M.2 SSD ...
User Manual - Page 37
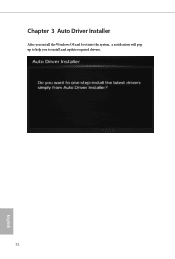
Chapter 3 Auto Driver Installer
After you install the Windows OS and boot into the system, a notification will pop up to help you to install and update required drivers.
32
English
User Manual - Page 38
H610TM-ITX
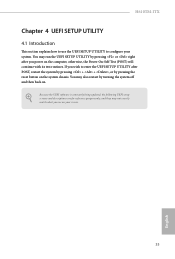
Chapter 4 UEFI SETUP UTILITY
4.1 Introduction
This section explains how to use the UEFI SETUP UTILITY to configure your system. You may run the UEFI SETUP UTILITY by pressing or right after you power on the computer, otherwise, the Power-On-Self-Test (POST) will continue with its test routines. If you wish to enter the UEFI SETUP UTILITY...
User Manual - Page 43

..., you can set up overclocking features.
Because the UEFI software is constantly being updated, the following UEFI setup screens and descriptions are for reference purpose only, and they may not exactly match what you see on your screen.
Base Frequency Boost
Enjoy the base frequency boost with the hidden power of processors immediately.
CPU Configuration CPU Turbo Ratio...
User Manual - Page 47
...the precharge command.
Command Rate (CR)
The delay between when a memory chip is selected and when the first active command can be issued.
Secondary Timing Write Recovery Time (tWR)
The amount of delay that must elapse after the completion... command to a row precharge command to the same rank.
Four Activate Window (tFAW)
The time window in which four activates are allowed the same rank.
42
English
User Manual - Page 56
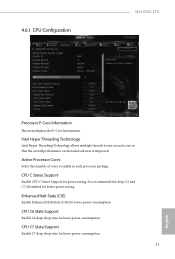
... CPU Configuration
H610TM-ITX
Processor P-Core Information
This item displays the P-Core Information.
Intel Hyper Threading Technology
Intel Hyper Threading Technology allows multiple threads to run on each core, so that the overall performance on threaded software is improved.
Active Processor Cores
Select the number of cores to enable in each processor package.
CPU C States Support
Enable CPU...
User Manual - Page 59
... network interface controller.
Onboard HD Audio
Enable/disable onboard HD audio. Set to Auto to enable onboard HD audio and automatically disable it when a sound card is installed.
Onboard HDMI HD Audio
Enable audio for the onboard digital outputs.
Onboard WAN Device
Use this item to enable or disable the onboard WAN device.
Deep Sleep
Configure deep sleep mode for power saving when the computer...
User Manual - Page 63
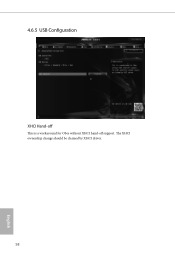
4.6.5 USB Configuration
XHCI Hand-off
This is a workaround for OSes without XHCI hand-off support. The XHCI ownership change should be claimed by XHCI driver.
58
English
User Manual - Page 66
...
H610TM-ITX
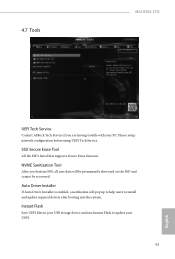
UEFI Tech Service
Contact ASRock Tech Service if you are having trouble with your PC. Please setup network configuration before using UEFI Tech Service.
SSD Secure Erase Tool
All the SSD's listed that supports Secure Erase function.
NVME Sanitization Tool
After you Sanitize SSD, all user data will be permanently destroyed on the SSD and cannot be recovered.
Auto Driver Installer...