ASRock M266A R3.0 driver and firmware
Related ASRock M266A R3.0 Manual Pages
Download the free PDF manual for ASRock M266A R3.0 and other ASRock manuals at ManualOwl.com
User Manual - Page 3
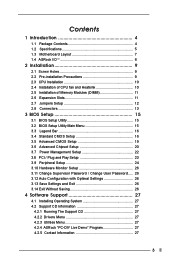
... Advanced CMOS Setup 19 3.6 Advanced Chipset Setup 20 3.7 Power Management Setup 22 3.8 PCI / Plug and Play Setup 23 3.9 Peripheral Setup 24 3.10 Hardware Monitor Setup 26 3.11 Change Supervisor Password / Change User Password ..... 26 3.12 Auto Configuration with Optimal Settings 26 3.13 Save Settings and Exit 26 3.14 Exit Without Saving 26
4 Software Support 27
4.1 Installing Operating...
User Manual - Page 4
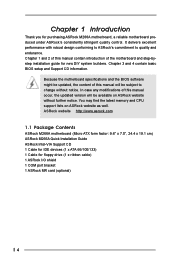
... memory and CPU support lists on ASRock website as well. ASRock website http://www.asrock.com
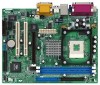
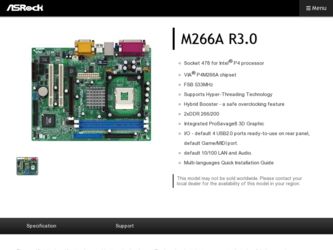
1.1 Package Contents
ASRock M266A motherboard (Micro ATX form factor: 9.6" x 7.5", 24.4 x 19.1 cm) ASRock M266A Quick Installation Guide ASRock Intel-VIA Support CD 1 Cable for IDE devices (1 x ATA 66/100/133) 1 Cable for floppy drive (1 x ribbon cable) 1 ASRock I/O shield 1 COM port bracket 1 ASRock...
User Manual - Page 5
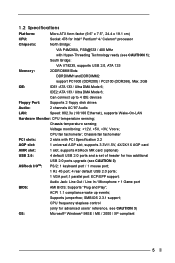
... USB 2.0, ATA 133
Memory:
2 DDR DIMM Slots:
DDR DIMM1 and DDR DIMM2
support PC1600 (DDR200) / PC2100 (DDR266), Max. 2GB
IDE:
IDE1: ATA 133 / Ultra DMA Mode 6;
IDE2: ATA 133 / Ultra DMA Mode 6;
Can connect up to 4 IDE devices
Floppy Port:
Supports 2 floppy disk drives
Audio:
2 channels AC'97 Audio
LAN:
Speed: 802.3u (10/100 Ethernet), supports Wake-On-LAN
Hardware Monitor: CPU...
User Manual - Page 6
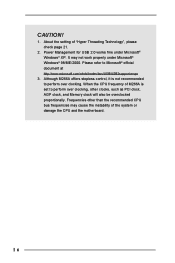
...® Windows® 98/ME/2000. Please refer to Microsoft® official document at http://www.microsoft.com/whdc/hwdev/bus/USB/USB2support.mspx
3. Although M266A offers stepless control, it is not recommended to perform over clocking. When the CPU frequency of M266A is set to perform over clocking, other clocks, such as PCI clock, AGP clock, and Memory clock...
User Manual - Page 9
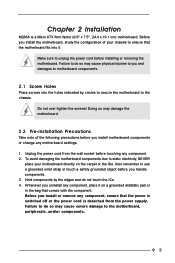
Chapter 2 Installation
M266A is a Micro ATX form factor (9.6" x 7.5", 24.4 x 19.1 cm) motherboard. Before you install the motherboard, study the configuration of your chassis to ensure that the motherboard fits into it.
Make sure to unplug the power cord before installing or removing the motherboard. Failure to do so may cause physical injuries to you and damages to motherboard components.
2.1 ...
User Manual - Page 10
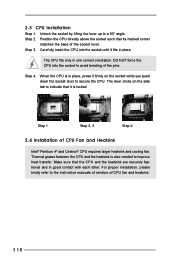
... larger heatsink and cooling fan. Thermal grease between the CPU and the heatsink is also needed to improve heat transfer. Make sure that the CPU and the heatsink are securely fastened and in good contact with each other. For proper installation, please kindly refer to the instruction manuals of vendors of CPU fan and heatsink.
10
User Manual - Page 11
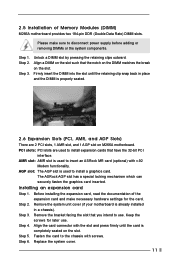
..., 1 AMR slot, and 1 AGP slot on M266A motherboard. PCI slots: PCI slots are used to install expansion cards that have the 32-bit PCI
interface. AMR slot: AMR slot is used to insert an ASRock MR card (optional) with v.92
Modem functionality. AGP slot: The AGP slot is used to install a graphics card.
The ASRock AGP slot has a special locking mechanism which can...
User Manual - Page 15
...Menu
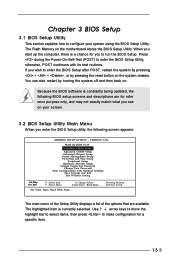
When you enter the BIOS Setup utility, the following screen appears:
AMIBIOS SETUP UTILITY - VERSION 3.31a
M266 (A) BIOS P1.50
Standard CMOS Setup
Advanced CMOS Setup Advanced Chipset Setup Power Management Setup PCI / Plug and Play Setup
Peripheral Setup Hardware Monitor Setup Change Supervisor Password
Change User Password Auto Configuration with Optimal Settings
Save Savings and Exit Exit...
User Manual - Page 16
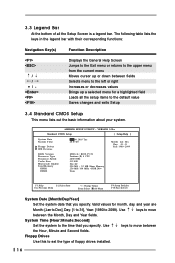
... information about your system.
AMIBIOS SETUP UTILITY - VERSION 3.31a
Standard CMOS Setup
[ Setup Help ]
System Date System Time
Floppy Drives IDE Devices
Jul 08 2003 Tue 20:07:40
Month: Jan - Dec Day: 01 - 31 Year: 1980 - 2099
BIOS Version Processor Type Processor Speed Cache Size Microcode Update Total Memory
DDR1 DDR2
M266 BIOS P1.50 Pentium (R) 4 CPU 2400 MHz 512 KB
F24 / 0F...
User Manual - Page 17
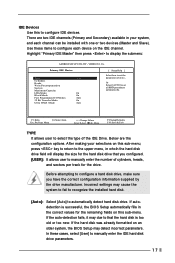
... sectors per track for the drive.
Before attempting to configure a hard disk drive, make sure you have the correct configuration information supplied by the drive manufacturer. Incorrect settings may cause the system to fail to recognize the installed hard disk.
[Auto]: Select [Auto] to automatically detect hard disk drive. If autodetection is successful, the BIOS Setup automatically fills in the...
User Manual - Page 18
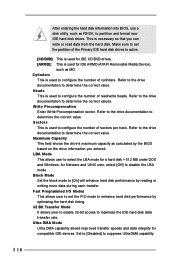
... disk. Make sure to set the partition of the Primary IDE hard disk drives to active.
[CD/DVD]: This is used for IDE CD/DVD drives. [ARMD]: This is used for IDE ARMD (ATAPI Removable Media Device...shows the drive's maximum capacity as calculated by the BIOS based on the drive information you entered. LBA Mode This allows user to select the LBA mode for a hard disk > 512 MB under DOS and Windows; for ...
User Manual - Page 20
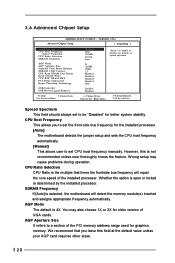
... Setup
AMIBIOS SETUP UTILITY - VERSION 3.31a
Advanced Chipset Setup
[ Setup Help ]
Spread Spectrum CPU Host Frequency
Actual Frequency CPU Ratio Selection SDRAM Frequency
AGP Mode AGP Aperture Size Onboard VGA Share Memory SDRAM CAS# Latency CPU Read DRAM Fast Ready Read Around Write CPU R/W DRAM 0WS PCI Delay Transaction Hyper-Threading Technology
USB Controller USB Device Legacy Support...
User Manual - Page 21
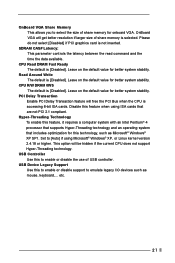
... technology, such as Microsoft® Windows® XP SP1. Set to [Auto] if using Microsoft® Windows® XP, or Linux kernel version 2.4.18 or higher. This option will be hidden if the current CPU does not support Hyper-Threading technology.
USB Controller Use this to enable or disable the use of USB controller.
USB Device Legacy Support Use this to enable or...
User Manual - Page 24
....
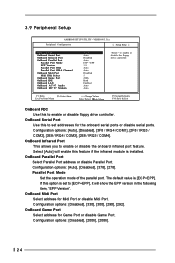
F1:Help Esc:Previous Menu
:Select Item
+/-:Change Values Enter:Select Sub-Menu
F9:Setup Defaults F10:Save & Exit
OnBoard FDC Use this to enable or disable floppy drive controller.
OnBoard Serial Port Use this to set addresses for the onboard serial ports or disable serial ports. Configuration options: [Auto], [Disabled], [3F8 / IRQ4 /COM1], [2F8 / IRQ3 / COM2], [3E8 / IRQ4 / COM3], [2E8...
User Manual - Page 26
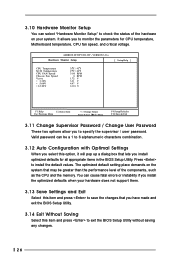
... of the components, such as the CPU and the memory. You can cause fatal errors or instability if you install the optimized defaults when your hardware does not support them.
3.13 Save Settings and Exit
Select this item and press to save the changes that you have made and exit the BIOS Setup Utility.
3.14 Exit Without Saving...
User Manual - Page 27
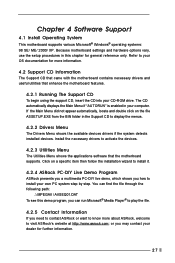
... the Support CD to display the menus.
4.2.2 Drivers Menu
The Drivers Menu shows the available devices drivers if the system detects installed devices. Install the necessary drivers to activate the devices.
4.2.3 Utilities Menu
The Utilities Menu shows the applications software that the motherboard supports. Click on a specific item then follow the installation wizard to install it.
4.2.4 ASRock PC...