ASRock X38TurboTwins driver and firmware
Related ASRock X38TurboTwins Manual Pages
Download the free PDF manual for ASRock X38TurboTwins and other ASRock manuals at ManualOwl.com
RAID Installation Guide - Page 6
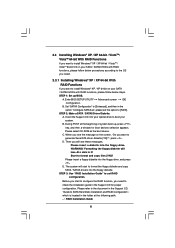
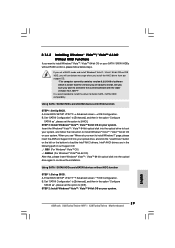
...XP 64-bit on your SATA / SATAII HDDs with RAID functions, please follow below steps. STEP 1: Set up BIOS.
A. Enter BIOS SETUP UTILITY Advanced screen IDE Configuration.
B. Set "SATAII Configuration" to [Enhanced], and then in the option "Configure SATAII as", please set the option to [RAID].
STEP 2: Make a SATA / SATAII Driver Diskette. A. Insert the Support CD into your optical drive to boot your...
RAID Installation Guide - Page 7
... SATA RAID Controller (Desktop - Windows XP64) " for Windows® XP 64-bit.
After the installation of Windows® XP / Windows® XP-64bit OS, if you want to manage RAID functions, you are allowed to use both "RAID Installation Guide" and "Intel Matrix Storage Manager Information" for RAID configuration. Please refer to the document in the Support CD, "Guide to SATA Hard Disks Installation...
RAID Installation Guide - Page 8
.../ICH9R SATA RAID Controller (Desktop - Windows XP)" for Windows® XP or "Intel(R) ICH8R/ICH9R SATA RAID Controller (Desktop - Windows XP64)" for Windows® XP 64-bit. 5. Finish the Windows® installation and install all necessary drivers. 6. Install the Intel(R) Matrix Storage Manager software via the CD-ROM included with your motherboard or after downloading it from the Internet. This...
RAID Installation Guide - Page 9
... optical disk into the optical drive to boot your system, and follow the instruction to install Windows® VistaTM / VistaTM 64-bit OS on your system. When you see "Where do you want to install Windows?" page, please insert the ASRock Support CD into your optical drive, and click the "Load Driver" button on the left on the bottom to load the Intel® RAID drivers. Intel® RAID drivers...
RAID Installation Guide - Page 10

If you want to use "Intel Matrix Storage Manager" in Windows® environment, please install SATA / SATAII drivers from the Support CD again so that "Intel Matrix Storage Manager" will be installed to your system as well.
10
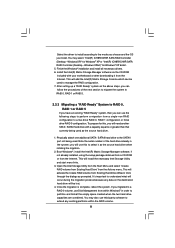
RAID Installation Guide - Page 11
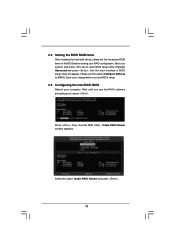
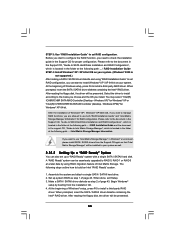
...drives, please set the necessary RAID items in the BIOS before setting your RAID configuration. Boot your system, and press key to enter BIOS setup utility. Highlight Advanced and press , then the main interface of BIOS setup utility will appear. Please set the option Configure SATA as to [RAID]. Save your change before you exit BIOS setup.
2.5 Configuring the Intel RAID BIOS
Reboot your computer...
User Manual - Page 3
... and CPU fan 17 2.5 Installation of Memory Modules (DIMM 18 2.6 Expansion Slots (PCI and PCI Express Slots 21 2.7 CrossFireTM Operation Guide 22 2.8 Surround Display Feature 25 2.9 Jumpers Setup 26 2.10 Onboard Headers and Connectors 29 2.11 HDMI_SPDIF Header Connection Guide 34 2.12 eSATAII Interface Introduction 35 2.13 SATAII Hard Disk Setup Guide 38 2.14 Serial ATA (SATA) / Serial...
User Manual - Page 4
... 47 2.19.2 Installing Windows® VistaTM / VistaTM 64-bit Without RAID Functions 48
2.20 DTS Operation Guide (For X38TurboTwins-WiFi Only) . 49 2.21 Untied Overclocking Technology 51
3 BIOS SETUP UTILITY 52
3.1 Introduction 52 3.1.1 BIOS Menu Bar 52 3.1.2 Navigation Keys 53
3.2 Main Screen 53 3.3 Advanced Screen 54
3.3.1 CPU Configuration 55 3.3.2 Chipset Configuration 57 3.3.3 ACPI...
User Manual - Page 5

...)
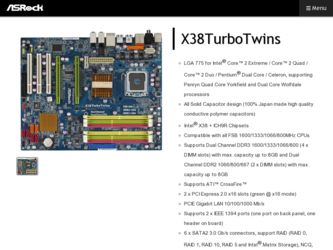
ASRock X38TurboTwins-WiFi / X38TurboTwins Quick Installation Guide ASRock X38TurboTwins-WiFi / X38TurboTwins Support CD ASRock WiFi-802.11g Module Operation Guide (For X38TurboTwins-WiFi Only)
Motherboard Accessories One 80-conductor Ultra ATA 66/100/133 IDE Ribbon Cable One Ribbon Cable for a 3.5-in Floppy Drive Four Serial ATA (SATA) Data Cables (Optional) One Serial ATA (SATA) HDD Power Cable...
User Manual - Page 22
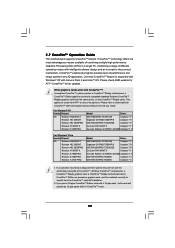
... a CrossFireTM Ready motherboard, a CrossFireTM Edition graphics card and a compatible standard Radeon (CrossFireTM Ready) graphics card from the same series, or two CrossFireTM Ready cards. This applies to cards from ATITM or any of its partners. Please refer to below table for CrossFireTM VGA card support list according to the OS you install.
For Windows® XP
Vendor Chipset
ATI
Radeon...
User Manual - Page 24
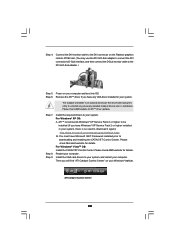
... card on PCIE2 slot. (You may use the DVI to D-Sub adapter to convert the DVI connector to D-Sub interface, and then connect the D-Sub monitor cable to the DVI to D-Sub adapter.)
Step 5. Power on your computer and boot into OS. Step 6. Remove the ATITM driver if you have any VGA driver installed in your system.
The Catalyst Uninstaller is an optional download...
User Manual - Page 44
... SATA RAID Controller (Desktop - Windows XP64)" for Windows® XP 64-bit.
After the installation of Windows® XP / Windows® XP-64bit OS, if you want to manage RAID functions, you are allowed to use both "RAID Installation Guide" and "Intel Matrix Storage Manager Information" for RAID configuration. Please refer to the document in the Support CD, "Guide to SATA Hard Disks Installation...
User Manual - Page 45
.../ICH9R SATA RAID Controller (Desktop Windows XP)" for Windows® XP or "Intel(R) ICH8R/ICH9R SATA RAID Controller (Desktop - Windows XP64)" for Windows® XP 64-bit. 5. Finish the Windows® installation and install all necessary drivers. 6. Install the Intel(R) Matrix Storage Manager software via the CD-ROM included with your motherboard or after downloading it from the Internet. This...
User Manual - Page 46
... optical disk into the optical drive to boot your system, and follow the instruction to install Windows® VistaTM / VistaTM 64-bit OS on your system. When you see "Where do you want to install Windows?" page, please insert the ASRock Support CD into your optical drive, and click the "Load Driver" button on the left on the bottom to load the Intel® RAID drivers. Intel® RAID drivers...
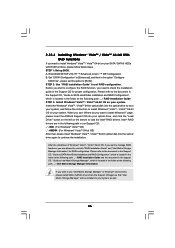
User Manual - Page 48
... the following path in our Support CD: .. \ I386 (For Windows® VistaTM OS) .. \ AMD64 (For Windows® VistaTM 64-bit OS) After that, please insert Windows® VistaTM / VistaTM 64-bit optical disk into the optical drive again to continue the installation.
Using SATA / SATAII HDDs and eSATAII devices without NCQ function
STEP 1: Set up BIOS. A. Enter BIOS SETUP UTILITY Advanced screen IDE...
User Manual - Page 52
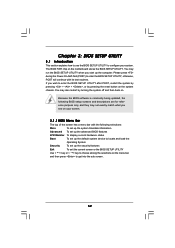
... the system time/date information
Advanced To set up the advanced BIOS features
H/W Monitor To display current hardware status
Boot
To set up the default system device to locate and load the
Operating System
Security
To set up the security features
Exit
To exit the current screen or the BIOS SETUP UTILITY
Use < > key or < > key to choose among...
User Manual - Page 71
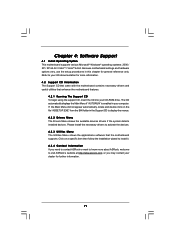
... for more information. 4.2 Support CD Information The Support CD that came with the motherboard contains necessary drivers and useful utilities that enhance the motherboard features.
4.2.1 Running The Support CD To begin using the support CD, insert the CD into your CD-ROM drive. The CD automatically displays the Main Menu if "AUTORUN" is enabled in your computer. If the Main Menu...
Quick Installation Guide - Page 16
... supported with Windows® XP with Service Pack 2 and VistaTM OS. Please check AMD website for ATITM CrossFireTM driver updates. For the detailed operation procedures and compatible PCI Express graphics cards, please refer to page 22 of "User Manual" in the support CD.
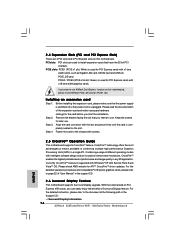
2.6 Surround Display Feature
This motherboard supports Surround Display upgrade. With the external add-on PCI Express VGA cards...
Quick Installation Guide - Page 28

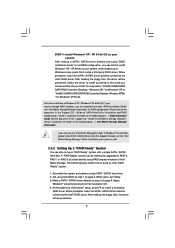
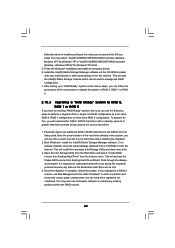
...for Windows® XP 64bit.
Using SATA / SATAII HDDs and eSATAII devices without NCQ function
STEP 1: Set up BIOS. A. Enter BIOS SETUP UTILITY Advanced screen IDE Configuration. B. Set "SATAII Configuration" to [Enhanced], and then in the option "Configure
SATAII as", please set the option to [IDE]. STEP 2: Install Windows® 2000 / XP / XP 64-bit OS on your system. 28
ASRock X38TurboTwins-WiFi...
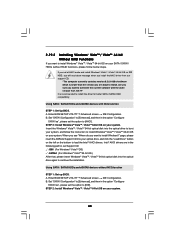
Quick Installation Guide - Page 29
... the following path in our Support CD: .. \ I386 (For Windows® VistaTM OS) .. \ AMD64 (For Windows® VistaTM 64-bit OS) After that, please insert Windows® VistaTM / VistaTM 64-bit optical disk into the optical drive again to continue the installation.
Using SATA / SATAII HDDs and eSATAII devices without NCQ function
STEP 1: Set up BIOS. A. Enter BIOS SETUP UTILITY Advanced screen IDE...