Acer AL1917W driver and firmware

Related Acer AL1917W Manual Pages
Download the free PDF manual for Acer AL1917W and other Acer manuals at ManualOwl.com
AL1917C User's Guide - Page 1
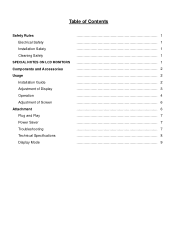
Table of Contents
Safety Rules Electrical Safety Installation Safety Cleaning Safety
SPECIAL NOTES ON LCD MONITORS
Components and Accessories Usage
Installation Guide Adjustment of Display Operation Adjustment of Screen Attachment Plug and Play Power Saver Troubleshooting Technical Specifications Display Mode
1 1 1 1 1 2 2 2 3 4 6 6 7 7 7 8 9
AL1917C User's Guide - Page 2
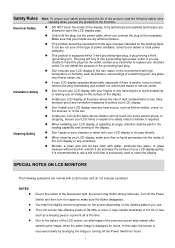
... touch the inside of the display. Only authorized and qualified technicians are allowed to open the LCD display case.
‹ Only hold the plug, not the power cable, when you connect the plug... When installing your LCD display or adjusting its angle, attention shall be paid to the loading capability and leveling of the display.
‹ Don't spray or pour cleanser or water onto your LCD display or ...
AL1917C User's Guide - Page 3
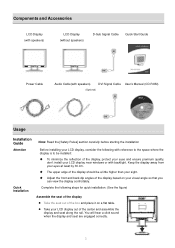
... and Accessories
LCD Display (with speakers)
LCD Display (without speakers)
D-Sub Signal Cable Quick Start Guide
Power Cable
Audio Cable(with speakers)
DVI Signal Cable User's Manual (CD-ROM)
(Optional)
Usage
Installation Guide
Attention
Quick Installation
Note: Read the [Safety Rules] section carefully before starting the installation
Before installing your LCD display, consider the...
AL1917C User's Guide - Page 5
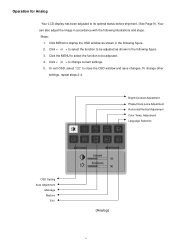
...the image in accordance with the following illustrations and steps. Steps:
1. Click MENU to display the OSD window as shown in the following figure. 2. Click < or > to select the function to...adjusted. 4. Click < or > to change current settings. 5. To exit OSD, select " " to close the OSD window and save changes. To change other
settings, repeat steps 2-4.
Bright/Contract Adjustment Phase/Clock ...
AL1917C User's Guide - Page 6
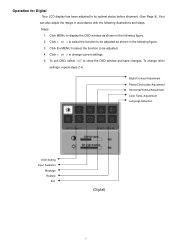
... and steps. Steps:
1. Click MENU to display the OSD window as shown in the following figure. 2. Click < or > to select the function to be adjusted as shown in the following figure. 3. Click the MENU to select the function to be adjusted. 4. Click < or > to change current settings. 5. To exit OSD, select " " to close...
AL1917C User's Guide - Page 7
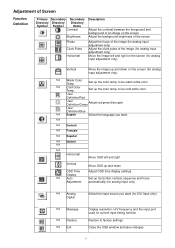
... and down Adjust OSD time display settings
Set up horizontal, vertical, sequence and focus automatically (for analog input only)
N/A Analog Digital
Select the input source you want (for DVI Input only)
N/A Message
N/A Restore N/A Exit
Display resolution, H/V frequency and the input port used for current input timing function
Restore to factory settings
Close the OSD window and save changes
6
AL1917C User's Guide - Page 8
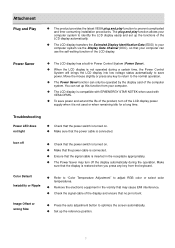
...Power Control System will brings the LCD display into low voltage status automatically to save power. Move the mouse slightly or press any key to return to the normal operation.
‹ The Power Saver function can only be operated by the display card of the computer system. You can set... cause EMI interference.
‹ Check the signal cable of the display and ensure that no pin is bent.
Image ...
AL1917T User's Guide - Page 1

TABLE OF CONTENTS
Special notes on LCD monitors 1 Introduction 2 Features 2 Unpacking 3 Attaching/Removing the base 4 Screen position adjustment 4 Connecting the power cord 5 Safety precaution 5 Cleaning your monitor 5 Preset modes 6 Power saving 7 DDC ...7 Installation 8 User controls 9 Troubleshooting 13 Specification 14
AL1917T User's Guide - Page 3
... of displaying crisp and vibrant color graphics with VGA, SVGA, XGA, SXGA (non-interlaced), and most Macintosh compatible color video cards. · The monitor is able to properly function even in case of upgrade video cards or
software because of the wide auto-scanning compatibility range without requiring to buy a new monitor. · The internal microprocessor digitally controls auto-scanning...
AL1917T User's Guide - Page 5
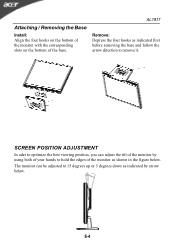
Attaching / Removing the Base
Install: Align the four hooks on the bottom of the monitor with the corresponding slots on the bottom of the base.
AL1917
Remove: Depress the four ...
AL1917T User's Guide - Page 6
... and plug rated 10 A, 250 V. The cord set should have the appropriate safety approvals for the country in which the equipment will be installed.
SAFETY PRECAUTION · Avoid placing the monitor, or any other heavy object, on the power cord to avoid
damage to the cable. · Do not expose the monitor to rain...
AL1917T User's Guide - Page 7
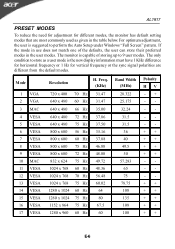
...the monitor has default setting modes that are most commonly used as given in the table below. For optimum adjustment, the user is suggested to perform the Auto Setup under Windows "Full Screen" ...different from the default modes.
Mode
1 VGA 2 VGA
Resolution
720 x 400 640 x 480
70 Hz 60 Hz
H. Freq. (KHz)
31.47 31.47
Band Width (MHz)
28.322 25.175
Polarity HV -+ --
3 MAC
640 x 480 66 Hz 35.00...
AL1917T User's Guide - Page 8
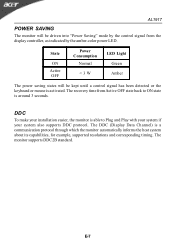
... until a control signal has been detected or the keyboard or mouse is activated. The recovery time from Active OFF state back to ON state is around 3 seconds.
DDC
To make your installation easier, the monitor is able to Plug and Play with your system if your system also supports DDC protocol. The DDC (Display Data...
AL1917T User's Guide - Page 9
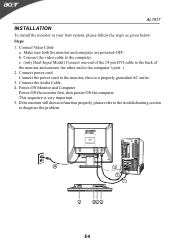
... one end of the 24-pin DVI cable to the back of the monitor and connect the other end to the computer's port. ) 2. Connect power cord Connect the power cord to the monitor, then to a properly grounded AC outlet. 3. Connect the Audio Cable. 4. Power-ON Monitor and Computer Power-ON the monitor first, then power-ON the computer. This sequence is very important...
AL1917T User's Guide - Page 11
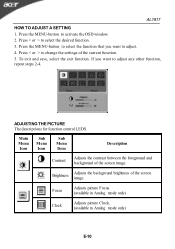
... the OSD window. 2. Press < or > to select the desired function. 3. Press the MENU-button to select the function that you want to adjust. 4. Press < or > to change the settings of the ...current function. 5. To exit and save, select the exit function. If you want to adjust any other function, repeat steps 2-4.
ADJUSTING THE PICTURE The descriptions for function control LEDS
...
AL1917X User's Guide - Page 1
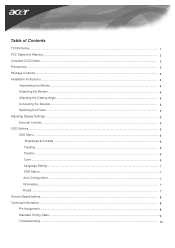
......1 FCC Statement Warning...2 Canadian DOC Notice...3 Precautions...3 Package Contents...4 Installation Instructions...4
Assembling the Monitor...4 Detaching the Monitor ...4 Adjusting the Viewing Angle ...4 Connecting the Devices ...4 Switching the Power ...5 Adjusting Display Settings ...5 External Controls ...5 OSD Options ...5 OSD Menu ...6
Brightness & Contrast ...6 Tracking ...6 Position...
AL1917X User's Guide - Page 3
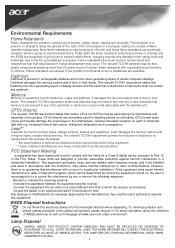
... circuit boards, cables, wires, casings and housings. Their purpose is to prevent, or at least to delay the spread of fire. Up to 30% of the plastic in a computer casing can... limits for a Class B digital device, pursuant to Part 15 of the FCC Rules. These limits are designed to provide reasonable protection against harmful interference in a residential installation. This equipment generates, uses...
AL1917X User's Guide - Page 4
... be used.
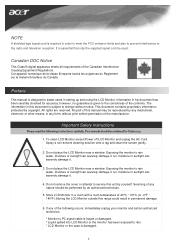
Canadian DOC Notice
This Class B digital apparatus meets all requirements of the Canadian InterferenceCausing Equipment Regulations. Cet appareil numerique de la classe B repecte toutes les exigences du Reglement sur le materiel brouilleur du Canada.
Preface
This manual is designed to assist users in setting up and using the LCD Monitor. Information...
AL1917X User's Guide - Page 8
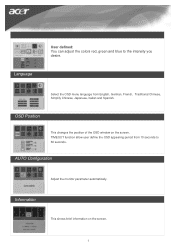
... the OSD menu language from English, German, French, Traditional Chinese, Simplify Chinese, Japanese, Italian and Spanish.
OSD Position
This changes the position of the OSD window on the screen. TIMEOUT function allow user define the OSD appearing period from 10 seconds to 60 seconds.
AUTO Configuration
Adjust the monitor parameter automatically...
AL1917X User's Guide - Page 11
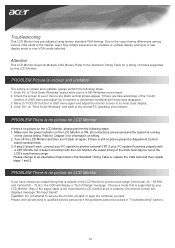
... a mode that is supported by your LCD Monitor. Also, if the signal cable is not connected to LCD monitor at all or properly, the monitor screen will display a message "No Input Signal".
Caution: Do not attempt to service the monitor yourself or open the computer yourself.
Please refer all servicing to qualified service personnel if the problems...