Acer GN276HL driver and firmware
Related Acer GN276HL Manual Pages
Download the free PDF manual for Acer GN276HL and other Acer manuals at ManualOwl.com
User Manual - Page 1
TABLE OF CONTENTS
Special notes on LCD monitors 1 Information for your safety and comfort 2 Unpacking 5 Attaching/Removing the base 6 Screen position adjustment 6 Connecting the power cord 7 Safety precaution 7 Cleaning your monitor 7 Power saving 8 DDC 8 Power adaptor 8 Connector Pin Assignment 9 Standard/3D Timing Table 11 Installation 12 User controls 13 Troubleshooting 19
User Manual - Page 2
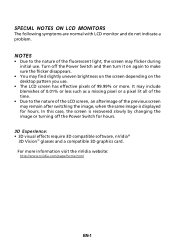
... find slightly uneven brightness on the screen depending on the desktop pattern you use.
• The LCD screen has effective...displayed for hours. In this case, the screen is recovered slowly by changing the image or turning off the Power Switch for hours.
3D Experience: • 3D visual effects require 3D compatible software, nVidia®
3D Vision™ glasses and a compatible 3D graphics card...
User Manual - Page 3
...-in installation unless ...Optical drive, and even exposure risk from lithium battery pack.
•
The adapter is only used for this monitor ,do not be used for other purposes.
•
Your device uses one of the following power supplies:
Manufacturer: Asian Power Devices Inc., Model: DA-40A19
Manufacturer: Delta Electronics Inc., Model: ADP-40KD BB
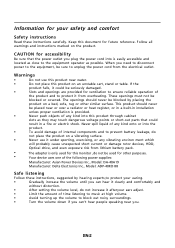
Safe listening
Follow these instructions...
User Manual - Page 5
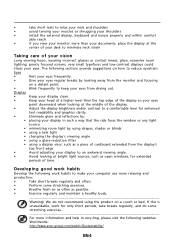
... a piece of cardboard extended from the display's
top front edge
•
Avoid adjusting your display to an awkward viewing angle.
•
Avoid looking at bright light sources, such as open windows, for extended
periods of time.
Developing good work habits
Develop the following work habits to make your computer use more relaxing and
productive...
User Manual - Page 7
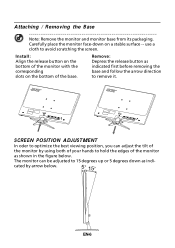
...: Remove the monitor and monitor base from its packaging. Carefully place the monitor face-down on a stable surface -- use a cloth to avoid scratching the screen.
Install: Align the release button on the bottom of the monitor with the corresponding slots on the bottom of the base.
Remove: Depress the release button...
User Manual - Page 8
...set should have the appropriate safety approvals for the country in which the equipment will be installed.
SAFETY PRECAUTION
• Avoid placing the monitor, or any other heavy object, on the power cord to avoid damage to the cable... ANY AMMONIA OR ALCOHOL-BASED CLEANERS ON
THE LCD DISPLAY SCREEN OR CASE. • Acer will not be liable for damage resulting from use of any ammonia or
alcohol-based...
User Manual - Page 9
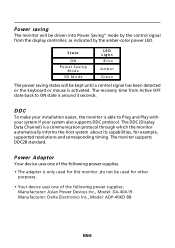
...system if your system also supports DDC protocol. The DDC (Display Data Channel) is a communication protocol through which the monitor automatically informs the host system about its capabilities, for example, supported resolutions and corresponding timing. The monitor supports DDC2B standard.
Power Adaptor
Your device uses one of the following power supplies.
• The adapter is only used for...
User Manual - Page 12
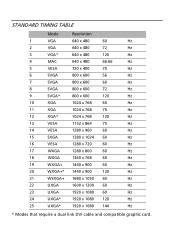
STANDARD TIMING TABLE
Mode
Resolution
1
VGA
640 x 480
60
Hz
2
VGA
640 x 480
72
Hz
3
VGA*
640 x 480
120
Hz
4
MAC
640 x 480
66.66
Hz
5
VESA
720 x 400
70
Hz
6
SVGA
800 x 600
56
Hz
7
SVGA
800 x 600
60
Hz
8
SVGA
800...x 1080 60
Hz
24
UXGA*
1920 x 1080 120
Hz
25
UXGA*
1920 x 1080 144
Hz
* Modes that require a dual link DVI cable and compatible graphic card.
User Manual - Page 13
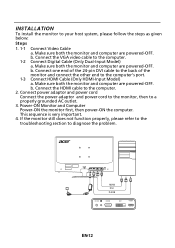
... VGA video cable to the computer.
1-2 Connect Digital Cable (Only Dual-Input Model) a. Make sure both the monitor and computer are powered-OFF. b. Connect one end of the 24-pin DVI cable to the back of the monitor and connect the other end to the computer's port.
1-3 Connect HDMI Cable (Only HDMI-Input Model) a. Make sure both the monitor and computer are powered-OFF. b. Connect the HDMI cable...
User Manual - Page 28
...Users are also at risk of physical injury after long hours of working in front of a computer. Long work periods, bad posture, poor work habits, stress, inadequate working conditions, personal ...shoulders • Avoid tensing your muscles or shrugging your shoulders • Install the external display, keyboard and mouse properly and within
comfortable reach
• If you view your monitor ...
User Manual - Page 29
.../or contrast to a comfortable level for
enhanced text readability and graphics clarity.
• Eliminate glare and reflections by: • Placing your display in such a way that the side faces the window or
any light source
• Minimizing room light by using drapes, shades or blinds • Using a task light • Changing the...
User Manual - Page 30
...
Warning about seizures
iv
Tips and information for comfortable use
v
Introducing 3D technology
1
Wireless glasses
1
Charging the glasses
1
Using the glasses
2
Hardware Installation
3
Setting up 3D Vision (Dual DVI to PC)
3
Connecting the display
3
Frequently asked questions
5
3D Vision is not working
5
Excessive flickering
5
Eyestrain/headache
6
3D content isn't shown...
User Manual - Page 32
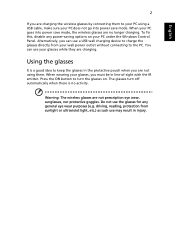
... to your PC using a USB cable, make sure your PC does not go into power save mode. When your PC goes into power save mode, the wireless glasses are no longer charging. To fix this, disable any power-saving options on your PC under the Windows Control Panel. Alternatively, you can use a USB wall charging device to charge the glasses...
User Manual - Page 33
English
3
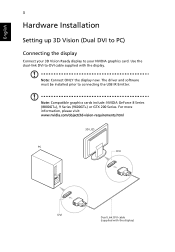
Hardware Installation
Setting up 3D Vision (Dual DVI to PC)
Connecting the display
Connect your 3D Vision Ready display to your NVIDIA graphics card. Use the dual-link DVI-to-DVI cable supplied with the display.
Note: Connect ONLY the display now. The driver and software must be installed prior to connecting the USB IR Emitter.
Note: Compatible graphics cards include: NVIDIA GeForce 8 ...
User Manual - Page 34
English
4
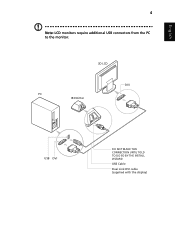
Note: LCD monitors require additional USB connectors from the PC to the monitor.
3D LCD
DVI PC
IR Emitter
USB DVI
DO NOT MAKE THIS CONNECTION UNTIL TOLD TO DO SO BY THE INSTALL WIZARD
USB Cable
Dual Link DVI cable (supplied with the display)
User Manual - Page 35

... to your PC using a USB cable, make sure your PC does not go into power-save mode. When your PC goes into power-save mode, the wireless glasses are no longer charging. To fix this, disable any power-saving options on your PC under the Windows Control Panel. Alternatively, you can use a USB wall charging device to charge the glasses...