Asus DVD-E616P1 driver and firmware


Related Asus DVD-E616P1 Manual Pages
Download the free PDF manual for Asus DVD-E616P1 and other Asus manuals at ManualOwl.com
Install Manual - Page 2

... SOFTWARE DESCRIBED IN IT.
Products and corporate names appearing in this manual may or may not be registered trademarks or copyrights of their respective companies, and are used only for identification or explanation and to the owners' benefit, without intent to infringe.
Product Name: Manual Version: Release Date:
ASUS DVD-E616P1 First Edition V1 E1305 June 2003
2
ASUS DVD-E616P1...
Install Manual - Page 3
... the Drive Cables 15
DVD-ROM Drive Basics 16 Placing a Disc into the Drive 16 Ejecting a Disc from the Drive 17 Using the Emergency Eject Pinhole 18
Using Compact Discs 19 Cleaning a Disc 19 Handling a Disc 19
Technical Information 20 Environmental Specifications 20 Electrical and Audio Specifications 20
DVD Region Codes 21
Quick Installation Guide 23
ASUS DVD-E616P1 User Manual
3
Install Manual - Page 4
.../TV technician for help.
WARNING! The use of shielded cables for connection of the monitor to the graphics card...digital apparatus does not exceed the Class B limits for radio noise emissions from digital apparatus set out in the Radio Interference Regulations of the Canadian Department of Communications.
This class B digital apparatus complies with Canadian ICES-003.
4
ASUS DVD-E616P1 User Manual
Install Manual - Page 6
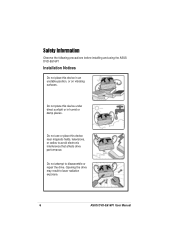
... vibrating surfaces.
Do not place this device under direct sunlight or in humid or damp places.
Do not use or place this device near magnetic fields, televisions, or radios to avoid electronic interference that affects drive performance.
Do not attempt to disassemble or repair the drive. Opening the drive may result to laser radiation exposure.
6
ASUS DVD-E616P1 User Manual
Install Manual - Page 8
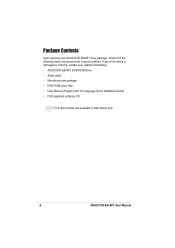
... items are present and in good condition. If any of the items is damaged or missing, contact your retailer immediately. • ASUS DVD-E616P1 DVD-ROM Drive • Audio cable • Mounting screw package • DVD-ROM driver disc • User Manual (English) with 12-Language Quick Installation Guide • DVD playback software CD
The above items are available in retail boxes only...
Install Manual - Page 9
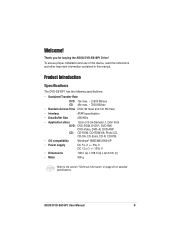
... you for buying the ASUS DVD-E616P1 Drive! To ensure proper installation and use of this device, read the instructions and other important information contained in this manual.
Product Introduction
Specifications
The DVD-E616P1 has the following specifications:
• Sustained Transfer Rate
DVD 16x max. ~ 21600 KB/sec CD 48x max. ~ 7200 KB/sec
• Random Access Time DVD: 90 msec and...
Install Manual - Page 10

... tray holds the optical disk media. Open the loading tray by pressing the Eject Button, then place a CD or DVD with the label side up. Press the Eject Button or push the front part of the tray to load the tray back in place.
4. Eject Button Press this button to load or unload a disc.
10
ASUS DVD-E616P1 User Manual
Install Manual - Page 12
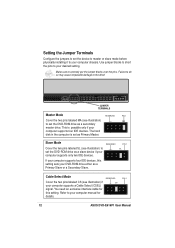
...computer supports four IDE devices, this setting sets your DVD-ROM drive either as a Primary Slave or a Secondary Slave.
PIN 1 SL
Cable Select Mode
RESERVED
PIN 1
Cover the two pins labeled CS (see illustration) if
CS
your computer supports a Cable Select (CSEL)
signal. You need an exclusive interface cable for
this setting. Refer to your computer manual for
details.
12
ASUS DVD-E616P1...
Install Manual - Page 13
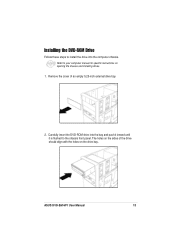
... instructions on opening the chassis and installing drives.
1. Remove the cover of an empty 5.25-inch external drive bay.
2. Carefully insert the DVD-ROM drive into the bay and push it inward until it is flushed to the chassis front panel. The holes on the sides of the drive should align with the holes on the drive bay.
ASUS DVD-E616P1 User Manual...
Install Manual - Page 24
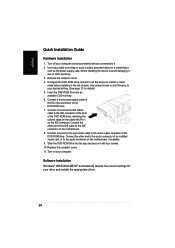
... end to the audio connector of an installed sound card, or to the audio connector on the motherboard, if available. 9. Slide the DVD-ROM drive into the bay and secure it with four screws. 10. Replace the computer cover. 11. Turn on your computer.
Software Installation Windows® 98SE/2000/ME/XP automatically detects the current settings for your drive and installs the appropriate driver.
24