Asus P8H61-I LX R2.0 RM SI driver and firmware
Drivers and firmware downloads for this Asus item

Related Asus P8H61-I LX R2.0 RM SI Manual Pages
Download the free PDF manual for Asus P8H61-I LX R2.0 RM SI and other Asus manuals at ManualOwl.com
P8H61-M LX PLUS R2 User's Manual - Page 2
.... Copies of these licenses are included in this product. Where the applicable license entitles you to the source code of such software and/or other additional data, you may obtain it for a period of three years after our last shipment of the product, either (1) for free by downloading it from http://support.asus.com/download or...
P8H61-M LX PLUS R2 User's Manual - Page 3

...
Safety information vi About this guide vii P8H61-M LX R2.0 Series specifications summary ix
Chapter 1 Product introduction
1.1 Welcome 1-1 1.2 Package contents 1-1 1.3 Special features 1-1
1.3.1 Product highlights 1-1 1.3.2 ASUS DIGI+VRM 1-3 1.3.3 Innovative ASUS features 1-3 1.4 Before you proceed 1-6 1.5 Motherboard overview 1-7 1.5.1 Placement direction 1-7 1.5.2 Screw holes...
P8H61-M LX PLUS R2 User's Manual - Page 6
..., ensure that the power cables for the devices are unplugged before the signal cables are connected. If possible, disconnect all power cables from the existing system before you add a device.
• Before connecting or removing signal cables from the motherboard, ensure that all power cables are unplugged.
• Seek professional assistance before using an adapter or extension cord. These...
P8H61-M LX PLUS R2 User's Manual - Page 7
... you need when installing and configuring the motherboard.
How this guide is organized
This guide contains the following parts: • Chapter 1: Product introduction
This chapter describes the supported features of the motherboard. • Chapter 2: BIOS information
This chapter provides a detailed guide to navigating and setting up the BIOS.
Conventions used in this guide
To ensure that...
P8H61-M LX PLUS R2 User's Manual - Page 8
Where to find more information
Refer to the following sources for additional information and for product and software updates.
1. ASUS websites
The ASUS website provides updated information on ASUS hardware and software products. Refer to the ASUS contact information.
2. Optional documentation
Your product package may include optional documentation, such as warranty flyers, that may have been ...
P8H61-M LX PLUS R2 User's Manual - Page 9
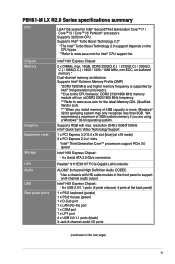
... Core™ processors support PCIe 3.0 speed.
Intel® H61 Express Chipset: - 4 x Serial ATA 3.0 Gb/s connectors
Realtek® 8111E/8111F PCIe Gigabit LAN controller
ALC887 8-channel High Definition Audio CODEC *Use a chassis with HD audio module in the front panel to support an 8-channel audio output.
Intel® H61 Express Chipset: - 8 x USB 2.0/1.1 ports (4 ports onboard, 4 ports at the...
P8H61-M LX PLUS R2 User's Manual - Page 10
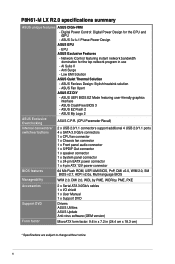
...1 x 4-pin ATX 12V power connector
BIOS features
64 Mb Flash ROM, UEFI AMI BIOS, PnP, DMI v2.0, WfM 2.0, SM BIOS v2.7, ACPI v2.0a, Multi-language BIOS
Manageability
WfM 2.0, DMI 2.0, WOL by PME, WOR by PME, PXE
Accessories
2 x Serial ATA 3.0Gb/s cables 1 x I/O shield 1 x User Manual 1 x Support DVD
Support DVD
Drivers ASUS Utilities ASUS Update Anti-virus software (OEM version)
Form factor...
P8H61-M LX PLUS R2 User's Manual - Page 26
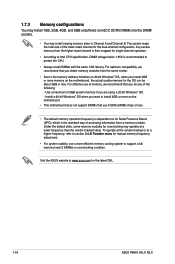
... than the vendor-marked value. To operate at the vendor-marked or at a higher frequency, refer to section 2.4 Ai Tweaker menu for manual memory frequency adjustment.
• For system stability, use a more efficient memory cooling system to support a full memory load (2 DIMMs) or overclocking condition.
Visit the ASUS website at www.asus.com for the latest QVL.
1-16
ASUS P8H61-M LX R2.0
P8H61-M LX PLUS R2 User's Manual - Page 34
...the card inoperable.
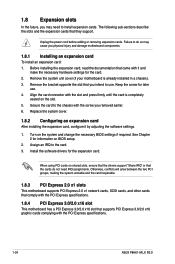
1.8.3 PCI Express 2.0 x1 slots
This motherboard supports PCI Express 2.0 x1 network cards, SCSI cards, and other cards that comply with the PCI Express specifications.
1.8.4 PCI Express 3.0/2.0 x16 slot
This motherboard has a PCI Express 3.0/2.0 x16 slot that supports PCI Express 3.0/2.0 x16 graphic cards complying with the PCI Express specifications.
1-24
ASUS P8H61-M LX R2...
P8H61-M LX PLUS R2 User's Manual - Page 40
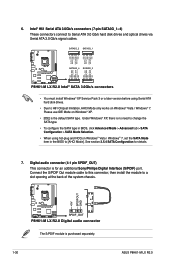
... GND GND RSATA_RXP3 RSATA_RXN3 GND RSATA_TXN3 RSATA_TXP3 GND
P8H61-M LX R2.0
SATA3G_4 SATA3G_3
P8H61-M LX R2.0 Intel® SATA 3.0Gb/s connectors
• You must install Windows® XP Service Pack 3 or a later version before using Serial ATA hard disk drives.
• Due to H61 Chipset limitation, AHCI Mode only works on Windows® Vista / Windows® 7. Please use IDE Mode on...
P8H61-M LX PLUS R2 User's Manual - Page 42
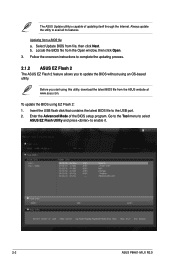
... updates.
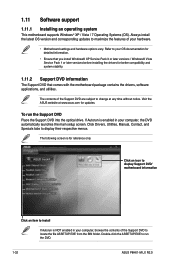
To run the Support DVD Place the Support DVD into the optical drive. If Autorun is enabled in your computer, the DVD automatically launches the main setup screen. Click Drivers, Utilities, Manual, Contact, and Specials tabs to display their respective menus.
The following screen is for reference only.
Click an icon to display Support DVD/ motherboard information
Click an item to install...
P8H61-M LX PLUS R2 User's Manual - Page 43
... a network or an Internet Service Provider (ISP).
• This utility is available in the support DVD that comes with the motherboard package.
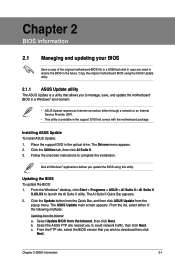
Installing ASUS Update To install ASUS Update: 1. Place the support DVD in the optical drive. The Drivers menu appears. 2. Click the Utilities tab, then click AI Suite II. 3. Follow the onscreen instructions to complete the installation.
Quit all Windows...
P8H61-M LX PLUS R2 User's Manual - Page 44
... utility.
Before you start using this utility, download the latest BIOS file from the ASUS website at www.asus.com.
To update the BIOS using EZ Flash 2: 1. Insert the USB flash disk that contains the latest BIOS file to the USB port. 2. Enter the Advanced Mode of the BIOS setup program. Go to the Tool menu to select
ASUS EZ Flash Utility and press to enable it.
2-2
ASUS P8H61-M LX R2.0
P8H61-M LX PLUS R2 User's Manual - Page 45
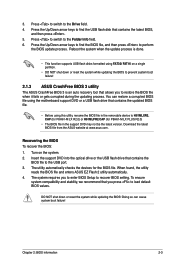
...(for P8H61-M LX PLUS R2.0)
• The BIOS file in the support DVD may not be the latest version. Download the latest BIOS file from the ASUS website at www.asus.com.
Recovering the BIOS To recover the BIOS: 1. Turn on the system. 2. Insert the support DVD into the optical drive or the USB flash drive that contains the
BIOS file to the USB port. 3. The utility automatically checks the devices for...
P8H61-M LX PLUS R2 User's Manual - Page 46

...disk drives (optional).
Booting the system in DOS environment 1. Insert the USB flash drive with the latest BIOS file and BIOS Updater to the USB port. 2. Boot your computer. When the ASUS Logo appears, press to show the BIOS
Boot Device Select Menu. Insert the support DVD into the optical drive and select the optical drive as the boot device.
Please select boot device:
SATA: XXXXXXXXXXXXXXXX USB...
P8H61-M LX PLUS R2 User's Manual - Page 48
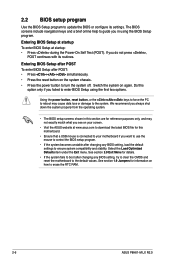
... and stability. Select the Load Optimized Defaults item under the Exit menu. See section 2.9 Exit Menu for details.
• If the system fails to boot after changing any BIOS setting, try to clear the CMOS and reset the motherboard to the default values. See section 1.9 Jumpers for information on how to erase the RTC RAM.
2-6
ASUS P8H61-M LX R2.0
P8H61-M LX PLUS R2 User's Manual - Page 53

... or change only selected fields in the BIOS setup program.
To set an administrator password: 1. Select Security and press . 2. Select Administrator Password, then press . 3. In the pop-up window, enter a password. Confirm the password when prompted.
To change an administrator password: 1. Select the Administrator Password item and press . 2. From the Enter Current Password box, key in the current...
P8H61-M LX PLUS R2 User's Manual - Page 63
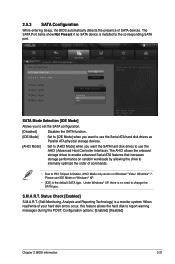
...Setup, the BIOS automatically detects the presence of SATA devices. The SATA Port items show Not Present if no SATA device is installed to the corresponding SATA port.
SATA Mode Selection [IDE Mode]
Allows you to set the SATA configuration.
[Disabled] Disables the SATA function.
[IDE Mode]
Set to [IDE Mode] when you want to use the Serial ATA hard disk drives as Parallel ATA physical storage...
P8H61-M LX PLUS R2 User's Manual - Page 71
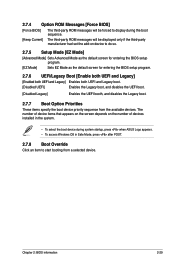
... ROM Messages [Force BIOS]
[Force BIOS]
The third-party ROM messages will be forced to display during the boot sequence.
[Keep Current] The third-party ROM messages will be displayed only if the third-party manufacturer had set the add-on device to do so.
2.7.5 Setup Mode [EZ Mode]
[Advanced Mode] Sets Advanced Mode as the default screen for entering the BIOS setup...
P8H61-M LX PLUS R2 User's Manual - Page 72
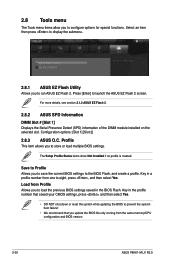
... previous BIOS settings saved in the BIOS Flash. Key in the profile number that saved your CMOS settings, press , and then select Yes.
• DO NOT shut down or reset the system while updating the BIOS to prevent the system boot failure!
• We recommend that you update the BIOS file only coming from the same memory/CPU configuration and BIOS version.
2-30
ASUS P8H61-M LX R2.0