Dell Latitude E6230 driver and firmware
Related Dell Latitude E6230 Manual Pages
Download the free PDF manual for Dell Latitude E6230 and other Dell manuals at ManualOwl.com
User Manual - Page 6
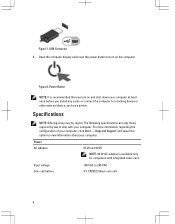
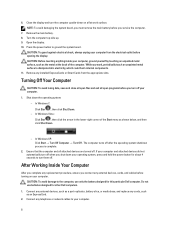
Figure 7. USB Connector 4. Open the computer display and press the power button to turn on the computer.
Figure 8. Power Button
NOTE: It is recommended that you turn on and shut down your computer at least once before you install any cards or connect the computer to a docking device or other external device, such as a printer.
Specifications
NOTE: Offerings may vary by region. The following...
User Manual - Page 8
... at support.dell.com/manuals.
Information in this publication is subject to change without notice. © 2012 Dell Inc. All rights reserved. Reproduction of these materials in any manner whatsoever without the written permission of Dell Inc. is strictly forbidden. Trademarks used in this text: Dell™, the DELL logo, Dell Precision™, Precision ON™, ExpressCharge™, Latitude...
Owner's Manual - Page 2
... Dell Inc. Intel®, Pentium®, Xeon®, Core® and Celeron® are registered trademarks of Intel Corporation in the U.S. and other countries. AMD® is a registered trademark and AMD Opteron™, AMD Phenom™ and AMD Sempron™ are trademarks of Advanced Micro Devices, Inc. Microsoft®, Windows®, Windows Server®, Internet...
Owner's Manual - Page 3

......15 Removing the Hard Drive...15 Installing the Hard Drive...17 Removing the Memory...17 Installing the Memory...18 Removing The Palmrest...18 Installing the Palmrest...20 Removing the Keyboard...21 Installing the Keyboard...22 Removing the Wireless Local Access Network (WLAN 23 Installing the Wireless Local Access Network (WLAN 24 Removing the Heat-Sink Fan...24 Installing the Heat-Sink Fan...
Owner's Manual - Page 4
... the Display Assembly...42 Installing the Display Assembly...44 Removing the Camera...45 Installing the Camera...46 Removing the LVDS and Camera Cable...47 Installing the LVDS and Camera Cable...48
3 Additional Information...49
Docking Port Information...49
4 System Setup...51
Boot Sequence...51 Navigation Keys...51 System Setup Options...52 Updating the BIOS ...59 System and Setup Password...60...
Owner's Manual - Page 7
... Turn off your computer (see Turning Off Your Computer). 3. If the computer is connected to a docking device (docked) such as the optional Media Base or Battery Slice,
undock it.
CAUTION: To disconnect a network cable, first unplug the cable from your computer and then unplug the cable from the network device. 4. Disconnect all network cables from the computer. 5. Disconnect your computer and all...
Owner's Manual - Page 8
... cables before turning on your computer.
CAUTION: To avoid damage to the computer, use only the battery designed for this particular Dell computer. Do not use batteries designed for other Dell computers.
1. Connect any external devices, such as a port replicator, battery slice, or media base, and replace any cards, such as an ExpressCard.
2. Connect any telephone or network cables to your computer...
Owner's Manual - Page 11
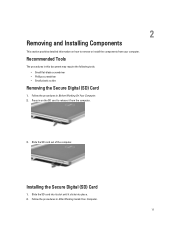
...; Phillips screwdriver • Small plastic scribe
Removing the Secure Digital (SD) Card
1. Follow the procedures in Before Working On Your Computer. 2. Press in on the SD card to release it from the computer.
3. Slide the SD card out of the computer.
Installing the Secure Digital (SD) Card
1. Slide the SD card into its slot until it clicks into place. 2. Follow the...
Owner's Manual - Page 12
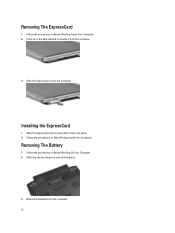
... ExpressCard to release it from the computer.
3. Slide the ExpressCard out of the computer.
Installing the ExpressCard
1. Slide the ExpressCard into its slot until it clicks into place. 2. Follow the procedures in After Working Inside Your Computer.
Removing The Battery
1. Follow the procedures in Before Working On Your Computer. 2. Slide the release latches to unlock...
Owner's Manual - Page 13
...2. Follow the procedures in After Working Inside Your Computer.
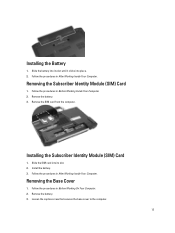
Removing the Subscriber Identity Module (SIM) Card
1. Follow the procedures in Before Working Inside Your Computer. 2. Remove the battery. 3. Remove the SIM card from the computer.
Installing the Subscriber Identity Module (SIM) Card
1. Slide the SIM card into its slot. 2. Install the battery. 3. Follow the procedures in After Working...
Owner's Manual - Page 14
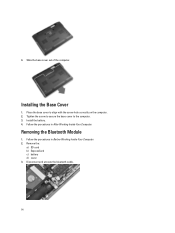
... the screw hole correctly on the computer. 2. Tighten the screw to secure the base cover to the computer. 3. Install the battery. 4. Follow the procedures in After Working Inside Your Computer.
Removing the Bluetooth Module
1. Follow the procedures in Before Working Inside Your Computer. 2. Remove the:
a) SD card b) ExpressCard c) battery d) cover 3. Disconnect and unroute the bluetooth cable.
14
Owner's Manual - Page 15
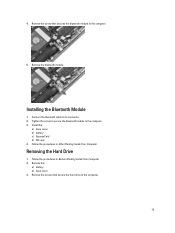
... bluetooth module to the computer.
5. Remove the bluetooth module.
Installing the Bluetooth Module
1. Connect the bluetooth cable to its connector. 2. Tighten the screw to secure the bluetooth module to the computer. 3. Install the:
a) base cover b) battery c) ExpressCard d) SD card 4. Follow the procedures in After Working Inside Your Computer.
Removing the Hard Drive
1. Follow the procedures in...
Owner's Manual - Page 16
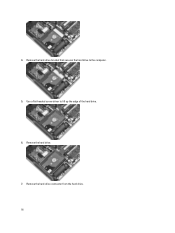
4. Remove the hard-drive bracket that secures the hard drive to the computer. 5. Use a flat-headed screw driver to lift up the edge of the hard drive. 6. Remove the hard drive. 7. Remove the hard-drive connector from the hard drive. 16
Owner's Manual - Page 17
....
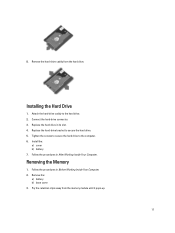
Installing the Hard Drive
1. Attach the hard-drive caddy to the hard drive. 2. Connect the hard-drive connector. 3. Replace the hard drive in its slot. 4. Replace the hard-drive bracket to secure the hard drive. 5. Tighten the screws to secure the hard drive to the computer. 6. Install the:
a) cover b) battery 7. Follow the procedures in After Working Inside Your Computer.
Removing the Memory...
Owner's Manual - Page 18
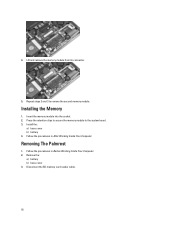
... the memory module into the socket. 2. Press the retention clips to secure the memory module to the system board. 3. Install the:
a) base cover b) battery 4. Follow the procedures in After Working Inside Your Computer.
Removing The Palmrest
1. Follow the procedures in Before Working Inside Your Computer. 2. Remove the:
a) battery b) base cover 3. Disconnect the SD memory card reader cable.
18
Owner's Manual - Page 20
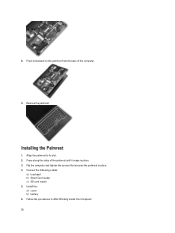
... from the base of the computer.
9. Remove the palmrest.
Installing the Palmrest
1. Align the palmrest to its slot. 2. Press along the sides of the palmrest until it snaps in place. 3. Flip the computer and tighten the screws that secures the palmrest in place. 4. Connect the following cables:
a) touchpad b) Smart Card reader c) SD card reader 5. Install the: a) cover b) battery 6. Follow...
Owner's Manual - Page 22
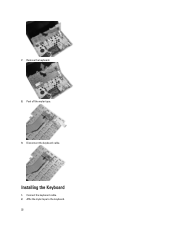
7. Remove the keyboard.
8. Peel off the mylar tape.
9. Disconnect the keyboard cable.
Installing the Keyboard
1. Connect the keyboard cable. 2. Affix the mylar tape to the keyboard. 22
Owner's Manual - Page 23
... at the bottom of the computer. 7. Install the:
a) palmrest b) cover c) battery 8. Follow the procedures in After Working Inside Your Computer.
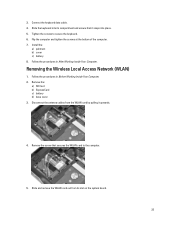
Removing the Wireless Local Access Network (WLAN)
1. Follow the procedures in Before Working Inside Your Computer. 2. Remove the:
a) SD Card b) ExpressCard c) battery d) base cover 3. Disconnect the antenna cables from the WLAN card by pulling it upwards...
Owner's Manual - Page 59
....
Description Displays the system event log and allows you to clear the log.
• Clear Log
Updating the BIOS
It is recommended to update your BIOS (system setup), on replacing the system board or if an update is available. For notebooks, ensure that your computer battery is fully charged and connected to a power outlet
1. Restart the computer. 2. Go to support.dell.com/support/downloads.
59
Owner's Manual - Page 60
... method below window; click Download Now. The File Download window appears. 8. Click Save to save the file on your computer. 9. Click Run to install the updated BIOS settings on your computer. Follow the instructions on the screen.
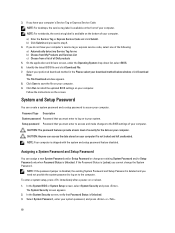
System and Setup Password
You can create a system password and a setup password to secure your computer.
Password Type Description System password Password that you...