Gigabyte GV-N76G256D-RH driver and firmware
Drivers and firmware downloads for this Gigabyte item

Related Gigabyte GV-N76G256D-RH Manual Pages
Download the free PDF manual for Gigabyte GV-N76G256D-RH and other Gigabyte manuals at ManualOwl.com
Manual - Page 4
... 15 3.1.6. Display Properties pages 18 3.1.7. nView Properties pages 25
3.2. Windows® 2000 Driver Installation 30
4. Troubleshooting Tips 31
5. Appendix 32
5.1. How to Reflash the BIOS 32 5.1.1. Reflash BIOS in MS-DOS Mode 32 5.1.2. Reflash BIOS in Windows Mode 32
5.2. Connecting to a HDTV 33 5.3. Resolutions and Color Depth Table (In Windows® XP 34
GV-N76G256D-RH Graphics...
Manual - Page 5
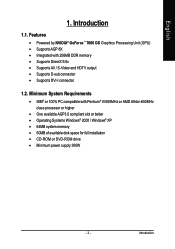
...; Supports DVI-I connector
1.2. Minimum System Requirements
• IBM® or 100% PC compatible with Pentium® III 650MHz or AMD Athlon 650MHz class processor or higher
• One available AGP3.0 compliant slot or better • Operating Systems Windows® 2000 / Windows® XP • 64MB system memory • 50MB of available disk space for full installation • CD-ROM...
Manual - Page 9

... the computer cover.
After installation, please connect the power cable to your graphics card, or the system will not boot.
3. Plug the display cable into your card; then turn on the computer and monitor. If your graphics card came with a DVI-I connector, you can connect a flat panel display to the appropriate connector, as shown below...
To TV / VCR
To VGA Monitor
To Flat Panel Display...
Manual - Page 11
English
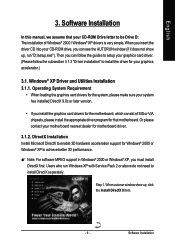
3. Software Installation
In this manual, we assume that your CD-ROM Drive letter to be Drive D: The installation of Windows® 2000 / Windows® XP drivers is very simple. When you insert the driver CD into your CD-ROM drive, you can see the AUTORUN window (if it does not show up, run "D:\setup.exe"). Then you can follow the guides to setup your graphics card driver. (Please follow...
Manual - Page 13
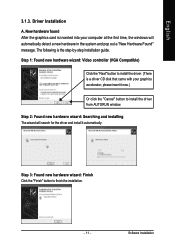
... inserted into your computer at the first time, the windows will automatically detect a new hardware in the system and pop out a "New Hardware Found" message. The following is the step-by-step installation guide.
Step 1: Found new hardware wizard: Video controller (VGA Compatible)
Click the "Next" button to install the driver. (There is a driver CD disk that came with your...
Manual - Page 14
English
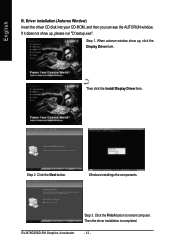
B. Driver installation (Autorun Window) Insert the driver CD disk into your CD-ROM, and then you can see the AUTORUN window. If it does not show up, please run "D:\setup.exe".
Step 1. When autorun window show up, click the Display Driver item.
Then click the Install Display Driver item.
Step 2. Click the Next button.
Windows installings the components.
GV-N76G256D-RH Graphics ...
Manual - Page 15

English
3.1.4. Utilities on Driver CD
Insert the driver CD disk into your CD-ROM, and then you can see the AUTORUN window.
If it does not show up, please run "D:\setup.exe".
• Install GIGABYTE utilities:
Step 1. When autorun window show up, please click the Utilities item.
Then click the GIGABYTE Utility item.
Step 2. Click the Next button.
Step 3. Enter your...
Manual - Page 17
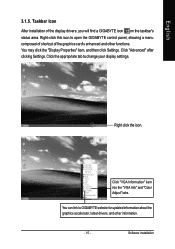
...Properties" item, and then click Settings. Click "Advanced" after clicking Settings. Click the appropriate tab to change your display settings.
Right click the icon.
Click "VGA Information" item into the "VGA Info" and "Color Adjust" tabs.
You can link to GIGABYTE website for updated information about the graphics accelerator, latest drivers, and other information.
- 15 -
Software Installation
Manual - Page 19
English
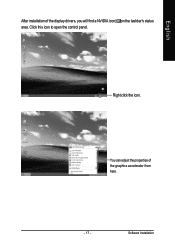
After installation of the display drivers, you will find a NVIDIA icon on the taskbar's status area. Click this icon to open the control panel.
Right click the icon.
You can adjust the properties of the graphics accelerator from here.
- 17 -
Software Installation
Manual - Page 21
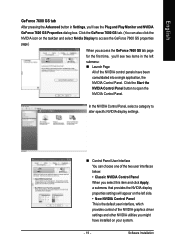
...; Classic NVIDIA Control Panel When you select this item and click Apply, a submenu that provides the NVIDIA display properties settings will appear on the left side. • New NVIDIA Control Panel This is the default user interface, which provides control of the NVIDIA graphics driver settings and other NVIDIA utilities you might have installed on your system.
- 19 -
Software Installation
Manual - Page 23
English
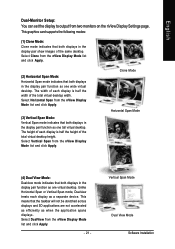
Dual-Monitor Setup: You can set the display to output from two monitors on the nView Display Settings page. This graphics card supports the following modes:
(1) Clone Mode:
Clone mode indicates that both displays in the display pair show images of the same desktop. Select Clone from the nView Display Mode list and click Apply.
(2) Horizontal Span Mode: Horizontal Span mode...
Manual - Page 25
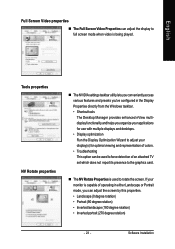
...displays and desktops. • Display optimization Run the Display Optimization Wizard to adjust your display(s) for optimal viewing and representation of colors. • Troubleshooting This option can be used to force detection of an attached TV set which does not report its presence to the graphics card... rotation) • Inverted portrait (270 degree rotation)
- 23 -
Software Installation
Manual - Page 27
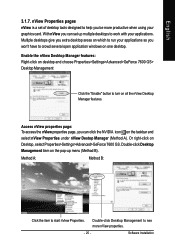
... using your graphics card. With nView you can set up multiple desktops to work with your applications. Multiple desktops give you extra desktop areas on which to run your applications so you won't have to crowd several open application windows on one desktop. Enable the nView Desktop Manager features: Right-click on desktop and choose Properties>Settings>Advanced>GeForce 7600...
Manual - Page 28
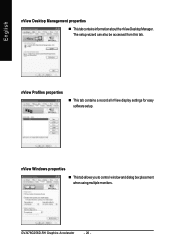
...Desktop Management properties
„ ThistabcontainsinformationaboutthenViewDesktopManager. The setup wizard can also be accessed from this tab.
nView Profiles properties
„ This tab contains a record all nView display settings for easy software setup.
nView Windows properties
„ This tab allows you to control window and dialog box placement when using multiple monitors.
GV-N76G256D-RH...
Manual - Page 29
English
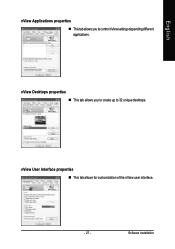
nView Applications properties „ This tab allows you to control nView settings depending different applications.
nView Desktops properties „ This tab allows you to create up to 32 unique desktops.
nView User Interface properties „ This tab allows for customization of the nView user interface.
- 27 -
Software Installation
Manual - Page 31
English
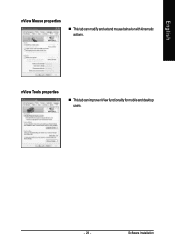
nView Mouse properties
„ This tab can modify and extend mouse behavior with kinematic actions.
nView Tools properties
„ This tab can improve nView functionality for mobile and desktop users.
- 29 -
Software Installation
Manual - Page 32
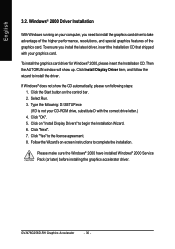
...". 5. Click on "Install Display Drivers" to begin the Installation Wizard. 6. Click "Next". 7. Click "Yes" to the license agreement. 8. Follow the Wizard's on-screen instructions to complete the installation.
Please make sure the Windows® 2000 have installed Windows® 2000 Service Pack (or later) before installing the graphics accelerator driver.
GV-N76G256D-RH Graphics Accelerator
- 30...
Manual - Page 33
... power. „ If necessary, disable any built-in graphics capabilities on your motherboard. For
more information, consult your computer's manual or manufacturer. (NOTE: Some manufacturers do not allow the built-in graphics to be disabled or to become the secondary display.) „ Make sure you selected the appropriate display device and graphics card when you installed the graphics driver...
Manual - Page 34
... your computer.
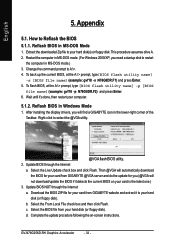
5.1.2. Reflash BIOS in Windows Mode
1. After installing the display drivers, you will find a GIGABYTE icon in the lower-right corner of the Taskbar. Right-click to select the @VGA utility.
@VGA flash BIOS utility. 2. Update BIOS through the Internet
a. Select the Live Update check box and click Flash. Then @VGA will automatically download the BIOS for your card from GIGABYTE @VGA...
Manual - Page 35
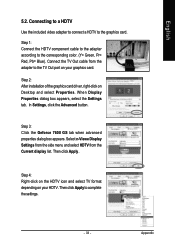
... the corresponding color. (Y= Green, Pr= Red, Pb= Blue). Connect the TV Out cable from the adapter to the TV Out port on your graphics card.
Step 2: After installation of the graphics card driver, right-click on Desktop and select Properties. When Display Properties dialog box appears, select the Settings tab. In Settings, click the Advanced button.
Step 3: Click the Geforce 7600 GS tab...