HP Pavilion dv8400 - Notebook PC driver and firmware
Drivers and firmware downloads for this Hewlett-Packard item
Related HP Pavilion dv8400 Manual Pages
Download the free PDF manual for HP Pavilion dv8400 and other HP manuals at ManualOwl.com
End User License Agreement - Page 1
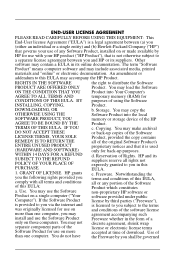
... the HP Product.
RIGHTS IN THE SOFTWARE
the right to distribute the Software
PRODUCT ARE OFFERED ONLY Product. You may load the Software
ON THE CONDITION THAT YOU Product into Your Computer's
AGREE TO ALL TERMS AND
temporary memory (RAM) for
CONDITIONS OF THIS EULA. BY purposes of using the Software
INSTALLING, COPYING,
Product.
DOWNLOADING, OR
b. Storage. You may copy the
OTHERWISE...
End User License Agreement - Page 2
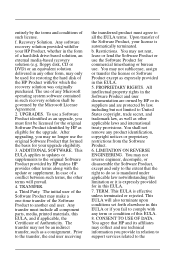
entirely by the terms and conditions of such license.
f. Recovery Solution. Any software recovery solution provided with/for your HP Product, whether in the form of a hard disk drive-based solution, an external media-based recovery solution (e.g. floppy disk, CD or DVD) or an equivalent solution delivered in any other form, may only be used for restoring the hard...
External Devices - Page 5
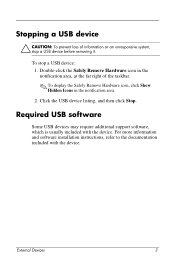
... of the taskbar.
✎ To display the Safely Remove Hardware icon, click Show Hidden Icons in the notification area.
2. Click the USB device listing, and then click Stop.
Required USB software
Some USB devices may require additional support software, which is usually included with the device. For more information and software installation instructions, refer to the documentation included with...
External Devices - Page 6
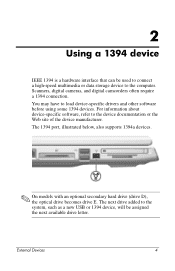
... storage device to the computer. Scanners, digital cameras, and digital camcorders often require a 1394 connection. You may have to load device-specific drivers and other software before using some 1394 devices. For information about device-specific software, refer to the device documentation or the Web site of the device manufacturer. The 1394 port, illustrated below, also supports 1394a devices...
External Media Cards - Page 6
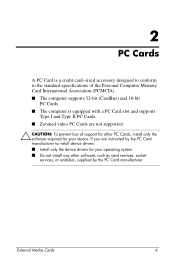
... PC Cards. ■ Zoomed video PC Cards are not supported.
Ä CAUTION: To prevent loss of support for other PC Cards, install only the software required for your device. If you are instructed by the PC Card manufacturer to install device drivers: ■ Install only the device drivers for your operating system. ■ Do not install any other software, such as card services, socket services...
External Media Cards - Page 11
...
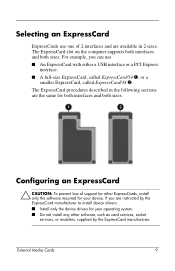
Ä CAUTION: To prevent loss of support for other ExpressCards, install only the software required for your device. If you are instructed by the ExpressCard manufacturer to install device drivers: ■ Install only the device drivers for your operating system. ■ Do not install any other software, such as card services, socket services, or enablers, supplied by the ExpressCard...
Multimedia - Page 2
... your software 2 Installing software 2 Using the QuickPlay buttons 3 Using media activity hotkeys 6 Protecting playback 7 Protecting the CD or DVD write process 8 Changing DVD region settings 9 Observing the Copyright warning 10
Multimedia hardware 10 Identifying your hardware 10 Using the remote control (select models only 11 Using the optical drive 12
2 Audio
Audio features...
Multimedia - Page 4
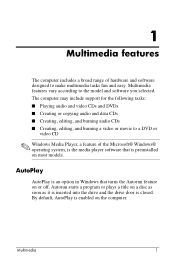
... and software you selected. The computer may include support for the following tasks: ■ Playing audio and video CDs and DVDs ■ Creating or copying audio and data CDs ■ Creating, editing, and burning audio CDs ■ Creating, editing, and burning a video or movie to a DVD or
video CD
✎ Windows Media Player, a feature of the Microsoft® Windows®...
Multimedia - Page 5
... the specific application. Documentation may also be found on the software manufacturer's Web site.
Installing software
To install software from a CD included with the computer: 1. Insert the software CD into the optical drive. 2. When the installation wizard opens, follow the installation instructions on the screen.
✎ Repeat the installation procedure for all software on CD that you want to...
Multimedia - Page 6
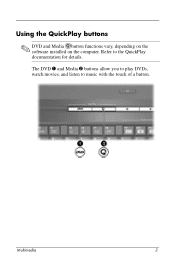
Using the QuickPlay buttons
✎ DVD and Media button functions vary, depending on the software installed on the computer. Refer to the QuickPlay documentation for details.
The DVD 1 and Media 2 buttons allow you to play DVDs, watch movies, and listen to music with the touch of a button.
Multimedia
3
Multimedia - Page 7
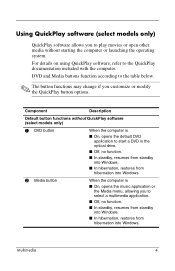
... button functions without QuickPlay software (select models only)
1 DVD button
When the computer is
■ On, opens the default DVD application to start a DVD in the optical drive.
■ Off, no function.
■ In standby, resumes from standby into Windows.
■ In hibernation, restores from hibernation into Windows.
2 Media button
When the computer is
■ On, opens...
Multimedia - Page 8
...
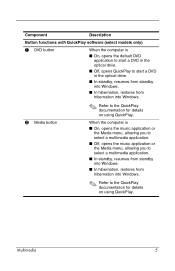
Button functions with QuickPlay software (select models only)
1 DVD button
When the computer is
■ On, opens the default DVD application to start a DVD in the optical drive.
■ Off, opens QuickPlay to start a DVD in the optical drive.
■ In standby, resumes from standby into Windows.
■ In hibernation, restores from hibernation into Windows.
✎ Refer to...
Multimedia - Page 13
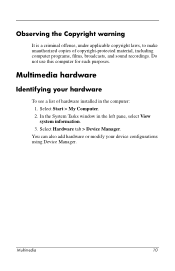
... sound recordings. Do not use this computer for such purposes.
Multimedia hardware
Identifying your hardware
To see a list of hardware installed in the computer: 1. Select Start > My Computer. 2. In the System Tasks window in the left pane, select View system information. 3. Select Hardware tab > Device Manager.
You can also add hardware or modify your device configurations using Device Manager...
Multimedia - Page 27
... Media 3, 4, 5
mute 17 volume 17
C
cables audio 18 S-Video 21
CDs inserting 12 playing 1 removing 14 setting AutoPlay preferences 1
copyright warning 10
D
digital audio 18
DVD button 3, 4, 5
DVDs changing regional settings 9
H
headphone (audio-out) jack
17, 18
headphones 18
I
installing software 2 internal microphone 18
J
jacks
audio-in (microphone) 17,
18
audio-out (headphone) 17,
18 S-Video-out...
Multimedia - Page 28
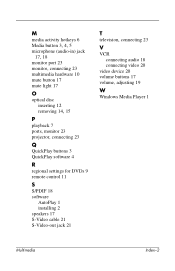
...light 17
O
optical disc inserting 12
removing 14, 15
P
playback 7 ports, monitor 23 projector, connecting 23
Q
QuickPlay buttons 3 QuickPlay software 4
R
regional settings for DVDs 9 remote control 11
S
S/PDIF 18 software
AutoPlay 1 installing 2 speakers 17 S-Video cable 21 S-Video-out jack 21
T
television, connecting 23
V
VCR connecting audio 18 connecting video 20
video device 20 volume buttons...
Notebook Tour Guide - Page 3
...
This guide explains the hardware features of the computer. To see a list of installed hardware on the computer:
1. Select Start > My Computer. 2. In the System Tasks window in the left pane, select View
system information. 3. Select Hardware tab > Device Manager. You can also add hardware or modify your device configurations using Device Manager.
✎ Components included with the computer may...
Notebook Tour Guide - Page 8
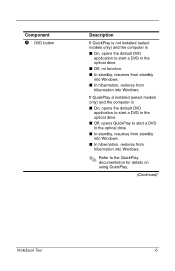
... ■ On, opens the default DVD
application to start a DVD in the optical drive. ■ Off, no function. ■ In standby, resumes from standby into Windows. ■ In hibernation, restores from hibernation into Windows.
If QuickPlay is installed (select models only) and the computer is ■ On, opens the default DVD
application to start a DVD in...
Notebook Tour Guide - Page 9

..., resumes from standby into Windows. ■ In hibernation, restores from hibernation into Windows.
If QuickPlay is installed (select models only) and the computer is ■ On, ...Windows. ■ In hibernation, restores from hibernation into Windows.
✎ Refer to the QuickPlay documentation for details on using QuickPlay.
Decreases system volume.
Mutes system sound.
(Continued)
Notebook...
Notebook Tour Guide - Page 10
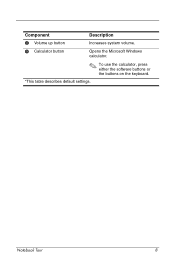
Component 8 Volume up button
Description Increases system volume.
9 Calculator button
Opens the Microsoft Windows calculator.
✎ To use the calculator, press either the software buttons or the buttons on the keyboard.
*This table describes default settings.
Notebook Tour
8
Notebook Tour Guide - Page 24
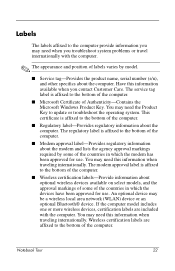
... been approved for use. An optional device may be a wireless local area network (WLAN) device or an optional Bluetooth® device. If the computer model includes one or more wireless devices, certification labels are included with the computer. You may need this information when traveling internationally. Wireless certification labels are affixed to the bottom of the computer.
Notebook Tour
22