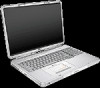
HP Presario X6100 - Notebook PC driver and firmware
Drivers and firmware downloads for this Hewlett-Packard item
Related HP Presario X6100 Manual Pages
Download the free PDF manual for HP Presario X6100 and other HP manuals at ManualOwl.com
End User License Agreement - Page 1
... the HP Product.
RIGHTS IN THE SOFTWARE
the right to distribute the Software
PRODUCT ARE OFFERED ONLY Product. You may load the Software
ON THE CONDITION THAT YOU Product into Your Computer's
AGREE TO ALL TERMS AND
temporary memory (RAM) for
CONDITIONS OF THIS EULA. BY purposes of using the Software
INSTALLING, COPYING,
Product.
DOWNLOADING, OR
b. Storage. You may copy the
OTHERWISE...
End User License Agreement - Page 2
entirely by the terms and conditions of such license.
f. Recovery Solution. Any software recovery solution provided with/for your HP Product, whether in the form of a hard disk drive-based solution, an external media-based recovery solution (e.g. floppy disk, CD or DVD) or an equivalent solution delivered in any other form, may only be used for restoring the hard...
Using LightScribe (Select Models Only) - Page 4
Creating Disc Labels on Your Notebook Using LightScribe
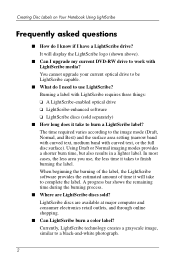
Frequently asked questions
■ How do I know if I have a LightScribe drive? It will display the LightScribe logo (shown above).
■ Can I upgrade my current DVD-RW drive to work with LightScribe media? You cannot upgrade your current optical drive to be LightScribe capable.
■ What do I need to use LightScribe? Burning a label...
Using LightScribe (Select Models Only) - Page 7
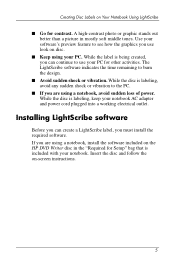
... notebook AC adapter and power cord plugged into a working electrical outlet.
Installing LightScribe software
Before you can create a LightScribe label, you must install the required software. If you are using a notebook, install the software included on the HP DVD Writer disc in the "Required for Setup" bag that is included with your notebook. Insert the disc and follow the on-screen instructions...
Wireless Setup Guide - Page 2
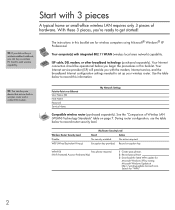
... Internet configuration settings needed to set up your wireless router. Use the table below to record this information.
TIP: You can buy one device that acts as both a wireless router and a cable/DSL modem.
Point-to-Point over Ethernet User Name (ID) Host Name Password Service Name
My Network Settings
Compatible wireless router (purchased separately). See the "Comparison of Wireless LAN...
Wireless Setup Guide - Page 5
..., as compared to dial-up Internet access.
cable modem-A device that connects a computer to the cable television network, which in turn connects to the Internet.
DHCP (Dynamic Host Configuration Protocol)-A specification for service provided by a wireless router, gateway, or other network device that automatically assigns TCP/IP network settings (IP address, DNS, default wireless gateway) to any...
Getting Started - Enhanced for Accessibility - Page 3
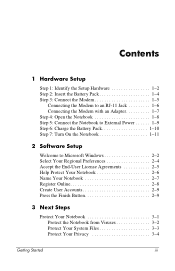
...Insert the Battery Pack 1-4 Step 3: Connect the Modem 1-5
Connecting the Modem to an RJ-11 Jack 1-6 Connecting the Modem with an Adapter 1-7 Step 4: Open the Notebook 1-8 Step 5: Connect the Notebook to External Power 1-9 Step 6: Charge the Battery Pack 1-10 Step 7: Turn On the Notebook 1-11
2 Software Setup
Welcome to Microsoft Windows 2-2 Select Your Regional Preferences 2-4 Accept the...
Getting Started - Enhanced for Accessibility - Page 5
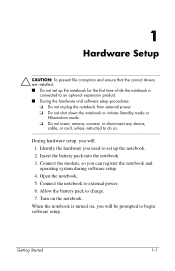
... connect, or disconnect any device, cable, or cord, unless instructed to do so.
During hardware setup, you will 1. Identify the hardware you need to set up the notebook. 2. Insert the battery pack into the notebook. 3. Connect the modem, so you can register the notebook and operating system during software setup. 4. Open the notebook. 5. Connect the notebook to external power. 6. Allow the battery...
Getting Started - Enhanced for Accessibility - Page 18
... indicated by an hourglass icon.
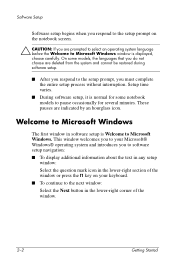
Welcome to Microsoft Windows
The first window in software setup is Welcome to Microsoft Windows. This window welcomes you to your Microsoft® Windows® operating system and introduces you to software setup navigation: ■ To display additional information about the text in any setup
window: Select the question mark icon in the lower-right section of the...
Getting Started - Enhanced for Accessibility - Page 19
Software Setup
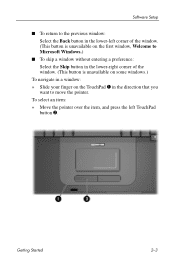
■ To return to the previous window: Select the Back button in the lower-left corner of the window. (This button is unavailable on the first window, Welcome to Microsoft Windows.)
■ To skip a window without entering a preference: Select the Skip button in the lower-right corner of the window. (This button is unavailable on some windows.)
To...
Getting Started - Enhanced for Accessibility - Page 20
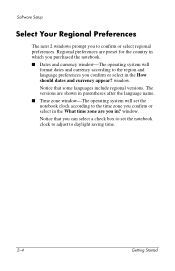
... preferences you confirm or select in the How should dates and currency appear? window. Notice that some languages include regional versions. The versions are shown in parentheses after the language name. ■ Time zone window-The operating system will set the notebook clock according to the time zone you confirm or select in the What time...
Getting Started - Enhanced for Accessibility - Page 21
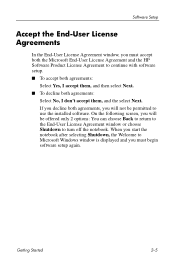
... to use the installed software. On the following screen, you will be offered only 2 options: You can choose Back to return to the End-User License Agreement window or choose Shutdown to turn off the notebook. When you start the notebook after selecting Shutdown, the Welcome to Microsoft Windows window is displayed and you must begin software setup again.
Getting...
Getting Started - Enhanced for Accessibility - Page 22
Software Setup
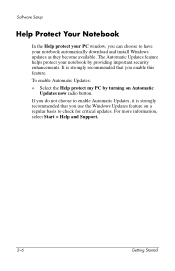
Help Protect Your Notebook
In the Help protect your PC window, you can choose to have your notebook automatically download and install Windows updates as they become available. The Automatic Updates feature helps protect your notebook by providing important security enhancements. It is strongly recommended that you enable this feature.
To enable Automatic Updates:
» Select the ...
Getting Started - Enhanced for Accessibility - Page 23
Software Setup
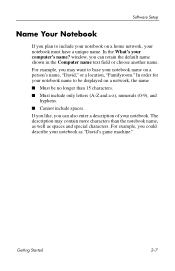
Name Your Notebook
If you plan to include your notebook on a home network, your notebook must have a unique name. In the What's your computer's name? window, you can retain the default name shown in the Computer name text field or choose another name. For example, you may want to base your notebook name on a person's name, "David," or a location...
Getting Started - Enhanced for Accessibility - Page 24
... Privacy Statement, select the underlined link near the bottom of the window.
If you connected your modem during the hardware setup in Chapter 1, "Hardware Setup," or have connected the notebook to the Internet by another method, the Connecting to online registration window is displayed. This window describes the progress of your registration.
If you are unable to send your...
Getting Started - Enhanced for Accessibility - Page 25

Software Setup
Create User Accounts
In the Who will use this computer? window, you can create a user account for each person who may use the notebook. User accounts enable each notebook user to create a personal notebook environment. A user's environment may include such customizations as display and security settings, personal files, screen savers, and the appearance of the Windows desktop. When ...
Getting Started - Enhanced for Accessibility - Page 30
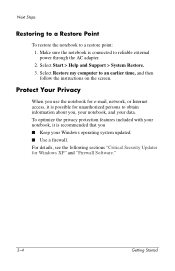
... a restore point: 1. Make sure the notebook is connected to reliable external power through the AC adapter. 2. Select Start > Help and Support > System Restore. 3. Select Restore my computer to an earlier time, and then follow the instructions on the screen.
Protect Your Privacy
When you use the notebook for e-mail, network, or Internet access, it is possible for unauthorized persons...
Getting Started - Enhanced for Accessibility - Page 31
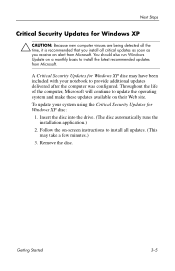
... notebook to provide additional updates delivered after the computer was configured. Throughout the life of the computer, Microsoft will continue to update the operating system and make these updates available on their Web site. To update your system using the Critical Security Updates for Windows XP disc:
1. Insert the disc into the drive. (The disc automatically runs the installation application...
Getting Started - Enhanced for Accessibility - Page 38
... Guide
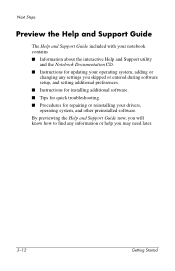
The Help and Support Guide included with your notebook contains ■ Information about the interactive Help and Support utility
and the Notebook Documentation CD. ■ Instructions for updating your operating system, adding or
changing any settings you skipped or entered during software setup, and setting additional preferences. ■ Instructions for installing additional software...
Getting Started - Enhanced for Accessibility - Page 61
...4-19
inserting 1-4 battery pack release latch 4-15 buttons
digital drive eject 4-14 display release 4-8 optical drive release 4-11 PC Card eject 4-13 power/standby 4-5
TouchPad 2-3, 4-2
volume 4-7
wireless 4-7
See also keys; latch
C
cables
modem 1-2, 4-14, 4-18 network 1-3, 4-14, 4-18
See also power cord caps lock light 4-6 category view, Windows XP
3-1 charging battery pack 1-10 classic view...