Lexmark 5500 driver and firmware
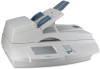
Related Lexmark 5500 Manual Pages
Download the free PDF manual for Lexmark 5500 and other Lexmark manuals at ManualOwl.com
Setup Guide - Page 3
... this agreement are commercial computer software and documentation developed exclusively at private expense.
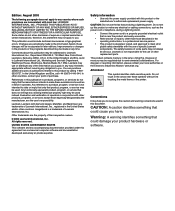
Safety information
• Use only the power supply provided with this product or the manufacturer's authorized replacement power supply.
CAUTION: Do not use the fax feature during a lightning storm. Do not set up this product or make any electrical or cabling connections, such as...
Setup Guide - Page 4
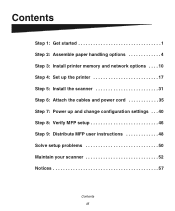
...1 Step 2: Assemble paper handling options 4 Step 3: Install printer memory and network options . . . . 10 Step 4: Set up the printer 17 Step 5: Install the scanner 31 Step 6: Attach the cables and power cord 35 Step 7: Power up and change configuration settings . . . 40 Step 8: Verify MFP setup 46 Step 9: Distribute MFP user instructions 48 Solve setup problems 50 Maintain your scanner 52...
Setup Guide - Page 5
... the option or your printer and then return to this guide and continue setup.
If you encounter a problem while setting up the printer, see "Solve setup problems" on page 50, or visit our Web site at www.lexmark.com.
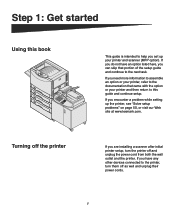
Turning off the printer
If you are installing a scanner after initial printer setup, turn the printer off and unplug the power cord from both...
Setup Guide - Page 6
... mm (56 in.)
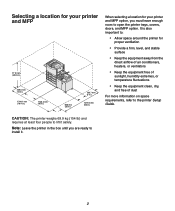
When selecting a location for your printer and MFP option, you must leave enough room to open the printer trays, covers, doors, and MFP option. It is ... important to:
• Allow space around the printer for proper ventilation
• Provide a firm, level...on space requirements, refer to the printer Setup Guide.
CAUTION: The printer weighs 69.9 kg (154 Ib) and requires at least four ...
Setup Guide - Page 7
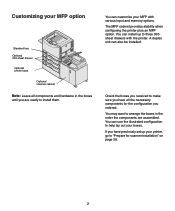
...MFP with various input and memory options. The MFP cabinet provides stability when configuring the printer plus an MFP option. You can install up to three 550sheet drawers with the printer. A duplex unit can also be installed.
Check the boxes you received... configuration to help lay out your boxes. If you have previously set up your printer, go to "Prepare for scanner installation" on page 28.
3
Setup Guide - Page 8
Step 2: Assemble paper handling options
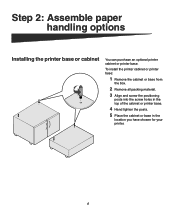
Installing the printer base or cabinet
You can purchase an optional printer cabinet or printer base.
To install the printer cabinet or printer base:
1 Remove the cabinet or base from
the box.
2 Remove all packing material.
3 Align and screw the positioning
posts into the screw holes in the ...
Setup Guide - Page 9
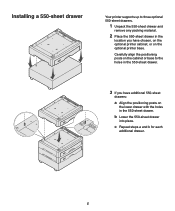
Installing a 550-sheet drawer
Your printer supports up to three optional 550-sheet drawers.
1 Unpack the 550-sheet drawer and
remove any packing material.
2 Place the 550-sheet drawer in the
location you have chosen, on the optional printer cabinet, or on the optional printer base.
Carefully align the positioning posts on the cabinet or base...
Setup Guide - Page 10
... people to help you. Use the handholds on the sides of the printer when lifting.
Printer
Publication and Drivers CDs
Power cord
Setup Guide
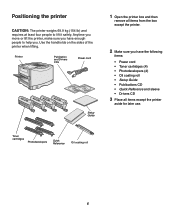
1 Open the printer box and then
remove all items from the box except the printer.
2 Make sure you have the following
items: • Power cord • Toner cartridges (4) • Photodevelopers (4) • Oil coating roll •...
Setup Guide - Page 11
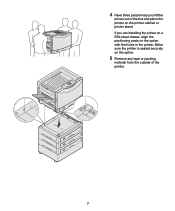
4 Have three people help you lift the
printer out of the box and place the printer on the printer cabinet or printer stand. If you are installing the printer on a 550-sheet drawer, align the positioning posts on the option with the holes in the printer. Make sure the printer is seated securely on the option.
5 Remove any tape or packing
material from the outside of the printer.
7
Setup Guide - Page 12
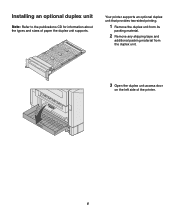
Installing an optional duplex unit
Note: Refer to the publications CD for information about the types and sizes of paper the duplex unit supports.
Your printer supports an optional duplex unit that provides two-sided printing.
1 Remove the duplex unit from its
packing material.
2 Remove any shipping tape and
additional packing material ...
Setup Guide - Page 13
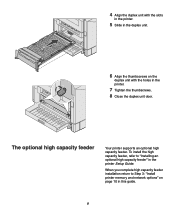
...Tighten the thumbscrews.
8 Close the duplex unit door.
The optional high capacity feeder
Your printer supports an optional high capacity feeder. To install the high capacity feeder, refer to "Installing an optional high capacity feeder" in the printer Setup Guide.
When you complete high capacity feeder installation return to Step 3: "Install printer memory and network options" on page 10 in this...
Setup Guide - Page 14
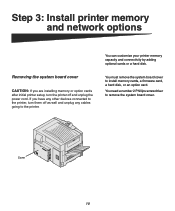
... initial printer setup, turn the printer off and unplug the power cord. If you have any other devices connected to the printer, turn them off as well and unplug any cables going to the printer.
You can customize your printer memory capacity and connectivity by adding optional cards or a hard disk.
You must remove the system board cover to install memory cards, a firmware card, a hard disk, or...
Setup Guide - Page 16
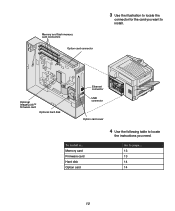
Memory and flash memory card connectors
Option card connector
3 Use the illustration to locate the
connector for the card you want to install.
Optional ImageQuick™ firmware card
Optional hard disk
Ethernet connector USB connector
Option card cover
To install a... Memory card Firmware card Hard disk Option card
4 Use the following table to locate
the instructions you need.
Go to page... ...
Setup Guide - Page 17
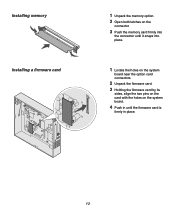
Installing memory Installing a firmware card
1 Unpack the memory option. 2 Open both latches on the
connector.
3 Push the memory card firmly into
the connector until it snaps into place.
1 Locate the holes on the system
board near the option card connectors.
2 Unpack the firmware card. 3 Holding the firmware card by its
sides, align the two pins on the card with the holes on the system board.
4 ...
Setup Guide - Page 47
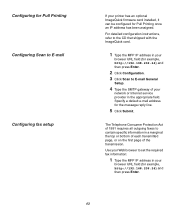
Configuring for Pull Printing Configuring Scan to E-mail
Configuring fax setup
If your printer has an optional ImageQuick firmware card installed, it can be configured for Pull Printing once an IP address has been assigned.
For detailed configuration instructions, refer to the CD that shipped with the ImageQuick card.
1 Type the MFP IP address in your
browser URL field (for example, http...
Setup Guide - Page 51
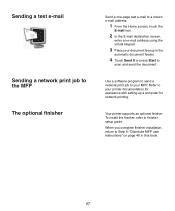
... Start to
scan and send the document.
Use a software program to send a network print job to your MFP. Refer to your printer documentation for assistance with setting up a computer for network printing.
Your printer supports an optional finisher. To install the finisher, refer to finisher setup guide.
When you complete finisher installation, return to Step 9: "Distribute MFP user instructions" on...
User's Guide - Page 28
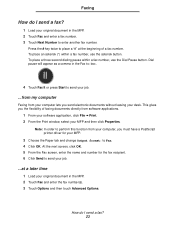
... your desk. This gives you the flexibility of faxing documents directly from software applications.
1 From your software application, click File ➠ Print. 2 From the Print window, select your MFP and then click Properties.
Note: In order to perform this function from your computer, you must have a PostScript printer driver for your MFP.
3 Choose the Paper tab and...
User's Guide - Page 37
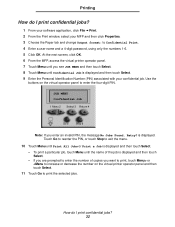
... your software application, click File ➠ Print. 2 From the Print window, select your MFP and then click Properties. 3 Choose the Paper tab and change Output format: to Confidential Print. 4 Enter a user name and a 4-digit password, using only the numbers 1-6. 5 Click OK. At the next screen, click OK. 6 From the MFP, access the virtual printer operator...
User's Guide - Page 39
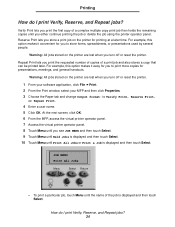
...copies for presentations, meetings, and general handouts.
Warning: All jobs stored on the printer are lost when you turn off or reset the printer.
1 From your software application, click File ➠ Print. 2 From the Print window...printer operator panel. 7 Access the virtual printer operator panel. 8 Touch Menu until you see JOB MENU and then touch Select. 9 Touch Menu until Held Jobs is displayed...
User's Guide - Page 50
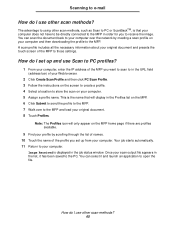
... to your computer over the network by creating a scan profile on your computer and then downloading the profile to the MFP. A scan profile includes all the necessary information about your original document and presets the touch screen of the MFP to those settings.
How do I set up and use Scan to PC profiles?
1 From your computer, enter the IP address of...