MSI A88XM driver and firmware

Related MSI A88XM Manual Pages
Download the free PDF manual for MSI A88XM and other MSI manuals at ManualOwl.com
User Guide - Page 1
... contents. Our products are under continual improvement and we reserve the right to make changes without notice.
Trademarks
All trademarks in this manual are properties of their respective owners. ■ MSI® is registered trademark of Micro-Star Int'l Co.,Ltd. ■ NVIDIA® is registered trademark of NVIDIA Corporation. ■ ATI...
User Guide - Page 3
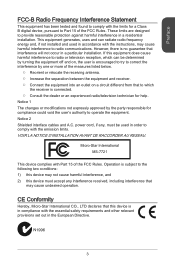
... the user's authority to operate the equipment. Notice 2 Shielded interface cables and A.C. power cord, if any, must be used in order to comply with the emission limits. VOIR LA NOTICE D'INSTALLATION AVANT DE RACCORDER AU RESEAU.
Micro-Star International MS-7721
This device complies with Part 15 of the FCC Rules. Operation is subject...
User Guide - Page 4
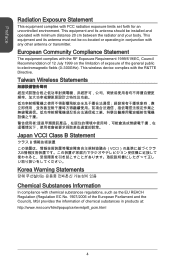
... device complies with the R&TTE Directive.
Taiwan Wireless Statements
Japan VCCI Class B Statement
クラス B VCCI B
Korea Warning Statements
Chemical Substances Information
In compliance with chemical substances regulations, such as the EU REACH Regulation (Regulation EC No. 1907/2006 of the European Parliament and the Council), MSI provides the information of chemical...
User Guide - Page 16
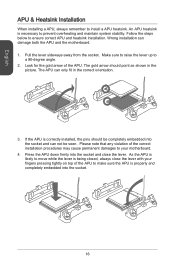
... APU heatsink is necessary to prevent overheating and maintain system stability. Follow the steps below to ensure correct APU and heatsink installation. Wrong installation can damage both the APU and the motherboard. 1. Pull the lever sideways away from the socket. Make sure to raise the lever up to
a 90-degree angle. 2. Look for...
User Guide - Page 17
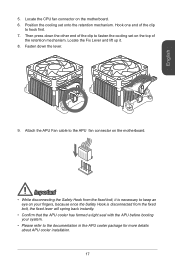
...CPU fan connector on the motherboard. 6. Position the cooling set onto the retention mechanism. Hook one end of the clip
to hook first. 7. Then press down the other end of the clip to fasten the cooling set...it. 8. Fasten down the lever.
9. Attach the APU Fan cable to the APU fan connector on the motherboard.
Important
• While disconnecting the Safety Hook from the fixed...cooler installation.
17
User Guide - Page 18
...
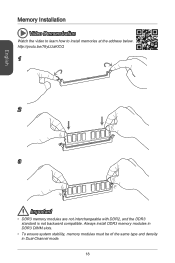
Watch the video to learn how to install memories at the address below. http://youtu.be/76yLtJaKlCQ
1
2
3
Important
• DDR3 memory modules are not interchangeable with DDR2, and the DDR3 standard is not backward compatible. Always install DDR3 memory modules in DDR3 DIMM slots.
• To ensure system stability, memory modules must be of the same type...
User Guide - Page 19
....rGouronudnd
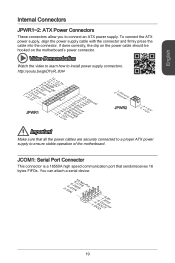
JPWR2
4.+31.+21V2V
Important
Make sure that all the power cables are securely connected to a proper ATX power supply to ensure stable operation of the motherboard.
JCOM1: Serial Port Connector
This connector is a 16550A high speed communication port that sends/receives 16 bytes FIFOs. You can attach a serial device.
2.S4I.ND6T.DR8S1.C0RT.NSo Pin 1.D3.CS5DO.G7Ur...
User Guide - Page 20
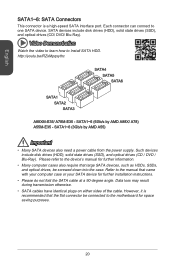
...Install SATA HDD. http://youtu.be/RZsMpqxythc
SATA4 SATA5 SATA6
SATA1 SATA2 SATA3
A88XM-E35/ A78M-E35 - SATA1~6 (6Gb/s by AMD A88X/ A78) A55M-E35 - SATA1~6 (3Gb/s by AMD A55)
Important
• Many SATA devices also need a power cable from the power supply. Such devices include disk drives (HDD), solid state drives (SSD), and optical drives (CD / DVD / Blu-Ray). Please refer to the device's manual...
User Guide - Page 21
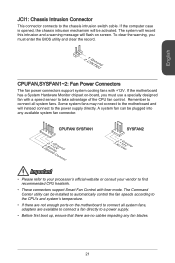
... your processor's official website or consult your vendor to find recommended CPU heatsink.
• These connectors support Smart Fan Control with liner mode. The Command Center utility can be installed to automatically control the fan speeds according to the CPU's and system's temperature.
• If there are not enough ports on the motherboard to connect all system fans, adapters are...
User Guide - Page 22
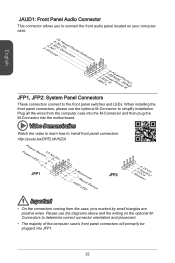
... front panel connectors, please use the optional M-Connector to simplify installation. Plug all the wires from the computer case into the M-Connector and then plug the M-Connector into the motherboard.
Video Demonstration
Watch the video to learn how to Install front panel connectors.
http://youtu.be/DPELIdVNZUI
PowPoewr LeEr DSwi2tc.h+41.0-6..N+8o.-Pin
JFP1...
User Guide - Page 26
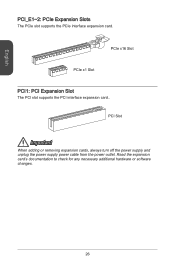
... the PCIe interface expansion card. PCIe x16 Slot
PCIe x1 Slot
PCI1: PCI Expansion Slot
The PCI slot supports the PCI interface expansion card.. PCI Slot
Important
When adding or removing expansion cards, always turn off the power supply and unplug the power supply power cable from the power outlet. Read the expansion card's documentation to check for any necessary additional hardware or software...
User Guide - Page 27
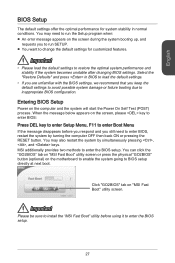
... the system becomes unstable after changing BIOS settings. Select the "Restore Defaults" and press in BIOS to load the default settings.
• If you are unfamiliar with the BIOS settings, we recommend that you keep the default settings to avoid possible system damage or failure booting due to inappropriate BIOS configuration.
Entering BIOS Setup
Power on the computer and the system will start...
User Guide - Page 29
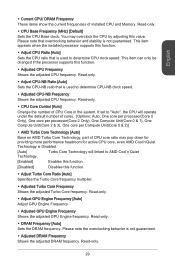
... show the current frequencies of installed CPU and Memory. Read-only.
▶ CPU Base Frequency (MHz) [Default]
Sets the CPU Base clock. You may overclock the CPU by adjusting this value. Please note that overclocking behavior and stability is not guaranteed. This item appears when the installed processor supports this function.
▶ Adjust CPU Ratio [Auto]
Sets the CPU ratio that is used...
User Guide - Page 30
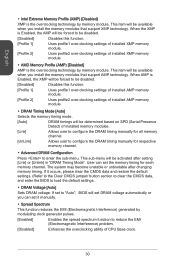
... over-clocking settings of installed AMP memory module.
[Profile 2]
Uses profile2 over-clocking settings of installed AMP memory module.
▶ DRAM Timing Mode [Auto]
Selects the memory timing mode.
[Auto]
DRAM timings will be determined based on SPD (Serial Presence Detect) of installed memory modules.
[Link]
Allows user to configure the DRAM timing manually for all memory channel...