MSI K7T266 - PRO-R Motherboard - ATX driver and firmware

Related MSI K7T266 Manual Pages
Download the free PDF manual for MSI K7T266 and other MSI manuals at ManualOwl.com
User Guide - Page 2
... for a class B digital device, pursuant to part 15 of the FCC rules. These limits are designed to provide reasonable protection against harmful interference when the equipment is operated in a commercial environment. This equipment generates, uses and can radiate radio frequency energy and, if not installed and used in accordance with the instruction manual, may cause...
User Guide - Page 3
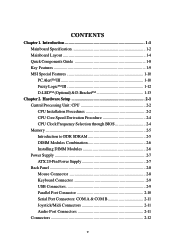
...we reserve the right to make changes without notice.
Trademarks All trademarks used in this manual are the property of their respective owners.
AMD, Athlon and Duron are registered trademarks... of AMD Corporation. PS/2 and OS/2 are registered trademarks of IBM Corporation. Windows 98/2000/ME and Windows NT are registered trademarks of Microsoft. Netware is a registered trademark of Novell. AMI...
User Guide - Page 5
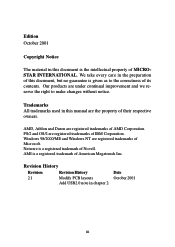
... 2-4 CPU Clock Frequency Selection through BIOS 2-4 Memory 2-5 Introduction to DDR SDRAM 2-5 DIMM Modules Combination 2-6 Installing DIMM Modules 2-6 Power Supply 2-7 ATX 20-Pin Power Supply 2-7 Back Panel 2-8 Mouse Connector 2-8 Keyboard Connector 2-9 USB Connectors 2-9 Parallel Port Connector 2-10 Serial Port Connectors: COM A & COM B 2-11 Joystick/Midi Connectors 2-11 Audio Port...
User Guide - Page 7
... Chipset Features 3-12 Power Management Setup 3-17 PNP/PCI Configurations 3-21 Integrated Peripherals 3-23 Hardware Monitor Setup 3-27 High Performance/BIOS Setup Defaults 3-29 Supervisor/User Password 3-31 IDE HDD AUTO Detection 3-33 Save & Exit Setup 3-34 Exit Without Saving 3-35 Chapter 4. Installing Drivers 4-1 Driver Installation for Windows® 98SE 4-2 Driver Installation...
User Guide - Page 15

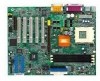
... to Power Supply FAN
See p. 2-22
ATX Power Supply Installing power supply
See p. 2-7
IDE1 & IDE2
Connecting to IDE hard disk drive
See p.2-13
IDE3 & IDE4
Connecting to IDE RAID HDD
See p.2-14
FDD1
Connecting to floppy disk drive
See p.2-12
JUSB1~3
Connecting to USB interfaces
See p. 2-23~2-25
PCI Slot 1~5
Installing expansion cards
See p. 2-30
AGP Slot
Installing AGP cards
See...
User Guide - Page 19
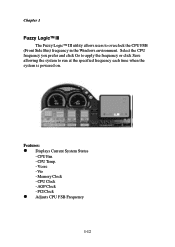
... Side Bus) frequency in the Windows environment. Select the CPU frequency you prefer and click Go to apply the frequency or click Save allowing the system to run at the specified frequency each time when the system is powered on.
Features:
z Displays Current System Status
- CPU Fan - CPU Temp. - Vcore - Vio - Memory Clock - CPU Clock - AGP Clock - PCI Clock
z Adjusts CPU...
User Guide - Page 46
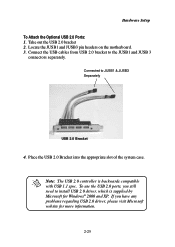
... headers on the motherboard. 3. Connect the USB cables from USB 2.0 bracket to the JUSB1 and JUSB 3
connectors separately.
Connected to JUSB1 & JUSB3 Separately
USB 2.0 Bracket
4. Place the USB 2.0 Bracket into the appropriate slot of the system case.
Note: The USB 2.0 controller is backwards compatible with USB 1.1 spec. To use the USB 2.0 ports, you still need to install USB 2.0 driver, which is...
User Guide - Page 52
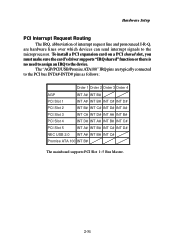
... send interrupt signals to the microprocessor. To install a PCI expansion card on a PCI shared slot, you must make sure the card's driver supports "IRQ shared" function or there is no need to assign an IRQ to the device.
The "AGP/PCI/USB/Promise ATA100" IRQ pins are typically connected to the PCI bus INTA#-INTD# pins as follows:
Order 1 Order 2 Order 3 Order...
User Guide - Page 67
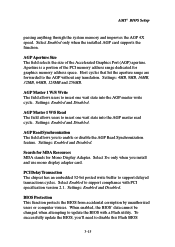
... stands for Mono Display Adapter. Select Yes only when you install and use mono display adapter card.
PCI Delay Transaction The chipset has an embedded 32-bit posted write buffer to support delayed transactions cycles. Select Enabled to support compliance with PCI specification version 2.1. Settings: Enabled and Disabled.
BIOS Protection This function protects the BIOS from accidental corruption...
User Guide - Page 78
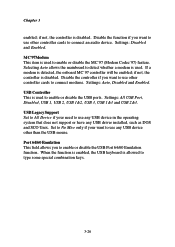
... to use other controller cards to connect modems. Settings: Auto, Disabled and Enabled. USB Controller This is used to enable or disable the USB ports. Settings: All USB Port, Disabled, USB 1, USB 2, USB 1&2, USB 3, USB 1&3 and USB 2&3. USB Legacy Support Set to All Device if your need to use any USB device in the operating system that does not support or have any USB driver installed, such as DOS...
User Guide - Page 88

... ALC201A sound drivers in different Windows® operating systems. When you do the installation, you should always install VIA® chipset driver prior to sound drivers.
This chapter includes the following topics:
Driver Installation for Windows® 98SE 4-2 Driver Installation for Windows® 2000 4-3 Driver Installation for Windows® ME 4-4 Driver Installation for Windows® NT4...
User Guide - Page 89
...
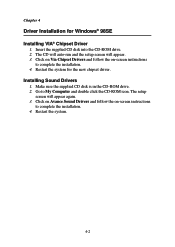
Driver Installation for Windows® 98SE Installing VIA® Chipset Driver
1. Insert the supplied CD disk into the CD-ROM drive. 2. The CD will auto-run and the setup screen will appear. 3. Click on Via Chipset Drivers and follow the on-screen instructions
to complete the installation. 4. Restart the system for the new chipset driver. Installing Sound Drivers 1. Make sure the supplied CD disk...
User Guide - Page 90
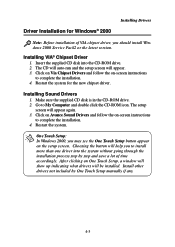
Driver Installation for Windows® 2000
Installing Drivers
Note: Before installation of VIA chipset driver, you should install Windows 2000 Service Pack2 or the latest version.
Installing VIA® Chipset Driver 1. Insert the supplied CD disk into the CD-ROM drive. 2. The CD will auto-run and the setup screen will appear. 3. Click on Via Chipset Drivers and follow the on-screen instructions ...
User Guide - Page 91
... 4
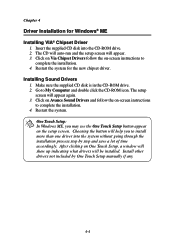
Driver Installation for Windows® ME Installing VIA® Chipset Driver
1. Insert the supplied CD disk into the CD-ROM drive. 2. The CD will auto-run and the setup screen will appear. 3. Click on Via Chipset Drivers follow the on-screen instructions to
complete the installation. 4. Restart the system for the new chipset driver. Installing Sound Drivers 1. Make sure the supplied CD disk is...
User Guide - Page 92
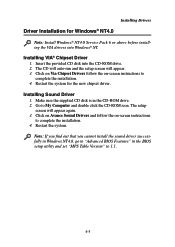
...-ROM drive. 2. Go to My Computer and double click the CD-ROM icon. The setup screen will appear again. 3. Click on Avance Sound Drivers and follow the on-screen instructions to complete the installation. 4. Restart the system. Note: If you find out that you cannot install the sound driver successfully in Windows NT4.0, go to "Advanced BIOS Features" in the BIOS setup utility and set...
User Guide - Page 94
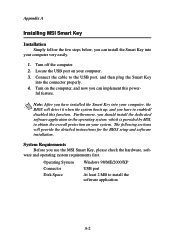
... protection on your system. The following sections will provide the detailed instructions for the BIOS setup and software installation.
System Requirements Before you use the MSI Smart Key, please check the hardware, soft-
ware and operating system requirements first.
Operating System Connector Disk Space
Windows 98/ME/2000/XP USB port At least 2 MB to install the software application
A-2
User Guide - Page 99
MSI Smart Key
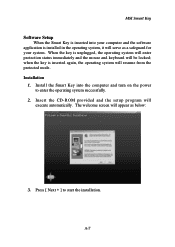
Software Setup When the Smart Key is inserted into your computer and the software
application is installed in the operating system, it... will resume from the protected mode. Installation
1. Install the Smart Key into the computer and turn on the power to enter the operating system successfully.
2. Insert the CD-ROM provided and the setup program will execute automatically. The welcome ...
User Guide - Page 100
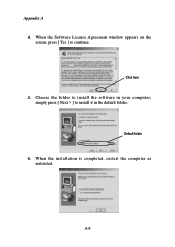
Appendix A 4. When the Software License Agreement window appears on the screen, press [ Yes ] to continue.
Click here
5. Choose the folder to install the software in your computer; simply press [ Next > ] to install it in the default folder.
Default folder
6. When the installation is completed, restart the computer as instructed.
A-8
User Guide - Page 101

... the Smart Key function is disabled in BIOS, this program will not be launched in the operating system.
2. To launch the program's setup screen, simply left-click on the Smart Key icon in the system tray. The program's setup screen appears as below.
Control options
Program version
This window contains the information of the program and...
User Guide - Page 105
MSI Smart Key
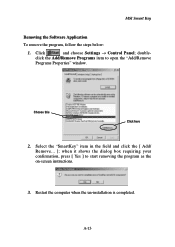
Removing the Software Application
To remove the program, follow the steps below:
1. Click
and choose Settings → Control Panel; double-
click the Add/Remove Programs item to open the "Add/Remove
Programs Properties" window.
Choose this
Click here
2. Select the "SmartKey" item in the field and click the [ Add/ Remove... ]; when it shows...