Samsung SD300 driver and firmware
Related Samsung SD300 Manual Pages
Download the free PDF manual for Samsung SD300 and other Samsung manuals at ManualOwl.com
User Manual - Page 2

... 13 15
19
PREPARATIONS 20
20
21
21 32
35
35
36
37
Copyright
Icons used in this manual
Cleaning
Securing the Installation Space
Precautions for storage
Safety Precautions
Symbols for safety precautions Electricity and Safety Installation and Safety Operation
Correct posture to use the product
Checking the Contents
Checking the Components
Parts
Frontal...
User Manual - Page 3
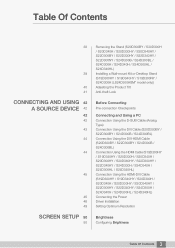
... / S20D300HY / S20D340HY / S22D300HY / S22D340HY / S24D300H / S24D340H / S24D300HL / S24D340HL) Connection Using the HDMI-DVI Cable (S19D300HY / S19D340HY / S20D300H / S20D340H / S20D300HY / S20D340HY / S22D300HY / S22D340HY / S24D300H / S24D340H / S24D300HL / S24D340HL) Connecting the Power Driver Installation Setting Optimum Resolution
Brightness
Configuring Brightness
3 Table Of Contents
User Manual - Page 6

...83
84
84
INFORMATION MENU AND 85 OTHERS 85
86
INSTALLING THE 87 SOFTWARE 87
88
TROUBLESHOOTING 89 GUIDE
89 89 89
92
SPECIFICATIONS 94
PC/AV Mode (...Displaying INFORMATION
Configuring Brightness and Contrast in the Initial Screen
Easy Setting Box
Installing the Software Removing the Software
Requirements Before Contacting Samsung Customer Service Center
Testing the Product Checking the Resolution...
User Manual - Page 8
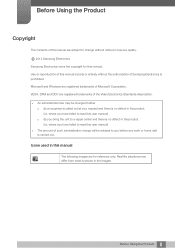
... Using the Product
Copyright
The contents of this manual are subject to change without notice to improve quality.
b 2014 Samsung Electronics
Samsung Electronics owns the copyright for this manual. Use or reproduction of this manual in parts or entirety without the authorization of Samsung Electronics is prohibited. Microsoft and Windows are registered trademarks of Microsoft Corporation. VESA...
User Manual - Page 10
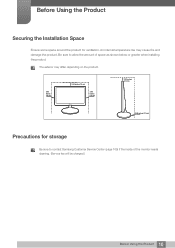
... space as shown below or greater when installing the product.
The exterior may differ depending on the product.
3.93 inches (10 cm)
3.93 inches (10 cm)
3.93 inches (10 cm)
3.93 inches (10 cm)
3.93 inches (10 cm)
Precautions for storage
Be sure to contact Samsung Customer Service Center (page 109) if the inside...
User Manual - Page 13
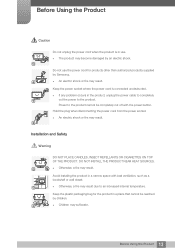
... problem occurs in the product, unplug the power cable to completely
!
cut the power to the product.
Power to the product cannot be completely cut off with the power button.
Hold the plug when disconnecting the power cord from the power socket.
z An electric shock or fire may result.
!
Installation and Safety
Warning
DO NOT PLACE CANDLES, INSECT...
User Manual - Page 14
...and injure children.
Edible oil, such as soybean oil, can damage or deform the product. Do not install the product in a kitchen or near a kitchen counter.
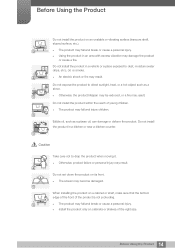
Caution
Take care not to drop the product ..., product failure or personal injury may result.
!
Do not set down the product on its front. z The screen may become damaged.
When installing the product on a cabinet or shelf, make sure that the...
User Manual - Page 15
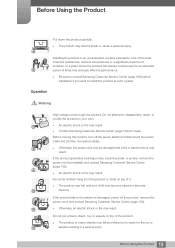
... affect its performance.
z Be sure to consult Samsung Customer Service Center (page 109) before installation if you want to install the product at such a place.
Operation
Warning
... Contact Samsung Customer Service Center (page 109) for repair.
Before moving the product, turn off the power switch and disconnect the power cable and all other connected cables.
!
z Otherwise, the power cord ...
User Manual - Page 35
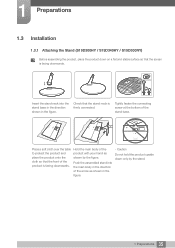
1 Preparations
1.3 Installation
1.3.1 Attaching the Stand (S19D300HY / S19D340HY / S19D300NY)
Before assembling the product, place the product down on a flat and stable surface so that the screen is facing ...
User Manual - Page 39
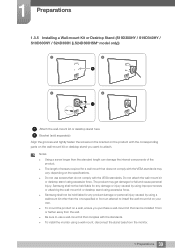
... not be held liable for any damage or injury caused by using improper screws or attaching the wall-mount kit or desktop stand using excessive force. z Samsung shall not be held liable for any product damage or personal injury caused by using a wallmount kit other than the one specified or from an...
User Manual - Page 48
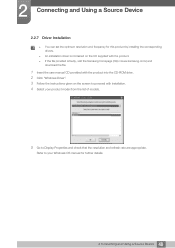
... can set the optimum resolution and frequency for this product by installing the corresponding drivers.
z An installation driver is contained on the CD supplied with the product. z If the file provided is faulty, visit the Samsung homepage (http://www.samsung.com/) and
download the file.
1 Insert the user manual CD provided with the product into the CD-ROM drive. 2 Click "Windows Driver". 3 Follow...
User Manual - Page 75
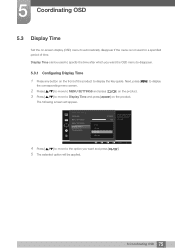
... and press [
] on the product.
The following screen will appear.
MENU SETTINGS Language Menu H-Position Menu V-Position Display Time Transparency
5 sec 10 sec 20 sec 200 sec
English 100 2
20 sec On
Set how long the menu window will remain on screen for when it is not in use.
AUTO
4 Press [
] to move to...
User Manual - Page 76
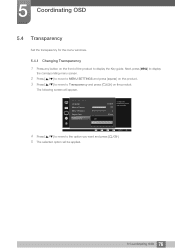
5 Coordinating OSD
5.4 Transparency
Set the transparency for the menu windows.
5.4.1 Changing Transparency
1 Press any button on the front of the product to display the Key guide. Next, press [MENU] to display
the corresponding menu screen.
2 Press [
] to move to MENU SETTINGS and press [
] on the product.
3 Press [
] to move to Transparency and press [
] on the product.
The...
User Manual - Page 87
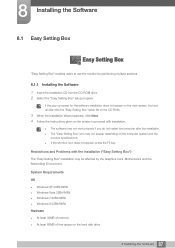
... the Installation ("Easy Setting Box")
The "Easy Setting Box" installation may be affected by the Graphics Card, Motherboard and the Networking Environment.
System Requirements
OS z Windows XP 32Bit/64Bit z Windows Vista 32Bit/64Bit z Windows 7 32Bit/64Bit z Windows 8 32Bit/64Bit Hardware z At least 32MB of memory z At least 60MB of free space on the hard disk drive
87 8 Installing the Software
User Manual - Page 88
8 Installing the Software
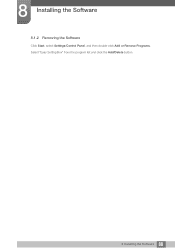
8.1.2 Removing the Software
Click Start, select Settings/Control Panel, and then double-click Add or Remove Programs. Select "Easy Setting Box" from the program list and click the Add/Delete button.
88 8 Installing the Software
User Manual - Page 89
....
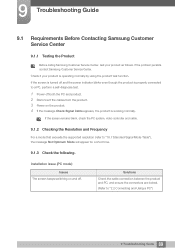
If the screen remains blank, check the PC system, video controller and cable.
9.1.2 Checking the Resolution and Frequency
For a mode that exceeds the supported resolution (refer to "10.7 Standard Signal Mode Table"), the message Not Optimum Mode will appear for a short time.
9.1.3 Check the following.
Installation issue (PC mode)
Issues The screen keeps switching on and...
User Manual - Page 92
... Guide
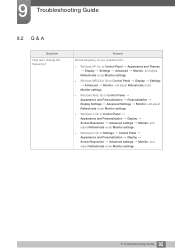
9.2 Q & A
Question How can I change the frequency?
Answer
Set the frequency on your graphics card.
z Windows XP: Go to Control Panel Appearance and Themes Display Settings Advanced Monitor, and adjust
Refresh rate under Monitor settings.
z Windows ME/2000: Go to Control Panel Display Settings Advanced Monitor, and adjust Refresh rate under
Monitor settings.
z Windows Vista: Go to Control...
User Manual - Page 93
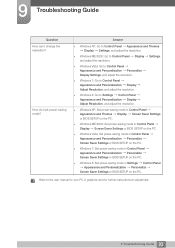
...or BIOS SETUP on the PC.
z Windows 7: Set power-saving mode in Control Panel Appearance and Personalization Personalize Screen Saver Settings or BIOS SETUP on the PC.
z Windows 8: Set power-saving mode in Settings Control Panel Appearance and Personalization Personalize
Screen Saver Settings or BIOS SETUP on the PC.
Refer to the user manual for your PC or graphics card for further instructions on...
User Manual - Page 94
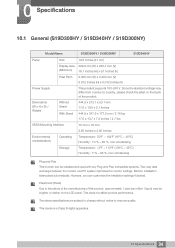
... installation settings if desired.
Panel Dots (Pixels) Due to the nature of the manufacturing of this product, approximately 1 pixel per million (1ppm) may be brighter or darker on the LCD panel. This does not affect product performance.
The above specifications are subject to change without notice to improve quality.
This device is a Class B digital...
User Manual - Page 115
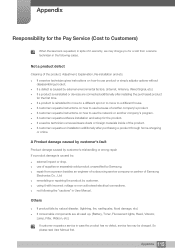
... spot or to move to a different house. z If customer requests instructions on how to use because of another company's product. z If customer requests instructions on how to use the network or another company's program. z If customer requests software installation and setup for the product. z If a service technician removes/cleans dusts or foreign materials inside of the product...