Sony DSLR-A390L - alpha; Digital Single Lens Reflex Camera Zoom driver and firmware
Related Sony DSLR-A390L Manual Pages
Download the free PDF manual for Sony DSLR-A390L and other Sony manuals at ManualOwl.com
Instruction Manual - Page 4
... and product safety is Sony Deutschland GmbH, Hedelfinger Strasse 61, 70327 Stuttgart, Germany. For any service or guarantee matters please refer to the addresses given in separate service or guarantee documents.
This product has been tested and found compliant with the limits set out in the EMC Directive for using connection cables shorter than 3 meters (9.8 feet...
Instruction Manual - Page 11
... on a TV screen 112
Changing your setup
Setting image size and image quality 116 Setting the method for recording on a memory card ..... 118 Changing the noise reduction setting 120 Changing the functions of the control dial 121 Changing other settings 122 Setting the LCD monitor 124 Confirming the version of the camera 126 Resetting to the default 127
Viewing images Copying images to...
Instruction Manual - Page 13
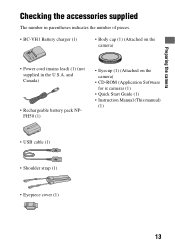
...; Body cap (1) (Attached on the camera)
• Power cord (mains lead) (1) (not supplied in the U.S.A. and Canada)
• Rechargeable battery pack NPFH50 (1)
• Eyecup (1) (Attached on the camera)
• CD-ROM (Application Software for α camera) (1)
• Quick Start Guide (1) • Instruction Manual (This manual)
(1)
• USB cable (1)
• Shoulder strap (1)
•...
Instruction Manual - Page 103
...,
even if you turn off the power.
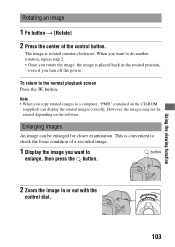
To return to the normal playback screen Press the button.
Note • When you copy rotated images to a computer, "PMB" contained on the CD-ROM
(supplied) can display the rotated images correctly. However, the images may not be rotated depending on the software.
Enlarging images
An image can be...
Instruction Manual - Page 117
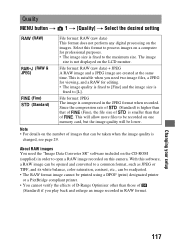
... the desired setting
(RAW)
(RAW & JPEG)
(Fine) (Standard)
File format: RAW (raw data) This format does not perform any digital processing on the images. Select this format to process images on a computer for professional purposes. • The image size is fixed to the maximum size. The image
size is not displayed on the LCD...
Instruction Manual - Page 126
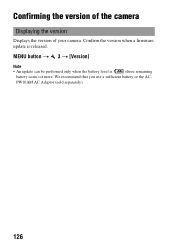
Confirming the version of the camera
Displaying the version
Displays the version of your camera. Confirm the version when a firmware update is released.
MENU button t 3 t [Version]
Note
• An update can be performed only when the battery level is
(three remaining
battery icons) or more. We recommend that you use a sufficient battery or the AC-
PW10AM AC Adaptor (sold separately).
126
Instruction Manual - Page 129
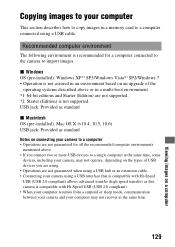
...section describes how to copy images in a memory card to a computer connected using a USB cable.
Recommended computer environment
The following environment is recommended for a computer connected to the camera to import images.
x Windows OS (pre-installed): Windows XP*1 SP3/Windows Vista*2 SP2/Windows 7 • Operation is not assured in an environment based on an upgrade of the
operating systems...
Instruction Manual - Page 131
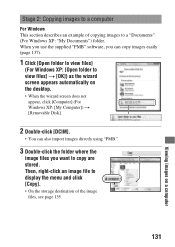
... you use the supplied "PMB" software, you can copy images easily (page 137).
1 Click [Open folder to view files]
(For Windows XP: [Open folder to view files] t [OK]) as the wizard screen appears automatically on the desktop.
• When the wizard screen does not appear, click [Computer] (For Windows XP: [My Computer]) t [Removable Disk].
2 Double-click [DCIM].
•...
Instruction Manual - Page 132
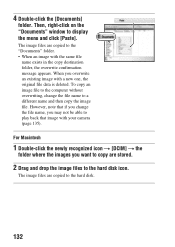
...on the "Documents" window to display the menu and click [Paste].
The image files are copied to the "Documents" folder. • When an image with the same file
name exists in the copy destination folder, the ...camera (page 135).
For Macintosh
1 Double-click the newly recognized icon t [DCIM] t the
folder where the images you want to copy are stored.
2 Drag and drop the image files to the hard disk...
Instruction Manual - Page 133
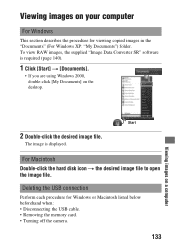
... the desktop.
2 Double-click the desired image file.
The image is displayed.
For Macintosh Double-click the hard disk icon t the desired image file to open the image file.
Deleting the USB connection
Perform each procedure for Windows or Macintosh listed below beforehand when: • Disconnecting the USB cable. • Removing the memory card. • Turning off the camera.
133...
Instruction Manual - Page 134
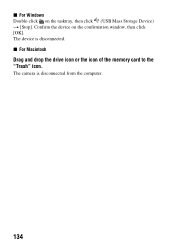
x For Windows Double-click on the tasktray, then click (USB Mass Storage Device) t [Stop]. Confirm the device on the confirmation window, then click [OK]. The device is disconnected. x For Macintosh
Drag and drop the drive icon or the icon of the memory card to the "Trash" icon.
The camera is disconnected from the computer.
134
Instruction Manual - Page 135
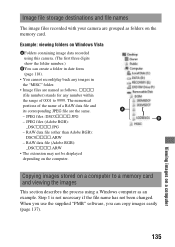
Image file storage destinations and file names
The image files recorded with your camera are grouped as folders on the memory card.
Example: viewing folders on Windows Vista
AFolders containing image data recorded using this camera. (The first three digits show the folder number.)
BYou can create a folder in date form (page 118).
• You cannot record/play back any images...
Instruction Manual - Page 136
... number.
• An extension may be displayed depending on the computer settings. The extension for images is JPG. Do not change the extension.
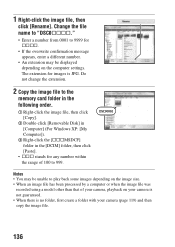
2 Copy the image file to the
memory card folder in the following order.
1 Right-click the image file, then click [Copy].
2 Double-click [Removable Disk] in [Computer] (For Windows XP: [My Computer]).
3 Right-click the [sssMSDCF] folder in...
Instruction Manual - Page 137
...Recommended computer environment x Windows Recommended environment for using "Image Data Converter SR Ver.3"/ "Image Data Lightbox SR" OS (pre-installed): Microsoft Windows XP*1 SP3/Windows Vista*2 SP2/ Windows 7 *1 64-bit editions and Starter (Edition) are not supported. *2 Starter (Edition) is not supported. CPU/Memory: Pentium 4 or faster is recommended, RAM 1 GB or more is recommended. Display...
Instruction Manual - Page 138
... (pre-installed): Mac OS X (v10.4, v10.5, v10.6 (Snow Leopard)) CPU: Power PC G4/G5 series (1.0 GHz or faster is recommended)/Intel Core Solo/Core Duo/Core 2 Duo or faster Memory: 1 GB or more is recommended. Display: 1024 × 768 dots or more
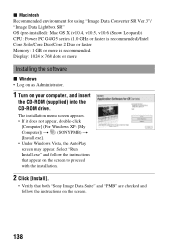
Installing the software
x Windows • Log on as Administrator.
1 Turn on your computer, and insert
the CD-ROM (supplied...
Instruction Manual - Page 139
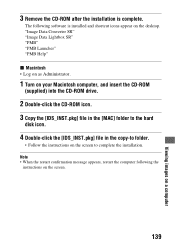
....
1 Turn on your Macintosh computer, and insert the CD-ROM
(supplied) into the CD-ROM drive.
2 Double-click the CD-ROM icon. 3 Copy the [IDS_INST.pkg] file in the [MAC] folder to the hard
disk icon.
4 Double-click the [IDS_INST.pkg] file in the copy-to folder.
• Follow the instructions on the screen to complete the installation. Note • When...
Instruction Manual - Page 140
... the [Sony Image Data Suite] folder from the [Applications] folder. To exit, click a quit item from the [IDC SR] menu.
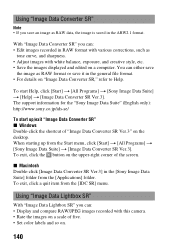
Using "Image Data Lightbox SR"
With "Image Data Lightbox SR" you can: • Display and compare RAW/JPEG images recorded with this camera. • Rate the images on a scale of five. • Set color labels...
Instruction Manual - Page 141
..."Image Data Lightbox SR" x Windows Double-click [Image Data Lightbox SR] on the desktop. When starting up from the Start menu, click [Start] t [All Programs] t [Sony Image Data Suite] t [Image... is not compatible with Macintosh computers.
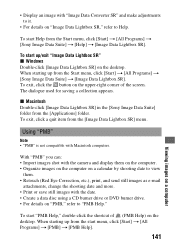
With "PMB" you can: • Import images shot with the camera and display them on the computer. • Organize images on the computer on a calendar by shooting ...
Instruction Manual - Page 142

... screen. The support information for the "PMB" (English only): http://www.sony.co.jp/pmb-se/ Note
• The confirmation message of the Information tool appears on the screen when starting "PMB" for the first time. Select [Start]. This function informs you of news, such as software updates. You can change the setting later.
142
Instruction Manual - Page 157
...; Use the USB cable (supplied) (page 130). • Disconnect the USB cable, and connect it again firmly. • Set [USB connection] to [Mass Storage] (page 130). • Disconnect all equipment other than the camera, the keyboard and the mouse from the USB jacks of your computer. • Connect the camera directly to your computer without passing through a USB hub or other device (page 129...