Sony SDM-X82 driver and firmware


Related Sony SDM-X82 Manual Pages
Download the free PDF manual for Sony SDM-X82 and other Sony manuals at ManualOwl.com
Operating Instructions - Page 2

... Information Center 1-800-222-SONY (7669)
or write to: Sony Customer Information Center 1 Sony Drive, Mail Drop #T1-11, Park Ridge, NJ 07656
Declaration of Conformity
Trade Name: Model No.: Responsible Party: Address:
Telephone No.:
SONY SDM-X52/X72/X82 Sony Electronics Inc. 680 Kinderkamack Road,Oradell,NJ 07649 USA 201-930-6972
This device complies with Part 15 of...
Operating Instructions - Page 3

... in each case in this manual.
Precautions 4 Identifying parts and controls 5
Setup 7
Setup 1: Connect a computer equipped with the DVI output connector (digital RGB 7
Setup 2: Connect a computer equipped with the HD15 output connector (analog RGB 7
Setup 3: Connect the audio cord 8 Setup 4: Connect the power cord 8 Setup 5: Bundle the cords and cables 9 Setup 6: Turn on the monitor and...
Operating Instructions - Page 4

... as a TV or various other household appliances. • In places subject to inordinate amounts of dust, dirt, or sand, for example near an open window or an outdoor exit. If setting up temporarily in... rubber or vinyl materials.
Transportation
• Disconnect all cables from the monitor and grasp the support and base sections of the display stand firmly with both hands when transporting. If you ...
Operating Instructions - Page 7

...included in your carton: • LCD display • Power cord • HD15-HD15 video signal cable (analog RGB) • DVI-D video signal cable (digital RGB) • Audio cord (stereo miniplug) • Windows Utility/Macintosh Utility Disk • Warranty card • This instruction manual
Setup 1: Connect a computer equipped with the DVI output connector (digital RGB)
• Turn off the...
Operating Instructions - Page 9

... the arm cover. 2 Bundle the cords and cables inside of the stand. 3 Secure the cables and cords with the cable holder. 4 Replace the arm cover and back cover.
1
arm cover Hold at this point.
2
4 back cover
Setup 6: Turn on the monitor and computer
1 Press the MAIN POWER switch on the left side of the monitor in...
Operating Instructions - Page 10

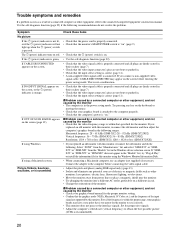
...: - Check that the video signal cable is properly connected. - Check that the input signal setting is correct by pressing the INPUT button repeatedly (page 11).
• If OUT OF SCAN RANGE appears on the screen, reconnect the old monitor. Then adjust the computer's graphics board in the following ranges.
SDM-X52
SDM-X72/X82
Horizontal frequency 28 - 61...
Operating Instructions - Page 13

...analog RGB signal only)
Note When receiving digital RGB signals from the DVI-D input connector for INPUT1, adjustment is ...Set the resolution to 1024 × 768 (SDM-X52) 1280 × 1024 (SDM-X72/X82) on the computer.
2 Load the Utility Disk.
3 Start the Utility Disk and display the test pattern. For Windows Click [Utility] t [Windows]/[Win Utility.exe]. For Macintosh Click [Utility] t [Mac]/[Mac...
Operating Instructions - Page 14

...'s centering as follows.
1 Set the resolution to 1280 × 1024 on the computer
when using the SDM-X72/X82 model. When using the SDM-X52 model, it is not necessary to set the resolution.
2 Load the Utility Disk.
3 Start the Utility Disk and display the test pattern. For Windows Click [Utility] t [Windows]/[Win Utility.exe]. For Macintosh Click [Utility] t [Mac]/[Mac Utility].
4 Press the MENU...
Operating Instructions - Page 15

... pictures appear clean. (This
US
mode is suited for CD-ROM software such as
photo images or illustrations.)
Note • When you set the (ZOOM) menu to REAL, the
(SMOOTHING) menu is not available. • 1024 × 768 (SDM-X52), 1280 × 1024 (SDM-X72/X82) resolution
signals are shown only in REAL mode and SMOOTHING is...
Operating Instructions - Page 20
... select "SDM-X52" or "SDMX72" or "SDM-X82" from the "Models" list in the Windows device selection screen. If "SDMX52" or "SDM-X72" or "SDM-X82" does not appear in the "Models" list, try "Plug & Play" or install the information file for this monitor using the Windows Monitor Information Disk.
If using a Macintosh system,
• When connecting a Macintosh computer, use an adapter (not...
Comparison Chart brochure - Page 2

... Card Au.di.o . . . Cable Warranty Card USB Cable Audio Cable, Warranty Card . . .
Limited Warranty
3 years (Parts, Labor, Backlight)
3 years (Parts, Labor, Backlight)
3 years (Parts, Labor, Backlight)
3 years (Parts, Labor, Backlight)
Sony Electronics Inc. 16450 West Bernardo Drive San Diego, California 92127 For more information: 1.800.352.SONY Web address: sony.com/displays
Computer...