Vantec NST-475LX-BK - NexStar LX Ultra driver and firmware
Related Vantec NST-475LX-BK Manual Pages
Download the free PDF manual for Vantec NST-475LX-BK and other Vantec manuals at ManualOwl.com
User Guide - Page 2

Package Contents:
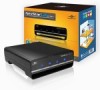
NexStar®LX Ultra Gigabit NAS Hard Drive Enclosure
1 NexStar® LX Ultra 2 USB Cable 3 eSATA Cable 4 RJ45 Ethernet Cable 5 SATA to eSATA Bracket 6 Power Adapter 7 User's Manual 8 Screws 9 User's CD
1 2
SATA
3
SATA
4
5 6
7
8
9
TRADEMARKS MS-DOS, Microsoft, Windows NT/2000/ME/XP/Vista are trademarks of Microsoft Corporation. Apple, Macintosh and Mac are trademarks...
User Guide - Page 3

... 2. Specifications / Features 03 3. System Requirements 04 4. Parts Layout...05 5. Installation
5.1 Installation of the hard drive 06 5.2 How to find the NexStar LX Ultra 08 5.3 Formatting the hard disk for the first time 09
6. Status Page
6.1 Changing the host name and group name 10 6.2 Changing the administrator's password 11
7. FTP Server
7.1 Creating a new FTP account 12 7.2 Modify the...
User Guide - Page 4

... of the Vantec NexStar® LX Ultra-blending the finest functions of a Network Attached Storage (NAS) solution into a powerful little package that fits any home or office. Crafted with versatility in mind to conform to different user's needs, the NexStar® LX Ultra is equipped with three interfaces (Gigabit Ethernet/eSATA/USB 2.0). Whether you have a PC or Mac, setting up the LX is a breeze...
User Guide - Page 5

... Drive Up To 2 TB*
Specifications:
Model
: NST-475LX-BK
Drive Supported: : 3.5" SATA I/II Hard Drive
External Interface: : Ethernet/eSATA/USB 2.0
Data Transfer Rates: : LAN (10/100/1000 Mbps)
eSATA (Up To 3 Gbps)
USB 2.0 (Up To 480 Mbps)
Storage Capacity: : Up to 2 TB*
Power Supply:
: AC Adapter
Material:
: Plastic
Dimensions:
: 185mm x 168 mm 65 mm
*For the most updated Storage...
User Guide - Page 6

...:
Microsoft Windows 2000/2003 server/XP x86/ XP 64 bit/Vista X86/Vista 64 bit 1. USB port, internal SATA port, eSATA port or
RJ45 Ethernet port. 2. For USB 2.0 speeds, the system must
support USB 2.0 specifications. 3. For SATA speeds, the system must support
SATA specifications. 4. CD-ROM drive.
Mac OS X & greater 1. USB port, internal SATA port, eSATA port or
RJ45 Ethernet port. 2. For USB...
User Guide - Page 8

5. Installation:
NexStar®LX Ultra Gigabit NAS Hard Drive Enclosure
5.1. Installation of the hard drive.
(1) Unscrew the screws on the underbody as shown. ( Figure 5.1-A )
( Figure 5.1-A )
XD
SD
2.5"
SATA
(2) Slide out the hard drive tray and place the hard drive in. Be sure to fasten the hard drive in with screws. ( Figure 5.1-B ) ,( Figure 5.1-C )
Universal Storage Adapter
3.5"/5.25"...
User Guide - Page 9

(3) Slide the hard drive tray back into the LX Ultra and re-screw the screws back on to the underbody. ( Figure 5.2-D ) ( Figure 5.2-E ) ( Figure 5.2-D )
( Figure 5.2-E )
Installation
7
User Guide - Page 10

... the user name and password.
Default account settings User name:anonymous Password: admin ( Figure 5.2-B )
NOTE :
( Figure 5.2-B )
1. If there is more than one NAS device attached in the same local area network, you will see the other IP addresses in the IP block.
2. If you are unable to open "SDisk jar", please download and install JAVA from (www.java...
User Guide - Page 11

(4) After entering the web UI, please select a language of your choice. ( Figure 5.2-C )
( Figure 5.2-C )
5.3 Formatting the hard disk for the first time.
(1) Click on "Disk Utility" located on the left list.
(2) Next click "Format" to begin the format of the hard disk. ( Figure 5.3-A )
( Figure 5.3-A )
(3) Click "OK" to confirm the format. ( Figure 5.3-B )
( Figure 5.3-B ) Installation
9
User Guide - Page 12

... host name, group name and administrator's password. You may also disable or enable features on the NAS such as DHCP server, SMB server and FTP server. Information about the NAS are also displayed in the "Status" tab also such as the information of Hard disk, IP address, MAC address and current installed firmware version.
6.1 Changing the host name and...
User Guide - Page 16

..." to return to the previous page. ( Figure 7.5-B )
7.6. How to use the FTP server?
( Figure 7.5-B )
(1) Open up "Internet Explorer". ( Figure 7.6-A )
( Figure 7.6-A )
(2) 1 Enter the NAS IP address.
2 The "Log On" window will pop up. Enter the "User Name" and "Password".
3 Once everything is entered, click "Log On". You should have access to your FTP now. ( Figure...
User Guide - Page 21

10. Printer Setup
(1) Plug the printer into the USB Printer Port.( Figure 10- A )
USB CABLE USB Printer Port
( Figure 10- A )
(2) Ensure the printer is installed on the NAS's web page.( Figure 10- B )
( Figure 10- B )
(3) Locate your computer's "Printers and Faxes" settings. ( Figure 10- C ) ( Figure 10- C )
(4) Click "Add a printer". ( Figure 10-D)
( Figure 10- D ) Printer Setup
19
User Guide - Page 22

... attached to this computer" but un-check the
㕐㕐㕐option of "Automatically detect and install my Plug and Play printer". When finished, click "Next". ( Figure 10- F )
( Figure 10- F )
(7) Select "Create a new port" and choose " Standard TCP/IP". When finished, click "Next". ( Figure 10- G )
( Figure 10- G )
(8) Click "Next". ( Figure 10- H )
( Figure 10- H )
Printer Setup
20
User Guide - Page 26

...to use the BitTorrent™ function
12.1 Uploading BitTorrent™ Files.
(1) Setup the download location and select "Apply". ( Figure 12.1-A )
(2) Browse for the ...downloading, there is a max that can be downloaded at one time. The LX Ultra will put the rest of the BitTorrent™ files that are not currently being downloaded into que. When one of the current downloads finish, the LX Ultra...
User Guide - Page 27

12.2 Mail Notification :
When BitTorrent™ downloads are finished, you may receive e-mail notifications. If you use this function, you will need to have an e-mail address which is on a SMTP server. Bellow is a sample.
(1) In this example, Microsoft Outlook will be used.
( Figure 12.2- A )
..., click "Apply". ( Figure 12.2- C )
( Figure 12.2- B )
( Figure 12.2- C ) How to use BT download
25
User Guide - Page 28

... "Account name and Password" for the Outgoing Mail Server. Make sure this information is also the same in the BitTorrent™ Mail Notification function also. When finished, click "Apply". ( Figure 12.1-E )
( Figure 12.1- E )
(6) Enter the e-mail address into the sender and receiver box. When finished, press "Apply".(Figure 12.1-F)
(7) When downloads are complete...
User Guide - Page 29

... 13.1-B )
(2) Check to make sure the file and pathway of the firmware file is correct. If everything is correct, click "Upload". ( Figure 13.1-C )
( Figure 13.1-C )
(3) When the upgrade of the firmware is complete, click on "OK". Preform a power cycle of the NAS by powering off and on the NAS. ( Figure 13.1-D ) ( Figure 13.1-D ) Maintenance Page...
Flyer - Page 1

...; NexStar LX Ultra • User's Manual • Power Adapter • USB Cable • eSATA Cable • RJ45 Ethernet Cable • SATA to eSATA Bracket • CD Driver • Screws
Ethernet
eSATA
USB
RoHS
Model: Device Support External Interface Data Transfer Rates
Power Supply Storage Capacity Material Dimension
NST-475LX-BK
3.5" SATA I/II Hard Drive Ethernet/eSATA/USB 2.0
LAN...