ASRock G41C-GS R2.0 driver and firmware
Related ASRock G41C-GS R2.0 Manual Pages
Download the free PDF manual for ASRock G41C-GS R2.0 and other ASRock manuals at ManualOwl.com
User Manual - Page 3
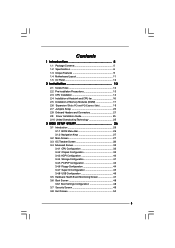
...Headers and Connectors 21 2.9 Driver Installation Guide 25 2.10 Untied Overclocking Technology 25
3 BIOS SETUP UTILITY 26
3.1 Introduction 26 3.1.1 BIOS Menu Bar 26 3.1.2 Navigation Keys 27
3.2 Main Screen 27 3.3 OC Tweaker Screen 28 3.4 Advanced Screen 32
3.4.1 CPU Configuration 33 3.4.2 Chipset Configuration 35 3.4.3 ACPI Configuration 40 3.4.4 Storage Configuration 41 3.4.5 PCIPnP...
User Manual - Page 4
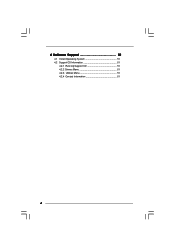
4 Software Support 51
4.1 Install Operating System 51 4.2 Support CD Information 51
4.2.1 Running Support CD 51 4.2.2 Drivers Menu 51 4.2.3 Utilities Menu 51 4.2.4 Contact Information 51
4
User Manual - Page 5
... ASRock website http://www.asrock.com If you require technical support related to this motherboard, please visit our website for specific information about the model you are using. www.asrock.com/support/index.asp
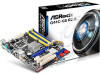
1.1 Package Contents
ASRock G41C-GS R2.0 Motherboard (Micro ATX Form Factor) ASRock G41C-GS R2.0 Quick Installation Guide ASRock G41C-GS R2.0 Support CD Two Serial ATA (SATA) Data Cables...
User Manual - Page 7
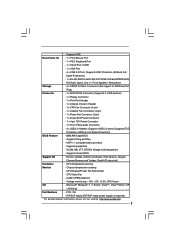
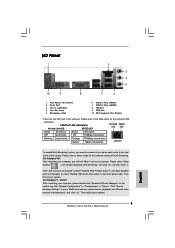
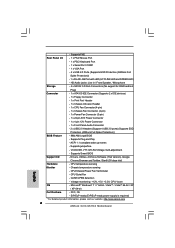
... x PS/2 Keyboard Port
- 1 x Serial Port: COM1
- 1 x VGA Port
- 4 x USB 2.0 Ports (Supports ESD Protection (ASRock Full
Spike Protection))
- 1 x RJ-45 LAN Port with LED (ACT/LINK LED and SPEED LED)
- HD Audio Jacks: Line in / Front Speaker / Microphone
Storage
- 4 x SATA2 3.0 Gb/s Connectors (No support for RAID and Hot
Plug)
Connector
- 1 x ATA100 IDE Connector (Supports 2 x IDE devices...
User Manual - Page 8
... memory module.
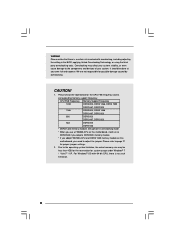
* If you adopt FSB1333-CPU and DDR3 1333 memory module on this
motherboard, you need to adjust the jumper. Please refer to page 21
for proper jumper settings.
2. Due to the operating system limitation, the actual memory size may be
less than 4GB for the reservation for system usage under Windows® 7
/ VistaTM / XP. For Windows...
User Manual - Page 9
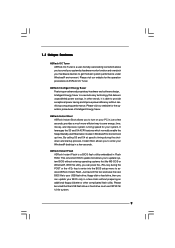
... Flash ROM. This convenient BIOS update tool allows you to update system BIOS without entering operating systems first like MS-DOS or WindowsR. With this utility, you can press the key during the POST or the key to enter into the BIOS setup menu to access ASRock Instant Flash. Just launch this tool and save the new BIOS file to your USB flash drive...
User Manual - Page 10
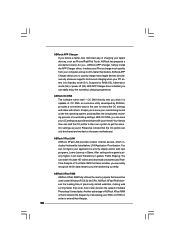
... to RAM (S3), hibernation mode (S4) or power off (S5). With APP Charger driver installed, you can easily enjoy the marvelous charging experience.
ASRock OC DNA The software name itself - OC DNA literally tells you what it is capable of. OC DNA, an exclusive utility developed by ASRock, provides a convenient way for the user to record the OC settings...
User Manual - Page 12
...
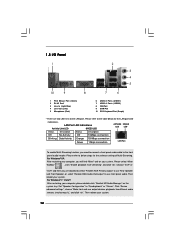
Blinking Data Activity
Orange 100Mbps connection Green 1Gbps connection
LAN Port
To enable Multi-Streaming function, you need to connect a front panel audio cable to the front
panel audio header. Please refer to below steps for the software setting of Multi-Streaming.
For Windows® XP:
After restarting your computer, you will find "Mixer" tool on your system. Please...
User Manual - Page 25
..., the drivers you install can work properly.
2.10 Untied Overclocking Technology
This motherboard supports Untied Overclocking Technology, which means during overclocking, FSB enjoys better margin due to fixed PCI / PCIE buses. Before you enable Untied Overclocking function, please enter "Overclock Mode" option of BIOS setup to set the selection from [Auto] to [Manual]. Therefore, CPU FSB is...
User Manual - Page 26
...
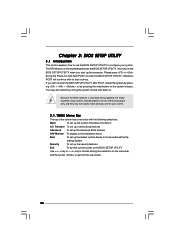
3.1 Introduction
This section explains how to use the BIOS SETUP UTILITY to configure your system. The SPI Memory on the motherboard stores the BIOS SETUP UTILITY. You may run the BIOS SETUP UTILITY when you start up the computer. Please press or during the Power-On-Self-Test (POST) to enter the BIOS SETUP UTILITY, otherwise, POST will continue with its test...
User Manual - Page 30
...] and [Disabled]. If you install Windows® XP and select [Auto], you need to set the "Power Schemes" as "Portable/Laptop" to enable this function. If you install Windows® VistaTM and want to enable this function, please set this item to [Enabled]. This item will be hidden if the current CPU does not support Intel (R) SpeedStep(tm) tech..
Please...
User Manual - Page 34
..., such as Microsoft® Windows® XP. Set to [Enabled] if using Microsoft® Windows® XP, or Linux kernel version 2.4.18 or higher. This option will be hidden if the installed CPU does not support Hyper-Threading technology.
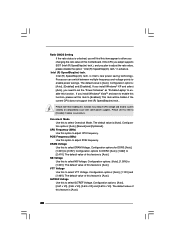
Intel (R) SpeedStep(tm) tech. Intel (R) SpeedStep(tm) tech. is Intel's new power saving technology. Processor can switch between multiple frequency...
User Manual - Page 39
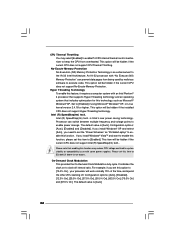
... item to [Enabled]. Besides the BIOS option, you can also choose our Intelligent Energy Saver utility to enable this function.
Primary Graphics Adapter This allows you to select [Onboard], [PCI] or [PCI Express] as the boot graphic adapter priority. The default value is [PCI].
Share Memory This allows you to set share memory feature. The default value is [Auto...
User Manual - Page 41
... to use this motherboard to submit Windows® VistaTM certification.
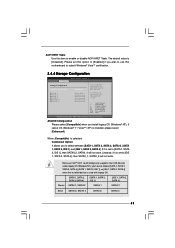
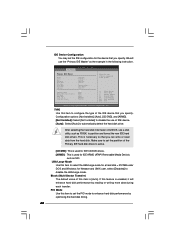
3.4.4 Storage Configuration
BIOS SETUP UTILITY Advanced
Storage Configuration
ATA/IDE Configuration
SATAII_1 SATAII_2 SATAII_3 SATAII_4 IDE1 Master IDE1 Slave
[Enhanced]
[Hard Disk] [Not Detected] [Not Detected] [Not Detected] [Not Detected] [Not Detected]
Set [Compatible] when Legacy OS (MS-DOS, Win NT) device is used...
User Manual - Page 42
... the example in the following instruction.
BIOS SETUP UTILITY Advanced
Primary IDE Master
Device Vendor Size LBA Mode Block Mode PIO Mode Async DMA Ultra DMA S.M.A.R.T.
Type LBA/Large Mode Block (Multi-Sector Transfer) PIO Mode DMA Mode S.M.A.R.T. 32Bit Data Transfer
:Hard Disk :ST340014A :40.0 GB :Supported :16Sectors :4 :MultiWord DMA-2 :Ultra DMA-5 :Supported
[Auto] [Auto] [Auto] [Auto...
User Manual - Page 51
...-ROM drive. The CD automatically displays the Main Menu if "AUTORUN" is enabled in your computer. If the Main Menu did not appear automatically, locate and double click on the file "ASRSETUP.EXE" from the BIN folder in the Support CD to display the menus. 4.2.2 Drivers Menu The Drivers Menu shows the available devices drivers if the system detects installed devices. Please install...
Quick Installation Guide - Page 3
.... For Windows® 7 / VistaTM: After restarting your computer, please double-click "Realtek HD Audio Manager" on the system tray. Set "Speaker Configuration" to "Quadraphonic" or "Stereo". Click "Device advanced settings", choose "Make front and rear output devices playbacks two different audio streams simultaneously", and click "ok". Then reboot your system.
3 ASRock G41C-GS R2.0 Motherboard
Quick Installation Guide - Page 4
... to this motherboard, please visit our website for specific information about the model you are using. www.asrock.com/support/index.asp
1.1 Package Contents
ASRock G41C-GS R2.0 Motherboard (Micro ATX Form Factor) ASRock G41C-GS R2.0 Quick Installation Guide ASRock G41C-GS R2.0 Support CD Two Serial ATA (SATA) Data Cables (Optional) One I/O Panel Shield
4 ASRock G41C-GS R2.0 Motherboard
English
Quick Installation Guide - Page 6
... x PS/2 Keyboard Port
- 1 x Serial Port: COM1
- 1 x VGA Port
- 4 x USB 2.0 Ports (Supports ESD Protection (ASRock Full
Spike Protection))
- 1 x RJ-45 LAN Port with LED (ACT/LINK LED and SPEED LED)
- HD Audio Jacks: Line in / Front Speaker / Microphone
Storage
- 4 x SATA2 3.0 Gb/s Connectors (No support for RAID and Hot
Plug)
Connector
- 1 x ATA100 IDE Connector (Supports 2 x IDE devices...
Quick Installation Guide - Page 12
... begin using the Support CD, insert the CD into your CDROM drive. It will display the Main Menu automatically if "AUTORUN" is enabled in your computer. If the Main Menu does not appear automatically, locate and doubleclick on the file "ASRSETUP.EXE" from the BIN folder in the Support CD to display the menus.
English
12 ASRock G41C-GS R2.0 Motherboard