ASRock J3455 Pro BTC driver and firmware
Related ASRock J3455 Pro BTC Manual Pages
Download the free PDF manual for ASRock J3455 Pro BTC and other ASRock manuals at ManualOwl.com
User Manual - Page 4
... Specifications
2
1.3 Motherboard Layout
5
1.4 I/O Panel
7
Chapter 2 Installation
8
2.1 Installing Memory Modules (SO-DIMM)
9
2.2 Expansion Slots (PCI Express Slots and Mining Ports)
11
2.3 Jumpers Setup
12
2.4 Onboard Headers and Connectors
13
2.5 Smart Switches
17
2.6 M.2_SSD (NGFF) Module Installation Guide
18
2.7 Installing the 4-pin PCIe Power Connectors
21
2.8 Special...
User Manual - Page 6
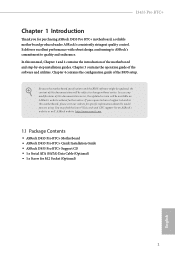
... are using. You may find the latest VGA cards and CPU support list on ASRock's website as well. ASRock website http://www.asrock.com.
1.1 Package Contents
• ASRock J3455 Pro BTC+ Motherboard • ASRock J3455 Pro BTC+ Quick Installation Guide • ASRock J3455 Pro BTC+ Support CD • 1 x Serial ATA (SATA) Data Cable (Optional) • 1 x Screw for M.2 Socket (Optional)
1
English
User Manual - Page 13
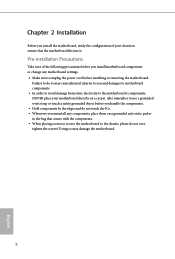
... the configuration of your chassis to ensure that the motherboard fits into it.
Pre-installation Precautions
Take note of the following precautions before you install motherboard components or change any motherboard settings. • Make sure to unplug the power cord before installing or removing the motherboard.
Failure to do so may cause physical injuries to you and damages to...
User Manual - Page 14
J3455 Pro BTC+
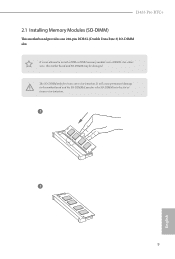
2.1 Installing Memory Modules (SO-DIMM)
This motherboard provides one 204-pin DDR3L (Double Data Rate 3) SO-DIMM slot.
It is not allowed to install a DDR or DDR2 memory module into a DDR3L slot; otherwise, this motherboard and SO-DIMM may be damaged. The SO-DIMM only fits in one correct orientation. It will cause permanent damage to the...
User Manual - Page 16
J3455 Pro BTC+
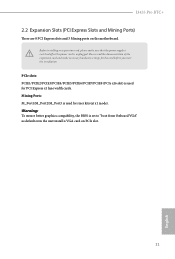
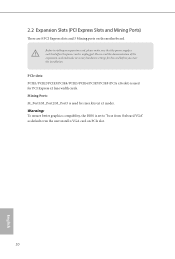
2.2 Expansion Slots (PCI Express Slots and Mining Ports)
There are 8 PCI Express slots and 3 Mining ports on the motherboard.
Before installing an expansion card, please make sure that the power supply is switched off or the power cord is unplugged. Please read the documentation of the expansion card and make necessary hardware settings for the card before you start the installation...
User Manual - Page 17
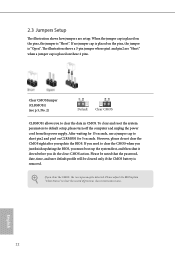
... reset the system parameters to default setup, please turn off the computer and unplug the power cord from the power supply. After waiting for 15 seconds, use a jumper cap to short pin2 and pin3 on CLRMOS1 for 5 seconds. However, please do not clear the CMOS right after you update the BIOS. If you need to clear...
User Manual - Page 23
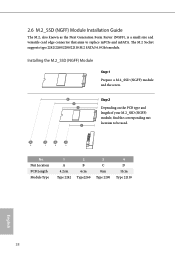
... M.2, also known as the Next Generation Form Factor (NGFF), is a small size and versatile card edge connector that aims to replace mPCIe and mSATA. The M.2 Socket supports type 2242/2260/2280/22110 M.2 SATA3 6.0 Gb/s module.
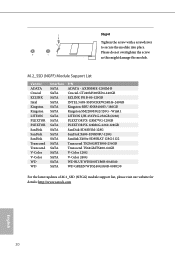
Installing the M.2_SSD (NGFF) Module
Step 1 Prepare a M.2_SSD (NGFF) module and the screw.
4 3 2
1
Step 2
Depending on the PCB...
User Manual - Page 25
...Module Support List
Vendor
ADATA Crucial EZLINK Intel Kingston Kingston LITEON PLEXTOR PLEXTOR SanDisk SanDisk SanDisk Transcend Transcend V-Color V-Color WD WD
Interface
SATA SATA SATA SATA SATA SATA SATA SATA SATA SATA SATA SATA SATA SATA SATA SATA SATA SATA
...For the latest updates of M.2_SSD (NFGG) module support list, please visit our website for details: http://www.asrock.com
English
20
User Manual - Page 26
J3455 Pro BTC+
2.7 Installing the 4-pin PCIe Power Connectors
The extra 4-pin PCIe power connectors on this motherboard offer more power for your graphics cards. They provide stable voltages and greatly reduce the risks of burning your motherboard or graphics cards. When the graphics cards are installed, be sure to install the PSU's 4-pin power cables to the corresponding 4-pin PCIe power ...
User Manual - Page 27
2.8 Special Features 2.8.1 Smart PCIe State Detection
This motherboard has included a smart way to show the status of every graphics card. While the system is booting, the Power-On, Self-Test (POST) screen will show the status of the graphics cards that were installed on the motherboard.
22
English
User Manual - Page 29
Chapter 3 Software and Utilities Operation
3.1 Installing Drivers
The Support CD that comes with the motherboard contains necessary drivers and useful utilities that enhance the motherboard's features.
Running The Support CD
To begin using the support CD, insert the CD into your CD-ROM drive. The CD automatically displays the Main Menu if "AUTORUN" is enabled in your computer. If the Main Menu ...
User Manual - Page 30
J3455 Pro BTC+
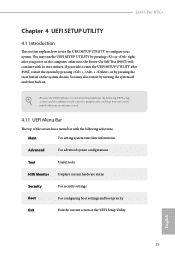
Chapter 4 UEFI SETUP UTILITY
4.1 Introduction
This section explains how to use the UEFI SETUP UTILITY to configure your system. You may run the UEFI SETUP UTILITY by pressing or right after you power on the computer, otherwise, the Power-On-Self-Test (POST) will continue with its test routines. If you wish to enter the UEFI SETUP UTILITY...
User Manual - Page 42
...
J3455 Pro BTC+
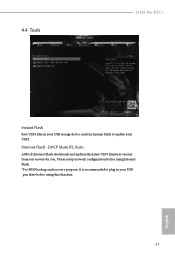
Instant Flash
Save UEFI files in your USB storage device and run Instant Flash to update your UEFI.
Internet Flash - DHCP (Auto IP), Auto
ASRock Internet Flash downloads and updates the latest UEFI firmware version from our servers for you. Please setup network configuration before using Internet Flash. *For BIOS backup and recovery purpose, it is recommended to plug in your USB...
User Manual - Page 43
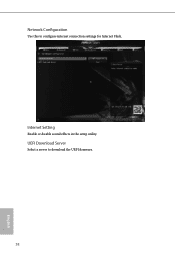
Network Configuration
Use this to configure internet connection settings for Internet Flash.
Internet Setting
Enable or disable sound effects in the setup utility.
UEFI Download Server
Select a server to download the UEFI firmware.
38
English
User Manual - Page 45
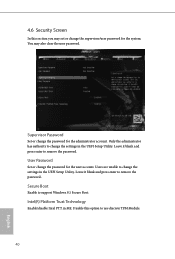
.... Leave it blank and press enter to remove the password.
User Password
Set or change the password for the user account. Users are unable to change the settings in the UEFI Setup Utility. Leave it blank and press enter to remove the password.
Secure Boot
Enable to support Windows 8.1 Secure Boot.
Intel(R) Platform Trust Technology
Enable/disable Intel PTT...
Quick Installation Guide - Page 6
... are using. You may find the latest VGA cards and CPU support list on ASRock's website as well. ASRock website http://www.asrock.com.
1.1 Package Contents
• ASRock J3455 Pro BTC+ Motherboard • ASRock J3455 Pro BTC+ Quick Installation Guide • ASRock J3455 Pro BTC+ Support CD • 1 x Serial ATA (SATA) Data Cable (Optional) • 1 x Screw for M.2 Socket (Optional)
4
English
Quick Installation Guide - Page 10
... the configuration of your chassis to ensure that the motherboard fits into it.
Pre-installation Precautions
Take note of the following precautions before you install motherboard components or change any motherboard settings. • Make sure to unplug the power cord before installing or removing the motherboard.
Failure to do so may cause physical injuries to you and damages to...
Quick Installation Guide - Page 11
J3455 Pro BTC+
2.1 Installing Memory Modules (SO-DIMM)
This motherboard provides one 204-pin DDR3L (Double Data Rate 3) SO-DIMM slot.
It is not allowed to install a DDR or DDR2 memory module into a DDR3L slot; otherwise, this motherboard and SO-DIMM may be damaged. The SO-DIMM only fits in one correct orientation. It will cause permanent damage to the...
Quick Installation Guide - Page 12
... the installation.
PCIe slots: PCIE1/PCIE2/PCIE3/PCIE4/PCIE5/PCIE6/PCIE7/PCIE8 (PCIe x16 slot) is used for PCI Express x1 lane width cards. Mining Ports: M_Port1/M_Port2/M_Port3 is used for riser kits (at x1 mode). Warning: To ensure better graphics compability, the BIOS is set to "boot from Onboard VGA" as default even the user install a VGA card on PCIe slot...
Quick Installation Guide - Page 13
J3455 Pro BTC+
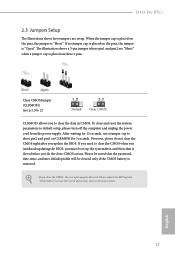
2.3 Jumpers Setup
The illustration shows how jumpers are setup. When the jumper cap is placed on the pins, the jumper is "Short". If ...setup, please turn off the computer and unplug the power cord from the power supply. After waiting for 15 seconds, use a jumper cap to short pin2 and pin3 on CLRMOS1 for 5 seconds. However, please do not clear the CMOS right after you update the BIOS....