ASRock Z790 Riptide WiFi driver and firmware
Drivers and firmware downloads for this ASRock item

Related ASRock Z790 Riptide WiFi Manual Pages
Download the free PDF manual for ASRock Z790 Riptide WiFi and other ASRock manuals at ManualOwl.com
User Manual - Page 3
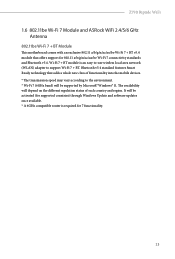
... and ASRock WiFi 2.4/5/6 GHz
Antenna
13
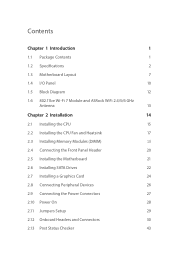
Chapter 2 Installation
14
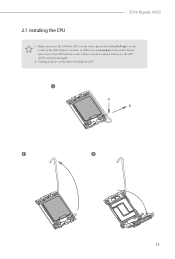
2.1 Installing the CPU
15
2.2 Installing the CPU Fan and Heatsink
17
2.3 Installing Memory Modules (DIMM)
18
2.4 Connecting the Front Panel Header
20
2.5 Installing the Motherboard
21
2.6 Installing SATA Drives
22
2.7 Installing a Graphics Card
24
2.8 Connecting Peripheral Devices
26
2.9 Connecting the Power...
User Manual - Page 4

2.14 M.2 SSD Card Installation Guide (M2_GEN5)
44
2.15 M.2 SSD Card Installation Guide (M2_1 and M2_2)
47
2.16 M.2 SSD Card Installation Guide (M2_3 and M2_4)
50
2.17 Change Screen Brightness for eDP in Windows®
53
User Manual - Page 5
... you are using. You may find the latest VGA cards and CPU support list on ASRock's website as well. ASRock website http://www.asrock.com.
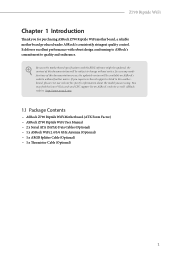
1.1 Package Contents
• ASRock Z790 Riptide WiFi Motherboard (ATX Form Factor) • ASRock Z790 Riptide WiFi User Manual • 2 x Serial ATA (SATA) Data Cables (Optional) • 1 x ASRock WiFi 2.4/5/6 GHz Antenna (Optional) • 1 x ARGB Splitter...
User Manual - Page 7
Z790 Riptide WiFi
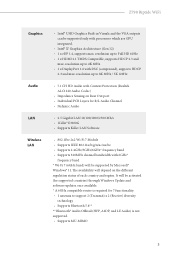
Graphics
Audio LAN Wireless LAN
• Intel® UHD Graphics Built-in Visuals and the VGA outputs can be supported only with processors which are GPU integrated.
• Intel® Xe Graphics Architecture (Gen 12) • 1 x eDP 1.4, supports max. resolution up to Full HD 60Hz • 1 x HDMI 2.1 TMDS Compatible, supports HDCP 2.3 and
max. resolution up to 4K 60Hz &#...
User Manual - Page 10
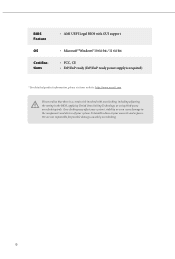
... Legal BIOS with GUI support
• Microsoft® Windows® 10 64-bit / 11 64-bit • FCC, CE • ErP/EuP ready (ErP/EuP ready power supply is required)
* For detailed product information, please visit our website: http://www.asrock.com
Please realize that there is a certain risk involved with overclocking, including adjusting the setting...
User Manual - Page 17
... ASRock WiFi 2.4/5/6 GHz Antenna
802.11be Wi-Fi 7 + BT Module
This motherboard comes with an exclusive 802.11 a/b/g/n/ac/ax/be Wi-Fi 7 + BT v5.4 module that offers support for 802.11 a/b/g/n/ac/ax/be Wi-Fi 7 connectivity standards and Bluetooth v5.4. Wi-Fi 7 + BT module is an easy-to-use wireless local area network (WLAN) adapter...
User Manual - Page 18

..., study the configuration of your chassis to ensure that the motherboard fits into it.
Pre-installation Precautions
Take note of the following precautions before you install motherboard components or change any motherboard settings. • Make sure to unplug the power cord before installing or removing the motherboard
components. Failure to do so may cause physical injuries and damages...
User Manual - Page 19
Z790 Riptide WiFi
2.1 Installing the CPU
1. Before you insert the 1700-Pin CPU into the socket, please check if the PnP cap is on the socket, if the CPU surface is unclean, or if there are any bent pins in the socket. Do not force to insert the CPU into the socket if above situation is found. Otherwise, the...
User Manual - Page 21

2.2 Installing the CPU Fan and Heatsink
Z790 Riptide WiFi
1
2
CPU_FAN
17
User Manual - Page 22
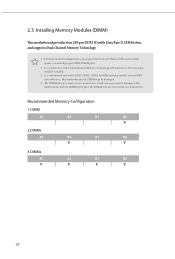
2.3 Installing Memory Modules (DIMM)
This motherboard provides four 288-pin DDR5 (Double Data Rate 5) DIMM slots, and supports Dual Channel Memory Technology.
1. For dual channel configuration, you always need to install identical (the same brand, speed, size and chip-type) DDR5 DIMM pairs.
2. It is unable to activate Dual Channel Memory Technology with only one or three memory module...
User Manual - Page 25

2.5 Installing the Motherboard
Z790 Riptide WiFi
21
User Manual - Page 26
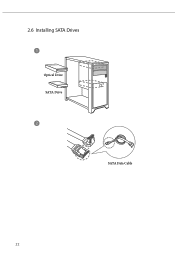
2.6 Installing SATA Drives
1
Optical Drive SATA Drive
2
SATA Data Cable
22
User Manual - Page 28
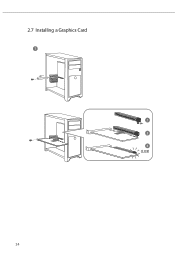
2.7 Installing a Graphics Card
1
CLICK!
24
User Manual - Page 29
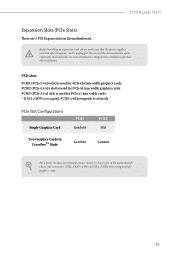
Z790 Riptide WiFi
Expansion Slots (PCIe Slots)
There are 3 PCI Express slots on the motherboard.
Before installing an expansion card, please make sure that the power supply is switched off or the power cord is unplugged. Please read the documentation of the expansion card and make necessary hardware settings for the card before you start the installation.
PCIe slots:
PCIE1 (PCIe 5.0 x16 slot) is...
User Manual - Page 33
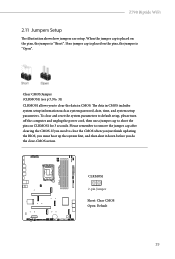
Z790 Riptide WiFi
2.11 Jumpers Setup
The illustration shows how jumpers are setup. When the jumper cap is placed on the pins, the jumper ...setup, please turn off the computer and unplug the power cord, then use a jumper cap to short the pins on CLRMOS1 for 3 seconds. Please remember to remove the jumper cap after clearing the CMOS. If you need to clear the CMOS when you just finish updating the BIOS...
User Manual - Page 60
... file or other text or file.
(e) Intel has no obligation to provide any support, technical assistance or updates for the Software.
OWNERSHIP OF SOFTWARE AND COPYRIGHTS. Title to all copies of the Software remains with Intel or its licensors or suppliers. The Software is copyrighted and protected by the laws of the United States and other countries...
RAID Installation Guide - Page 1
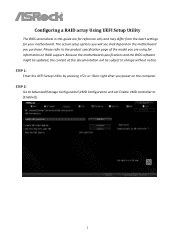
... are using for information on RAID support. Because the motherboard specifications and the BIOS software might be updated, the content of this documentation will be subject to change without notice. STEP 1: Enter the UEFI Setup Utility by pressing or right after you power on the computer. STEP 2: Go to Advanced\Storage Configuration\VMD Configuration and set Enable VMD controller to [Enabled].
1
RAID Installation Guide - Page 7

Installing Windows® on a RAID volume
After the UEFI and RAID BIOS setup, please follow the steps below. STEP 1
Please download the drivers from ASRock's website (https://www.asrock.com/index.asp) and unzip the files to a USB flash drive.
STEP 2 Press at system POST to launch the boot menu and choose the item "UEFI: " to install Windows® 10 64-bit OS.
7
RAID Installation Guide - Page 8
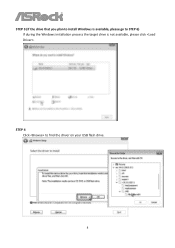
STEP 3 (If the drive that you plan to install Windows is available, please go to STEP 6) If during the Windows installation process the target drive is not available, please click .
STEP 4 Click to find the driver on your USB flash drive.
8
RAID Installation Guide - Page 10
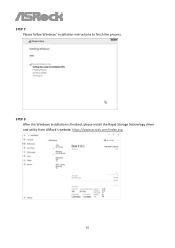
STEP 7 Please follow Windows' installation instructions to finish the process.
STEP 8 After the Windows installation is finished, please install the Rapid Storage Technology driver and utility from ASRock's website. https://www.asrock.com/index.asp
10