Acer Aspire 4752Z driver and firmware
Drivers and firmware downloads for this Acer Computers item
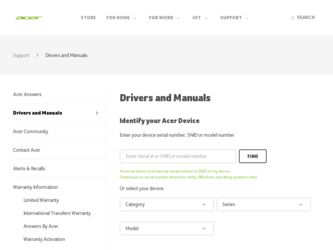
Related Acer Aspire 4752Z Manual Pages
Download the free PDF manual for Acer Aspire 4752Z and other Acer manuals at ManualOwl.com
Aspire 4352, 4752, 4752G, 4752Z Service Guide - Page 2
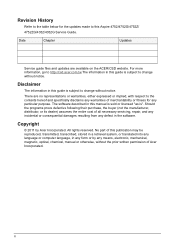
Revision History
Refer to the table below for the updates made to this Aspire 4752/4752G/4752Z/ 4752ZG/4352/4352G Service Guide.
Date
Chapter
Updates
Service guide files and updates are available on the ACER/CSD website. For more information, go to http://csd.acer.com.tw.The information in this guide is subject to change without notice.
Disclaimer
The information in this...
Aspire 4352, 4752, 4752G, 4752Z Service Guide - Page 5
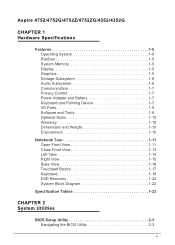
Aspire 4752/4752G/4752Z/4752ZG/4352/4352G
CHAPTER 1 Hardware Specifications
Features 1-5 Operating System 1-5 Platform 1-5 System Memory 1-5 Display 1-5 Graphics 1-5 Storage Subsystem 1-6 Audio Subsystem 1-6 Communication 1-7 Privacy Control 1-7 Power Adapter and Battery 1-7 Keyboard and Pointing Device 1-7 I/O Ports 1-8 Software and Tools 1-8 Optional Items 1-10 Warranty 1-10 ...
Aspire 4352, 4752, 4752G, 4752Z Service Guide - Page 9
CHAPTER 6 FRU List
Aspire 4752/4752G/4752Z/4752ZG/4352/4352G Exploded Diagrams 6-4
Main Assembly 6-4 LCD Assembly 6-6 FRU List 6-7
CHAPTER 7 Test Compatible Components
Microsoft Windows 7 Environment Test 7-4
ix
Aspire 4352, 4752, 4752G, 4752Z Service Guide - Page 12
...14 Right View 1-15 Base View 1-16 Touchpad Basics 1-17 Keyboard 1-18 D2D Recovery 1-22 System Block Diagram 1-22
Specification Tables 1-23 Computer Specifications 1-23 Processor 1-24 Processor Specifications 1-25 System Memory 1-25 Graphics Controller 1-27 VRAM (Discrete models only 1-27 System BIOS 1-28 Keyboard 1-28 Hard Disk Drive 1-29 Super-Multi Drive 1-30 BD Drive 1-30
1-2
Aspire 4352, 4752, 4752G, 4752Z Service Guide - Page 15
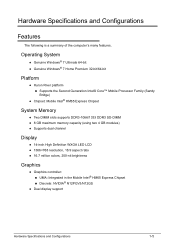
... Mobile Processor Family (Sandy Bridge) Chipset: Mobile Intel® HM65 Express Chipset
System Memory 0 Two DIMM slots supports DDR3-1066/1333 DDR3 SO-DIMM 8 GB maximum memory capacity (using two 4 GB modules) Supports dual channel
Display 0 14-inch High Definition WXGA LED LCD 1366×768 resolution...
Aspire 4352, 4752, 4752G, 4752Z Service Guide - Page 17
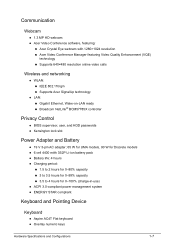
... calls
Wireless and networking 0 WLAN: IEEE 802.11b/g/n Supports Acer SignalUp technology LAN: Gigabit Ethernet, Wake-on-LAN ready Broadcom NetLink® BCM57785X controller
Privacy Control 0 BIOS supervisor, user, and HDD passwords Kensington lock slot
Power Adapter and...
Aspire 4352, 4752, 4752G, 4752Z Service Guide - Page 18
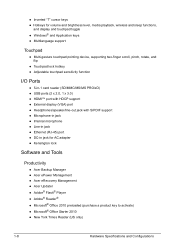
... touchpad pointing device, supporting two-finger scroll, pinch, rotate, and flip
Touchpad lock hotkey Adjustable touchpad sensitivity function
I/O Ports 0
5-in-1 card reader (SD/MMC/MS/MS PRO/xD) USB ports (2 x 2.0, 1 x 3.0) HDMI™ port with HDCP support External display (VGA) port ...
Aspire 4352, 4752, 4752G, 4752Z Service Guide - Page 19
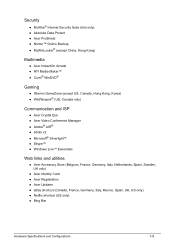
...® Silverlight™ Skype™ Windows Live™ Essentials
Web links and utilities 0 Acer Accessory Store (Belgium, France, Germany, Italy, Netherlands, Spain, Sweden, UK only) Acer Identity Card Acer Registration Acer Updater eBay shortcut (Canada, France, Germany, Italy...
Aspire 4352, 4752, 4752G, 4752Z Service Guide - Page 28
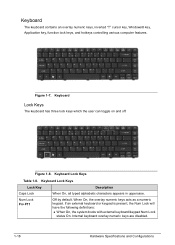
Keyboard 0
The keyboard contains an overlay numeric keys, inverted "T" cursor key, Windows® key, Application key, function lock keys, and hotkeys controlling various computer features.
Figure 1-7. Keyboard
Lock Keys 0
The keyboard has three lock keys which the user can toggle on and off.
Figure 1-8. Keyboard Lock Keys
Table 1-8. Keyboard ...
Aspire 4352, 4752, 4752G, 4752Z Service Guide - Page 29

... menu +R: Open the Run dialog box +M: Minimizes all windows Shift+ +M: Restore minimized windows to the desktop +F1: Show the Help window + E: Open Windows Explorer +F: Search for a file or folder + D: Display the desktop Ctrl+ +F: Search for computers (if you are on a network)
Hardware Specifications and Configurations
1-19
Aspire 4352, 4752, 4752G, 4752Z Service Guide - Page 30

... box
Functions supported by Windows XP: +Break: Display the System Properties dialog box +U: Open the Ease of Access Center window
Application This key has the same effect as clicking the right mouse button; it opens
key
the application's context menu.
Hotkeys 0
The computer uses hotkeys or key combinations to access most computer controls. To activate...
Aspire 4352, 4752, 4752G, 4752Z Service Guide - Page 54
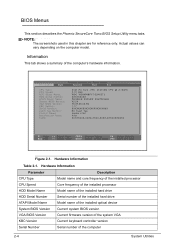
... KBC Version Serial Number
Description Model name and core frequency of the installed processor Core frequency of the installed processor Model name of the installed hard drive Serial number of the installed hard drive Model name of the installed optical device Current system BIOS version Current firmware version of the system VGA Current keyboard controller version Serial number of the computer...
Aspire 4352, 4752, 4752G, 4752Z Service Guide - Page 62
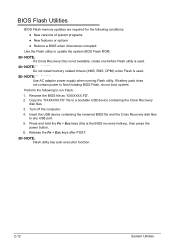
... does not contain power to finish loading BIOS Flash, do not boot system.
Perform the following to run Flash.
1. Rename the BIOS file as "XXXXXXX.FD". 2. Copy the "XXXXXXX.FD" file to a bootable USB device containing the Crisis Recovery
disk files. 3. Turn off the computer. 4. Insert the USB device containing the renamed BIOS file and the Crisis Recovery disk files
to any USB port. 5. Press and...
Aspire 4352, 4752, 4752G, 4752Z Service Guide - Page 158
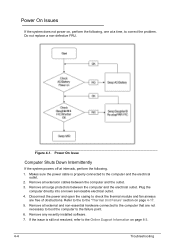
..., perform the following. 1. Makes sure the power cable is properly connected to the computer and the electrical
outlet. 2. Remove all extension cables between the computer and the outlet. 3. Remove all surge protectors between the computer and the electrical outlet. Plug the
computer directly into a known serviceable electrical outlet. 4. Disconnect the power and open the casing to check the...
Aspire 4352, 4752, 4752G, 4752Z Service Guide - Page 160
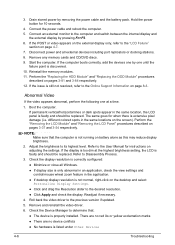
... Personalize Display Settings.
Click and drag the Resolution slider to the desired resolution.
Click Apply and check the display. Readjust if necessary.
4. Roll back the video driver to the previous version if updated.
5. Remove and reinstall the video driver.
6. Check the Device Manager to determine that:
The device is properly installed. There...
Aspire 4352, 4752, 4752G, 4752Z Service Guide - Page 164
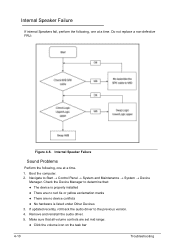
...: The device is properly installed There are no red Xs or yellow exclamation marks There are no device conflicts No hardware is listed under Other Devices 3. If updated recently, roll back the audio driver to the previous version. 4. Remove and reinstall the audio driver. 5. Make sure that all volume controls are set mid range...
Aspire 4352, 4752, 4752G, 4752Z Service Guide - Page 165
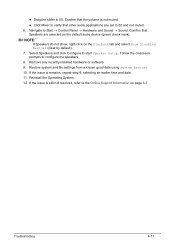
... default audio device (green check mark).
NOTE: NOTE:
If Speakers do not show, right-click on the Playback tab and select Show Disabled Devices (clear by default). 7. Select Speakers and click Configure to start Speaker Setup. Follow the on-screen prompts to configure the speakers. 8. Remove any recently installed hardware or software. 9. Restore system and file settings...
Aspire 4352, 4752, 4752G, 4752Z Service Guide - Page 173
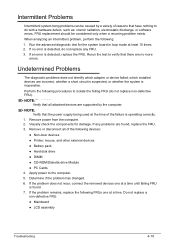
... the FRU. 3. Remove or disconnect all of the following devices:
Non-Acer devices Printer, mouse, and other external devices Battery pack Hard disk drive DIMM CD-ROM/Diskette drive Module PC Cards 4. Apply power to the computer. 5. Determine if the problem has changed. 6. If the problem...
Aspire 4352, 4752, 4752G, 4752Z Service Guide - Page 194
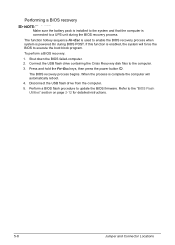
... disk files to the computer.
3. Press and hold the Fn+Esc keys, then press the power button .
The BIOS recovery process begins. When the process is complete the computer will automatically reboot.
4. Disconnect the USB flash drive from the computer.
5. Perform a BIOS flash procedure to update the BIOS firmware. Refer to the "BIOS Flash Utilities" section on page 2-12 for detailed instructions...
Aspire 4352, 4752, 4752G, 4752Z Service Guide - Page 223
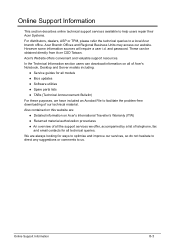
.... These can be obtained directly from Acer CSD Taiwan.
Acer's Website offers convenient and valuable support resources.
In the Technical Information section users can download information on all of Acer's Notebook, Desktop and Server models including:
Service guides for all models
Bios updates
Software utilities
Spare parts lists...