Acer Aspire 5540 driver and firmware
Drivers and firmware downloads for this Acer Computers item

Related Acer Aspire 5540 Manual Pages
Download the free PDF manual for Acer Aspire 5540 and other Acer manuals at ManualOwl.com
User Manual - Page 3
... device
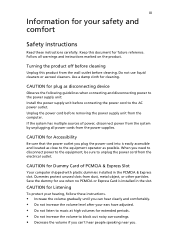
Observe the following guidelines when connecting and disconnecting power to the power supply unit: Install the power supply unit before connecting the power cord to the AC power outlet. Unplug the power cord before removing the power supply unit from the computer. If the system has multiple sources of power, disconnect power from the system by unplugging all power cords from the power...
User Manual - Page 10
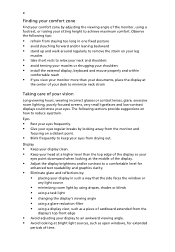
...• avoid tensing your muscles or shrugging your shoulders • install the external display, keyboard and mouse properly and within
comfortable reach
• if you view your ...graphics clarity.
• Eliminate glare and reflections by: • placing your display in such a way that the side faces the window or
any light source
• minimizing room light by using drapes, shades ...
User Manual - Page 17

...71
Fax/data modem
71
Built-in network feature
72
Fast Infrared (FIR) (for selected models)
72
Universal Serial Bus (USB)
73
IEEE 1394 port (for selected models)
73
PC Card slot
74
ExpressCard (for selected models)
75
Installing memory
76
BIOS utility
77
Boot sequence
77
Enable disk-to-disk recovery
77
Password
77
Using software
78
Playing DVD movies
78
Power management...
User Manual - Page 31
Empowering Technology
13
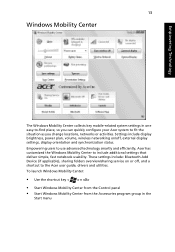
Windows Mobility Center
The Windows Mobility Center collects key mobile-related system settings in one easy-to-find place, so you can quickly configure your Acer system to fit the situation as you change locations, networks or activities. Settings include display brightness, power plan, volume, wireless networking on/off, external display settings, display orientation and...
User Manual - Page 39
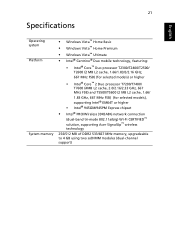
... MHz FSB) (for selected models), supporting Intel® EM64T or higher
• Intel® 945GM/945PM Express chipset
• Intel® PRO/Wireless 3945ABG network connection
(dual-band tri-mode 802.11a/b/g) Wi-Fi CERTIFIED™ solution, supporting Acer SignalUp™ wireless technology 256/512 MB of DDR2 533/667 MHz memory, upgradeable to 4 GB using two soDIMM modules...
User Manual - Page 64

... the tray. (If your computer's optical drive is a slot-load model, it will not have an eject hole.)
The keyboard does not respond.
Try attaching an external keyboard to a USB port on the computer. If it works, contact your dealer or an authorized service center as the internal keyboard cable may be loose.
The infrared port does not work.
Check...
User Manual - Page 65
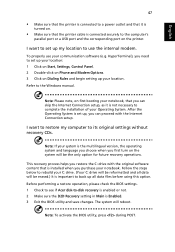
... software (e.g. HyperTerminal), you need to set up your location: 1 Click on Start, Settings, Control Panel. 2 Double-click on Phone and Modem Options. 3 Click on Dialing Rules and begin setting up your location. Refer to the Windows manual.
Note: Please note, on first booting your notebook, that you can skip the Internet Connection setup, as it is not necessary to complete the installation...
User Manual - Page 69
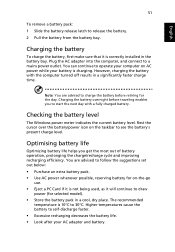
...sure that it is correctly installed in the battery bay. Plug the AC adapter into the computer, and connect to a mains power outlet. You can continue to operate your computer on AC power while your battery is ...to follow the suggestions set out below: • Purchase an extra battery pack. • Use AC power whenever possible, reserving battery for on-the-go
use. • Eject a PC Card if it is ...
User Manual - Page 96
English
78
Using software
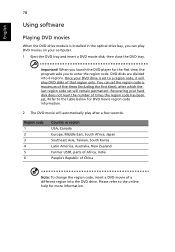
Playing DVD movies
When the DVD drive module is installed in the optical drive bay, you can play DVD movies on your computer. 1 Eject the DVD tray and insert a DVD movie disk; then close the DVD tray.
Important! When you launch the DVD player for the first time, the program asks you to enter the...
User Manual - Page 98
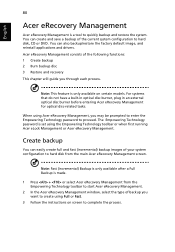
... save a backup of the current system configuration to hard disk, CD or DVD. You can also backup/restore the factory default image, and reinstall applications and drivers. Acer eRecovery Management consists of the following functions: 1 Create backup 2 Burn backup disc 3 Restore and recovery This chapter will guide you through each process.
Note: This feature is...
User Manual - Page 99
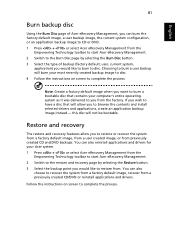
... toolbar to start Acer eRecovery Management. 2 Switch to the restore and recovery page by selecting the Restore button. 3 Select the backup point you would like to restore from. You can also
choose to recover the system from a factory default image, recover from a previously created CD/DVD or reinstall applications and drivers.
Follow the instructions on screen...
User Manual - Page 115
... 49 charging 51 checking charge level 51 installing 50 low conditions 52 maximizing life 49 optimizing 51 removing 51 using the first time 49
BIOS utility 77 brightness
hotkeys 36
C
caps lock 33 on indicator 27
care AC adapter xiii battery pack xiv computer xiii
CD-ROM ejecting manually 46 troubleshooting 46
charging checking level 51...
User Manual - Page 116
...
on indicator 27 memory
installing 76 messages
error 83 modem 71
N
network 72 Notebook Manager
hotkey 35 num lock 33
on indicator 27 numeric keypad
embedded 33
P
password 69 types 69
PC Card 74 ejecting 74 inserting 74
ports 71 printer
troubleshooting 46 problems 45
CD-ROM 46 display 45 keyboard 46 printer 46 startup 45 troubleshooting 83
Q
questions setting location for modem use 47...
Service Guide - Page 45
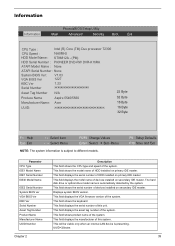
... on primary IDE master. This field displays the mofel name of devices installed on secondary IDE master. The hard disk drive or optical drive model name is automatically detected by the system. This field shows the serial number of devices installed on secondary IDE master. Displays system BIOS version. This field displays the VGA firmware version of the system. This field shows the keyboard...
Service Guide - Page 54
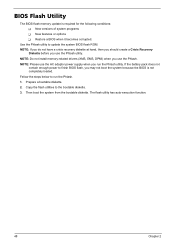
... conditions: T New versions of system programs T New features or options T Restore a BIOS when it becomes corrupted.
Use the Phlash utility to update the system BIOS flash ROM. NOTE: If you do not have a crisis recovery diskette at hand, then you should create a Crisis Recovery
Diskette before you use the Phlash utility. NOTE: Do not install memory-related drivers (XMS, EMS, DPMI...
Service Guide - Page 76
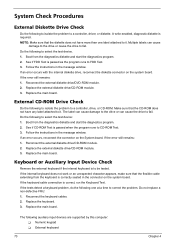
... instructions in the message window. If an error occurs with the internal diskette drive, reconnect the diskette connector on the system board. If the error still remains: 1. Reconnect the external diskette drive/DVD-ROM module. 2. Replace the external diskette drive/CD-ROM module. 3. Replace the main board.
External CD-ROM Drive Check
Do the following to isolate the problem to a controller, drive...
Service Guide - Page 77
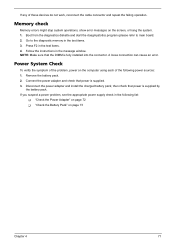
... to main board. 2. Go to the diagnostic memory in the test items. 3. Press F2 in the test items. 4. Follow the instructions in the message window. NOTE: Make sure that the DIMM is fully installed into the connector. A loose connection can cause an error.
Power System Check
To verify the symptom of the problem, power on the computer using each...
Service Guide - Page 79
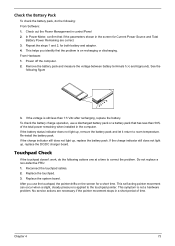
... Software: 1. Check out the Power Management in control Panel 2. In Power Meter, confirm that if the parameters shown in the screen for Current Power Source and Total
Battery Power Remaining are correct. 3. Repeat the steps 1 and 2, for both battery and adapter. 4. This helps you identify first the problem is on recharging or discharging. From Hardware: 1. Power off the computer...
Service Guide - Page 89
...size.
Action in Sequence
Enter BIOS Setup Utility to execute "Load Default Settings, then reboot system. DIMM System board
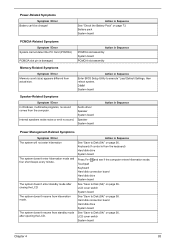
Speaker-Related Symptoms
Symptom / Error In Windows, multimedia programs, no sound comes from the computer.
Internal speakers make noise or emit no sound.
Audio driver Speaker System board
Speaker System board
Action in Sequence
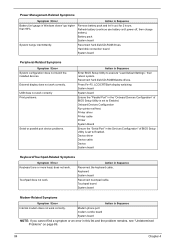
Power Management-Related Symptoms
Symptom...
Service Guide - Page 90
...
Reconnect hard disk/CD-ROM drives. Hard disk connection board System board
Peripheral-Related Symptoms
Symptom / Error System configuration does not match the installed devices. External display does not work correctly. USB does not work correctly Print problems.
Serial or parallel port device problems.
Action in Sequence
Enter BIOS Setup Utility to execute "Load Default Settings", then reboot...