Asus H81-M2 driver and firmware

Related Asus H81-M2 Manual Pages
Download the free PDF manual for Asus H81-M2 and other Asus manuals at ManualOwl.com
H81-M2 User's Manual - Page 2
.... Copies of these licenses are included in this product. Where the applicable license entitles you to the source code of such software and/or other additional data, you may obtain it for a period of three years after our last shipment of the product, either (1) for free by downloading it from http://support.asus.com/download or...
H81-M2 User's Manual - Page 3
...
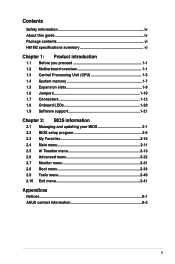
Chapter 1: Product introduction
1.1 Before you proceed 1-1 1.2 Motherboard overview 1-1 1.3 Central Processing Unit (CPU 1-3 1.4 System memory 1-7 1.5 Expansion slots 1-9 1.6 Jumpers 1-10 1.7 Connectors 1-12 1.8 Onboard LEDs 1-20 1.9 Software support 1-21
Chapter 2: BIOS information
2.1 Managing and updating your BIOS 2-1 2.2 BIOS setup program 2-6 2.3 My Favorites 2-10 2.4 Main menu...
H81-M2 User's Manual - Page 5
... updates.
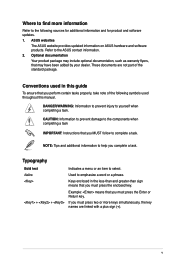
1. ASUS websites
The ASUS website provides updated information on ASUS hardware and software products. Refer to the ASUS contact information.
2. Optional documentation
Your product package may include optional documentation, such as warranty flyers, that may have been added by your dealer. These documents are not part of the standard package.
Conventions used in this guide
To ensure...
H81-M2 User's Manual - Page 8
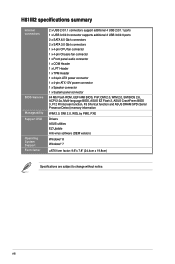
... connector 64 Mb Flash ROM, UEFI AMI BIOS, PnP, DMI 2.0, WfM 2.0, SM BIOS 2.6, ACPI 2.0a, Multi-language BIOS, ASUS EZ Flash 2, ASUS CrashFreen BIOS 3, F12 Printscreen function, F3 Shortcut function and ASUS DRAM SPD (Serial Presence Detect) memory information
WfM 2.0, DMI 2.0, WOL by PME, PXE
Drivers ASUS utilities EZ Update Anti-virus software (OEM version)
Windows® 8 Windows® 7
uATX...
H81-M2 User's Manual - Page 15
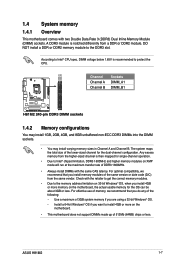
... compatibility, we recommend that you install memory modules of the same version or date code (D/C) from the same vendor. Check with the retailer to get the correct memory modules.
• Due to the memory address limitation on 32-bit Windows® OS, when you install 4GB or more memory on the motherboard, the actual usable memory for the OS can be...
H81-M2 User's Manual - Page 17
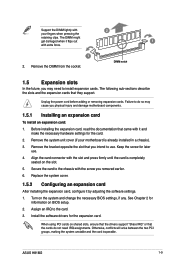
...BIOS settings, if any. See Chapter 2 for information on BIOS setup.
2. Assign an IRQ to the card.
3. Install the software drivers for the expansion card.
When using PCI cards on shared slots, ensure that the drivers support "Share IRQ" or that the cards do not need IRQ assignments. Otherwise, conflicts will arise between the two PCI groups, making the system unstable and the card inoperable.
ASUS...
H81-M2 User's Manual - Page 21
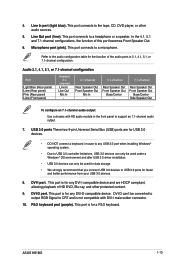
... to support an 7.1-channel audio output.
7. USB 3.0 ports These two 9-pin Universal Serial Bus (USB) ports are for USB 3.0 devices.
• DO NOT connect a keyboard / mouse to any USB 3.0 port when installing Windows® operating system.
• Due to USB 3.0 controller limitations, USB 3.0 devices can only be used under a Windows® OS environment and after USB 3.0 driver installation...
H81-M2 User's Manual - Page 23
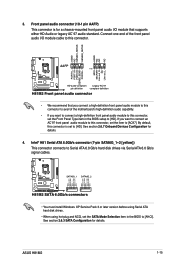
... RSATA_RXN1 GND RSATA_TXN1 RSATA_TXP1 GND GND RSATA_RXP2 RSATA_RXN2 GND RSATA_TXN2 RSATA_TXP2 GND
H81M2 SATA 6.0Gb/s connectors
• You must install Windows. XP Service Pack 3 or later version before using Serial ATA hard disk drives.
• When using hot-plug and NCQ, set the SATA Mode Selection item in the BIOS to [AHCI]. See section 2.6.3 SATA Configuration for details.
ASUS H81M2
1-15
H81-M2 User's Manual - Page 24
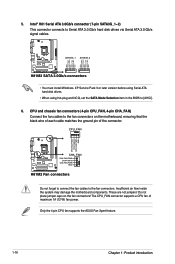
... RSATA_TXN1 RSATA_TXP1 GND GND RSATA_RXP2 RSATA_RXN2 GND RSATA_TXN2 RSATA_TXP2 GND
H81M2 SATA 3.0Gb/s connectors
• You must install Windows. XP Service Pack 3 or later version before using Serial ATA hard disk drives.
• When using hot-plug and NCQ, set the SATA Mode Selection item in the BIOS to [AHCI].
6. CPU and chassis fan connectors (4-pin CPU_FAN, 4-pin CHA_FAN) Connect the fan...
H81-M2 User's Manual - Page 29
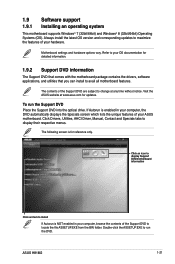
... the drivers, software applications, and utilities that you can install to avail all motherboard features.
The contents of the Support DVD are subject to change at any time without notice. Visit the ASUS website at www.asus.com for updates.
To run the Support DVD Place the Support DVD into the optical drive. If Autorun is enabled in your computer, the DVD automatically displays...
H81-M2 User's Manual - Page 30
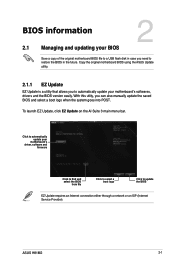
... your BIOS
2
Save a copy of the original motherboard BIOS file to a USB flash disk in case you need to restore the BIOS in the future. Copy the original motherboard BIOS using the ASUS Update
utility.
2.1.1 EZ Update
EZ Update is a utility that allows you to automatically update your motherboard's softwares, drivers and the BIOS version easily. With this utlity, you can also manually update the...
H81-M2 User's Manual - Page 31
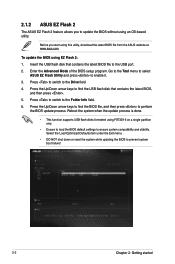
... utility, download the latest BIOS file from the ASUS website at www.asus.com.
To update the BIOS using EZ Flash 2:
1. Insert the USB flash disk that contains the latest BIOS file to the USB port.
2. Enter the Advanced Mode of the BIOS setup program. Go to the Tool menu to select ASUS EZ Flash Utility and press to enable it.
3. Press to switch to the Drive field...
H81-M2 User's Manual - Page 32

...the BIOS To recover the BIOS: 1. Turn on the system. 2. Insert the support DVD to the optical drive or the USB flash drive that contains the
BIOS file to the USB port. 3. The utility automatically checks the devices for the BIOS file. When found, the utility
reads the BIOS file and enters ASUS EZ Flash 2 utility automatically. 4. The system requires you to enter BIOS Setup to recover BIOS settings...
H81-M2 User's Manual - Page 35
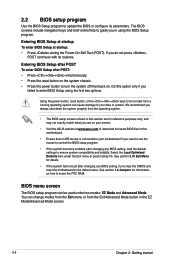
... your screen.
• Visit the ASUS website at www.asus.com to download the latest BIOS file for this motherboard.
• Ensure that a USB mouse is connected to your motherboard if you want to use the mouse to control the BIOS setup program.
• If the system becomes unstable after changing any BIOS setting, load the default settings to ensure system compatibility and stability...
H81-M2 User's Manual - Page 54
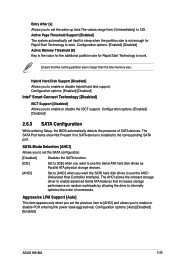
... Setup, the BIOS automatically detects the presence of SATA devices. The SATA Port items show Not Present if no SATA device is installed to the corresponding SATA port.
SATA Mode Selection [AHCI]
Allows you to set the SATA configuration.
[Disabled]
Disables the SATA function.
[IDE]
Set to [IDE] when you want to use the Serial ATA hard disk drives as Parallel ATA physical storage devices...
H81-M2 User's Manual - Page 64
....
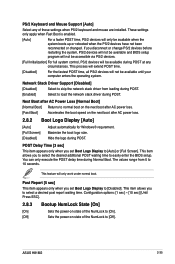
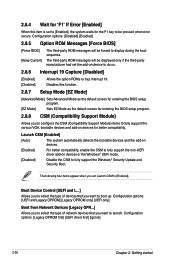
[Disabled]
For the fastest POST time, all PS/2 devices will not be available until your computer enters the operating system.
Network Stack Driver Support [Disabled]
[Disabled]
Select to skip the network stack driver from loading during POST.
[Enabled]
Select to load the network stack driver during POST.
Next Boot after AC Power Loss [Normal Boot]
[Normal Boot] Returns to normal boot...
H81-M2 User's Manual - Page 65
...] For better compatibility, enable the CSM to fully support the non-UEFI driver add-on devices or the Windows® UEFI mode.
[Disabled] Disable the CSM to fully support the Windows® Security Update and Security Boot.
The following four items appear when you set Launch CSM to [Enabled].
Boot Device Control [UEFI and L...] Allows you to select the type...
H81-M2 User's Manual - Page 66
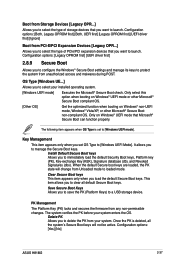
..., UEFI first] [Legacy OPROM first] [UEFI driver first] [Ignore]
Boot from PCI-E/PCI Expansion Devices [Legacy OPR...] Allows you to select the type of PCIe/PCI expansion devices that you want to launch. Configuration options: [Legacy OPROM first] [UEFI driver first]
2.8.9 Secure Boot
Allows you to configure the Windows® Secure Boot settings and manage its keys to protect the...
H81-M2 User's Manual - Page 67
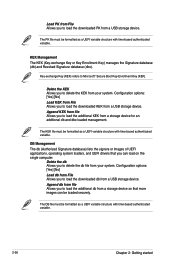
... loaders, and UEFI drivers that you can load on the single computer.
Delete the db Allows you to delete the db file from your system. Configuration options: [Yes] [No] Load db from File Allows you to load the downloaded db from a USB storage device. Append db from file Allows you to load the additional db from a storage device so that more images...
H81-M2 User's Manual - Page 68
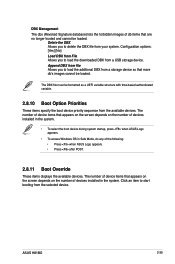
... number of devices installed in the system.
• To select the boot device during system startup, press when ASUS Logo appears.
• To access Windows OS in Safe Mode, do any of the following: • Press when ASUS Logo appears. • Press after POST.
2.8.11 Boot Override
These items displays the available devices. The number of device items that...