Biostar N4SLI-A9 driver and firmware
Related Biostar N4SLI-A9 Manual Pages
Download the free PDF manual for Biostar N4SLI-A9 and other Biostar manuals at ManualOwl.com
N4SLI-A9 user's manual - Page 1

N4SLI-A9
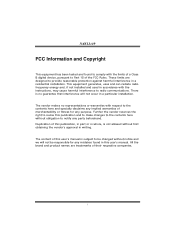
FCC Information and Copyright
This equipment has been tested and found to comply with the limits of a Class B digital device, pursuant to Part 15 of the FCC Rules. These limits are designed to provide reasonable protection against harmful interference in a residential installation...writing.
The content of this user's manual is subject to be changed without notice and we will not be...
N4SLI-A9 user's manual - Page 2
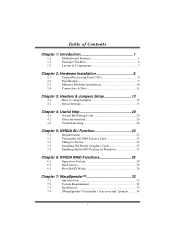

... Setup 13
3.1
How to setup Jumpers 13
3.2
Detail Settings 13
Chapter 4: Useful Help 20
4.1
Award BIOS Beep Code 20
4.2
Extra Information 20
4.3
Troubleshooting 22
Chapter 5: NVIDIA SLI Function 23
5.1
Requirements 23
5.2
Placing the SLI-NF4 Selector Card 23
5.3
Things to Notice 25
5.4
Installing SLI-Ready Graphics Cards 25
5.5
Enabling Multi-GPU Feature in Windows...
N4SLI-A9 user's manual - Page 3
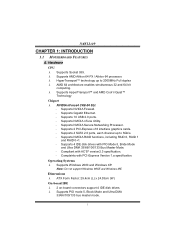

... Gigabit Ethernet. - Supports 10 USB 2.0 ports. - Supports NVIDIA nTune Utility. - Supports NVIDIA Secure Networking Processor. - Supports 2 PCI-Express x16 interface graphics cards. - Supports 4 SATA 2.0 ports, each channel up to 3Gb/s. - Supports NVIDIA RAID functions, including RAID 0, RAID 1
and RAID 0+1. - Supports 4 IDE disk drives with PIO Mode 5, Bride Mode
and Ultra DMA 33/66/100/133 Bus...
N4SLI-A9 user's manual - Page 7

...-A9
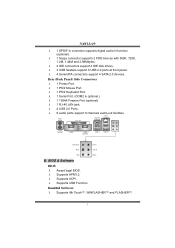
λ 1 SPDIF-in connector supports digital audio-in function (optional).
λ 1 floppy connector supports 2 FDD devices with 360K, 720K, 1.2M, 1.44M and 2.88Mbytes.
λ 2 IDE connectors support 4 IDE disk drives. λ 3 USB headers support 6 USB 2.0 ports at front panel. λ 4 Serial ATA connectors support 4 SATA 2.0 devices.
Rear (Back Panel) Side Connectors
λ 1 Printer...
N4SLI-A9 user's manual - Page 8

N4SLI-A9 1.2 PACKAGE CHECKLIST
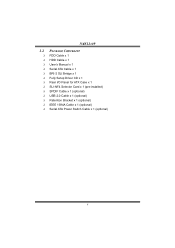
λ FDD Cable x 1 λ HDD Cable x 1 λ User's Manual x 1 λ Serial ATA Cable x 1 λ BRI-2 SLI Bridge x 1 λ Fully Setup Driver CD x 1 λ Rear I/O Panel for ATX Case x 1 λ SLI-NF4 Selector Card x 1 (pre-installed) λ SPDIF Cable x 1 (optional) λ USB 2.0 Cable x 1 (optional) λ Retention Bracket x 1 (optional) λ IEEE ...
N4SLI-A9 user's manual - Page 10

N4SLI-A9
CHAPTER 2: HARDWARE INSTALLATION
2.1 CENTRAL PROCESSING UNIT (CPU)
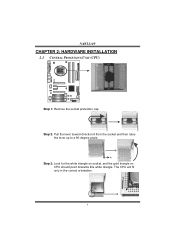
Step 1: Remove the socket protection cap.
Step 2: Pull the lever toward direction A from the socket and then raise the lever up to a 90-degree angle.
90 A
Step 3: Look for the white triangle on socket, and the gold triangle on CPU should point forwards this white triangle. The...
N4SLI-A9 user's manual - Page 11

N4SLI-A9
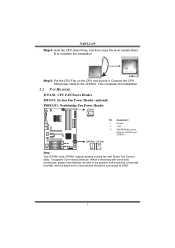
Step 4: Hold the CPU down firmly, and then close the lever toward direct B to complete the installation.
B
Step 5: Put the CPU Fan on the CPU and buckle it. Connect the CPU FAN power cable to the JCFAN1. This completes the installation.
2.2 FAN HEADERS
JCFAN1: CPU FAN Power Header
JSFAN1: System Fan Power Header (optional)
JNBFAN1: Northbridge Fan Power Header
JCFAN1
13
Pin Assignment...
N4SLI-A9 user's manual - Page 12
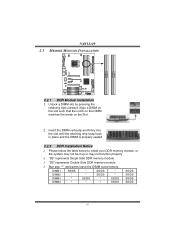

N4SLI-A9 2.3 MEMORY MODULES INSTALLATION
DIMM2 DIMM 4 DIMM1 DIMM 3
2.2.1 DDR Module installation
1. Unlock a DIMM slot by pressing the retaining clips outward. Align ...retaining chip snap back
in place and the DIMM is properly seated.
2.2.2 DDR Installation Notice
λ Please follow the table below to install your DDR memory module, or the system may not boot up or may not function properly.
...
N4SLI-A9 user's manual - Page 22
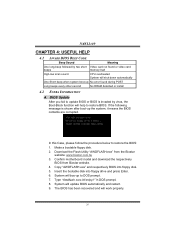

....biostar.com.tw 3. Confirm motherboard model and download the respectively
BIOS from Biostar website. 4. Copy "AWDFLASH.exe" and respectively BIOS into floppy disk. 5. Insert the bootable disk into floppy drive and press Enter. 6. System will boo-up to DOS prompt. 7. Type "Awdflash xxxx.bf/sn/py/r" in DOS prompt. 8. System will update BIOS automatically and restart. 9. The BIOS has been recovered...
N4SLI-A9 user's manual - Page 24

... snaps into place.
System does not boot from hard disk 1. drive, can be booted from optical drive.
2.
Check cable running from disk to disk controller board. Make sure both ends are securely plugged in; check the drive type in the standard CMOS setup.
Backing up the hard drive is extremely important. All hard disks are capable of breaking down at any time.
System...
N4SLI-A9 user's manual - Page 25

N4SLI-A9
CHAPTER 5: NVIDIA SLI FUNCTION
5.1 REQUIREMENTS
λOnly Windows XP supports SLI (Dual Video) function. λTwo identical SLI-ready graphics cards that are NVIDIA certified. λThe graphics card driver should support NVIDIA SLI technology. λThe power supply unit must provide at least the minimum power required
by the system, or the system will be unstable.
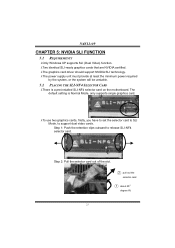
5.2 PLACING THE SLI-...
N4SLI-A9 user's manual - Page 27
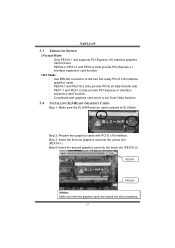

...λSLI Mode: - Use BRI-SLI connector to link two SLI-ready PCI-E x16 interface graphics cards. - PEX16-1 and PEX16-2 slots provide PCI-E x8 data transfer rate. - PEX1-1 and PEX1-2 slots provide PCI-Express x1 interface expansion card function. - Coordinate with graphics card driver to set Dual Video function.
5.4 INSTALLING SLI-READY GRAPHICS CARDS
Step 1: Make sure the SLI-NF4 selector card is...
N4SLI-A9 user's manual - Page 28

N4SLI-A9
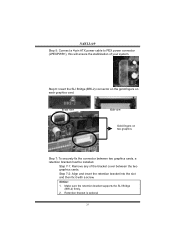
Step 5: Connect a 4-pin ATX power cable to PEX power connector (JPEXPWR1), this will ensure the stabilization of your system.
Step 6: Insert the SLI Bridge (BRI-2) connector on the gold-fingers on each graphics card.
Front view
Side view
Gold-fingers on two graphics
Step 7: To securely fix the connector between two graphics cards, a retention bracket must be...
N4SLI-A9 user's manual - Page 29
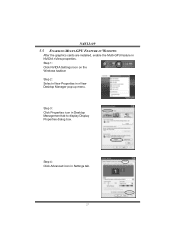

N4SLI-A9 5.5 ENABLING MULTI-GPU FEATURE IN WINDOWS
After the graphics cards are installed, enable the Multi-GPU feature in NVIDIA nView properties. Step 1: Click NVIDIA Settings icon on the Windows taskbar. Step 2: Select nView Properties in nView Desktop Manager pop-up menu.
Step 3: Click Properties icon in Desktop Management tab to display Display Properties dialog box.
Step 4: Click Advanced ...
N4SLI-A9 user's manual - Page 31

N4SLI-A9
CHAPTER 6: NVIDIA RAID FUNCTIONS
6.1 OPERATION SYSTEM
λSupports Windows XP Home/Professional Edition, and Windows 2000 Professional.
6.2 RAID ARRAYS
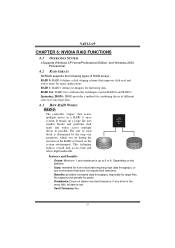
NVRAID supports the following types of RAID arrays: RAID 0: RAID 0 defines a disk striping scheme that improves disk read and writes times for many applications.
RAID 1: RAID 1 defines techniques for mirroring data.
RAID 0+1: RAID 0+1...
N4SLI-A9 user's manual - Page 33

N4SLI-A9
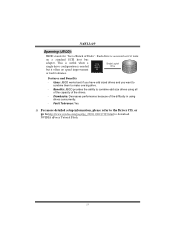
Spanning (JBOD):
JBOD stands for "Just a Bunch of Disks". Each drive is accessed as if it were
on a standard SCSI host bus
adapter. This is useful when a single drive configuration is needed, but it offers no speed improvement or fault tolerance.
Single Logical Drive
Disk 1: 40GB Disk 2: 80GB Disk 3: 40GB Disk 4: 120GB
Features and Benefits
- Uses: JBOD works best if you have...
N4SLI-A9 user's manual - Page 34
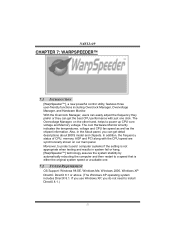

.... Also, in the About panel, you can get detail descriptions about BIOS model and chipsets. In addition, the frequency status of CPU, memory, AGP and PCI along with the CPU speed are synchronically shown on our main panel. Moreover, to protect users' computer systems if the setting is not appropriate when testing and results in system fail or...
N4SLI-A9 user's manual - Page 35

N4SLI-A9
7.3
1.
INSTALLATION
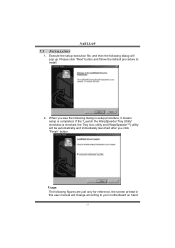
Execute the setup execution file, and then the following dialog will pop up. Please click "Next" button and follow the default procedure to install.
2. When you see the following dialog in setup procedure, it means setup is completed. If the "... are just only for reference, the screen printed in this user manual will change according to your motherboard on hand.
33
N4SLI-A9 BIOS guide - Page 4
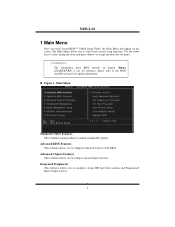

... Menu allows you to select from several setup functions. Use the arrow keys to select among the items and press to accept and enter the sub-menu.
!! WARNING !! The information about BIOS defaults on manual (Figure 1,2,3,4,5,6,7,8,9) is just for reference, please refer to the BIOS installed on board, for update information.
Figure 1. Main Menu
Standard CMOS Features...
N4SLI-A9 BIOS guide - Page 17
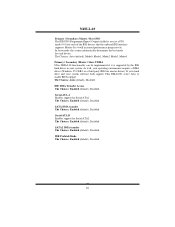

... requires a DMA driver (Windows 95 OSR2 or a third party IDE bus master driver). If your hard drive and your system software both support Ultra DMA/100, select Auto to enable BIOS support. The Choices: Auto (default), Disabled. IDE DMA Transfer Access The Choices: Enabled (default), Disabled. Serial-ATA A Enables support for Serial-ATA1. The Choices: Enabled (default), Disabled SATA DMA transfer...

