Epson 875DCS - Stylus Photo Color Inkjet Printer driver and firmware
Related Epson 875DCS Manual Pages
Download the free PDF manual for Epson 875DCS and other Epson manuals at ManualOwl.com
Printer Basics - Page 3

... Your Electronic Printer Manual
Accessing Your Electronic Printer Manual Navigating Your Electronic Printer Manual
Printing from Start to Finish Printing with Windows
Loading Paper Opening the Printer Software Selecting Printer Software Settings Controlling Printing Printing on a Macintosh Loading Paper Opening the Printer Software Selecting Printer Software Settings Controlling Printing Using...
Printer Basics - Page 5

... Problems Setting Up the Printer or Installing Software Problems with Printing Problems Getting Good Print Quality Problems with the Memory Stick Problems with Paper Feeding Solving Miscellaneous Printout Problems Uninstalling Printer Software Uninstalling Windows 98 Software Uninstalling Windows 2000 Software Uninstalling Macintosh Software Reinstalling Printer Software Where To Get Help EPSON...
Printer Basics - Page 7

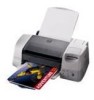
... EPSON Stylus® Photo 875DCS makes it quick and easy to go from digital image capture to brilliant digital image printing. Just insert your Memory Stick into the PC card adapter included with your printer-your bonus photo software starts automatically and lets you view the images on your Memory Stick.
You can also use a memory card that conforms to PCMCIA Flash ATA standards with your printer...
Printer Basics - Page 9

... manual from the CD-ROM (View Reference Guide) or copy the manual to your hard drive (Install Reference Guide) and view it from there. For details on viewing the manual, see the next section.
If you copied the manual to your hard drive, you can access it at any time, as follows:
Windows: Select Start, Programs, EPSON, and double-click ESP875DCS Guide.
Macintosh: Open the EPSON Stylus Photo 875DCS...
Printer Basics - Page 13

... to select your printer software settings. From the File menu, click Print. You see your application's Print window:
Click here to open your printer software
Make the following selections on the Print window (your window may look slightly different): s Make sure your EPSON Stylus Photo 875DCS printer model is selected. s Click the Properties button. (If you see a Setup, Printer, or Options button...
Printer Basics - Page 14

Selecting Printer Software Settings
Once you click Properties, you see your printer software Properties window. The most important thing to remember is to select the type of paper you're using. If necessary, click the Main tab to display the settings shown below:
Select the type of paper you loaded Select the ink color Select Automatic mode
Select higher-quality or...
Printer Basics - Page 18

... page setup window (your window may look slightly different):
s Make sure your printer (SP 875DCS) is selected. (If the printer model is incorrect, you need to select your printer in the Chooser; see the Start Here poster for instructions.)
s Select the correct Paper Size, Paper Source, Orientation, and Printable Area settings for your document. See your electronic Reference Guide for...
Printer Basics - Page 19

Selecting Printer Software Settings
Now open the File menu and click Print. You see the main printer settings window for your application (your window may look slightly different):
Select the type of paper you loaded Select the Ink color
Select Automatic mode
Select higher-quality or faster printing
The most important thing to remember is to select the type of...
Printer Basics - Page 58

... the level of ink you have left, see the graphic in the printer driver (Windows) or click the ink level icon in the printer driver or EPSON Monitor 3 utility (Macintosh).
You cannot print if either ink cartridge is empty. Leave the empty cartridge installed in the printer until you have obtained a replacement; otherwise the ink remaining in the...
Printer Basics - Page 65

... for solutions to common setup,
software, print quality, paper feeding, or other problems.
It's a good idea to check EPSON's web site periodically for possible updates to your printer driver. Visit www.epson.com and check the section for your product to see if there is a new driver available, free of charge, for downloading to your computer. Download instructions are posted for your...
Printer Basics - Page 70

... sure your printer and application software are installed correctly.
s Make sure the EPSON Stylus Photo 875DCS is selected as the default printer in the Printers utility (Windows), or the SP 875DCS is selected in the Chooser (Macintosh).
s If you're printing on a network, you need to set up your printer for network printing, as described in your electronic Reference Guide.
The printer sounds as...
Printer Basics - Page 78

... Add/Remove Programs. Click EPSON Printer Software in the
program list, and then click the Add/Remove button. 6. On the Printer Model tab, select the EPSON Stylus Photo 875DCS printer icon.
Then click the Utility tab. Make sure EPSON USB Memory Card Driver is selected, then click OK. 7. Follow the instructions on the screen. When you're done, click EPSON USB Printer Devices in the program list...
Printer Basics - Page 79
... on the Windows taskbar, and click Exit. 4. Double-click My Computer, then double-click the Control Panel icon. 5. Double-click Add/Remove Programs. Click EPSON Printer Software in the
program list, and then click the Change/Remove button. 6. On the Printer Model tab, select the EPSON Stylus Photo 875DCS printer icon.
Then click the Utility tab. Make sure EPSON USB Memory Card Driver is selected...
Printer Basics - Page 80

... Show hidden devices. Select EPSON SP 875DCS Storage and click Next.
Click this box to select it
14. In the next screen, select Yes, I want to uninstall this device and click Next. 15. On the last screen, click Finish. Then restart your computer.
Uninstalling Macintosh Software
1. If you have a Memory Stick and PC card adapter in the PC card slot, drag...
Printer Basics - Page 82

... Web
EPSON Internet FTP Site
EPSON E-Mail Technical Support
Automated Telephone Services
Access
From the Internet, you can reach EPSON Support at www.epson.com. At this site, you can download drivers and other files, look at documentation such as product brochures and user manuals, and access troubleshooting information.
If you have Internet FTP capability, use your Web browser (or other software...
Printer Basics - Page 85

... your EPSON Stylus Photo 875DCS.
Windows System Requirements
To use your printer and its software, your system should have: s A Microsoft Windows® compatible PC with a Pentium® processor (266 MHz or faster
recommended) s Windows 98 or Windows 2000 s 64MB of RAM (128MB or more recommended) s 100MB of free hard disk space (200MB or more recommended) s CD-ROM or DVD drive for installing the...
Printer Basics - Page 86

...; G3 or G4 with
USB port s Mac OS 8.6 or later (or OS 8.5 with Macintosh ROM 1.2 or later)
Check the Apple website for any updates to your operating system.
s 64MB of available RAM (128MB recommended) s 220MB of free hard disk space (200MB recommended) s CD-ROM or DVD drive for installing the printer software s SVGA or better display adapter and monitor s A shielded USB "AB" cable up to 9.8 feet...
Printer Basics - Page 93

... 43 on 4 x 6-inch Photo Paper, 41 to 43 on roll paper, 38 to 40 Windows, 6 to 10, 38 to 39, 41 to 42 with custom project types, 15 to 16
Problems connection, 35 installing software, 63 Memory Stick, 68 to 69 miscellaneous, 71 paper feeding, 70 print quality, 65 to 67 setting up printer, 63
Progress Meter...
Product Brochure - Page 2

... head Color head
48 nozzles 48 nozzles x 5
Resolution
1440 x 720 dpi; 720 x 720 dpi; 360 x 720 dpi; 360 x 360 dpi; 180 x 180 dpi
Ink Droplet Size 4 picoliters
Print Speed*
Photos 4" x 6": 48 seconds 8" x 10": 1 minute 50 seconds
Sound Level 38 dB(A)
Printer Language EPSON ESC/P® Raster
Software Drivers
Windows 98, Windows 2000 - USB compliant Macintosh system 8.5 or later with Mac ROM...
Product Information Guide - Page 8

EPSON Stylus Photo 875DCS
3. Click OK to enable write-to-disk mode, then insert the Memory Stick in the adapter. 4. Locate the photos you want to upload on your hard drive. Drag them to the following directory on your Memory Stick: D:\Dcim\100msdcf (substitute the drive letter assigned to your Memory Stick for D).
You must copy or move your photos to the correct folder on...