Gateway NX270 driver and firmware
Drivers and firmware downloads for this Gateway Computers item

Related Gateway NX270 Manual Pages
Download the free PDF manual for Gateway NX270 and other Gateway manuals at ManualOwl.com
Component Replacement Manual - Page 4
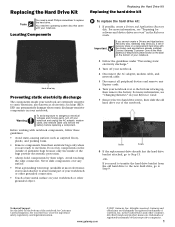
... Gateway may send you a set of recovery discs or a replacement hard drive with the drivers and applications already installed. Contact Gateway Customer Care at the Web address or telephone number shown on the label on the bottom of your notebook.
2 Follow the guidelines under "Preventing static electricity discharge."
3 Turn off your notebook.
4 Disconnect the AC adapter, modem cable, and network...
Component Replacement Manual - Page 5
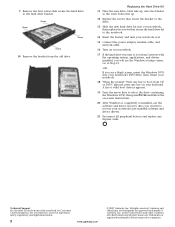
... notebook.
14 Insert the battery and turn your notebook over.
15 Connect the power adapter, modem cable, and network cable.
16 Turn on your notebook.
17 If the hard drive was sent to you from Gateway with the operating system, applications, and drivers installed, you will see the Windows startup screen. Go to Step 21.
-OR-
If you see a blank screen...
Gateway Notebook Reference Guide R2 for Windows Vista - Page 5
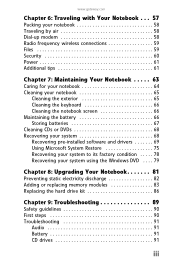
... the battery 66 Storing batteries 67 Cleaning CDs or DVDs 68 Recovering your system 68 Recovering pre-installed software and drivers 69 Using Microsoft System Restore 75 Recovering your system to its factory condition . . . . . 78 Recovering your system using the Windows DVD . . . . 79
Chapter 8: Upgrading Your Notebook 81
Preventing static electricity discharge 82 Adding or replacing...
Gateway Notebook Reference Guide R2 for Windows Vista - Page 20
...notebook, follow these general guidelines for setting up a safe and comfortable work ... on a footrest. • Although notebooks are sometimes called "laptops," do
not use your notebook while it rests on your unprotected...computer desk and screen so you can avoid
glare on your screen and light shining directly into your eyes. Reduce glare by installing shades or curtains on windows, and by installing...
Gateway Notebook Reference Guide R2 for Windows Vista - Page 68

CHAPTER 6: Traveling with Your Notebook
• Consult your insurance company and credit card
company to learn about emergency travel assistance if your notebook is lost or damaged.
• Take your recovery discs in case you need to install an
additional driver or software. Tip
You can create a Drivers and Applications Recovery disc using the Gateway Recovery Center.
62
Gateway Notebook Reference Guide R2 for Windows Vista - Page 74
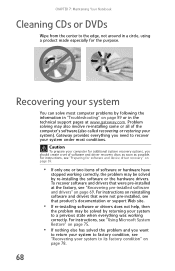
... technical support pages at www.gateway.com. Problem solving may also involve re-installing some or all of the computer's software (also called recovering or restoring your system). Gateway provides everything you need to recover your system under most conditions.
Caution
To prepare your computer for additional system recovery options, you should create a set of software and driver recovery discs...
Gateway Notebook Reference Guide R2 for Windows Vista - Page 75
...'s installation instructions. You can recover pre-installed software and drivers from a set of recovery discs (you must create the discs) or by using Gateway Recovery Center.
Preparing for software and device driver recovery
You can usually recover your pre-installed software and drivers from your hard drive. However, if you ever re-install Windows from the Windows DVD or install a new hard drive...
Gateway Notebook Reference Guide R2 for Windows Vista - Page 76
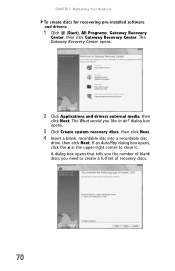
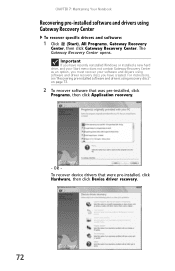
... create discs for recovering pre-installed software and drivers:
1 Click (Start), All Programs, Gateway Recovery
Center, then click Gateway Recovery Center. The Gateway Recovery Center opens.
2 Click Applications and drivers external media, then
click Next. The What would you like to do? dialog box opens.
3 Click Create system recovery discs, then click Next. 4 Insert a blank, recordable disc into...
Gateway Notebook Reference Guide R2 for Windows Vista - Page 77
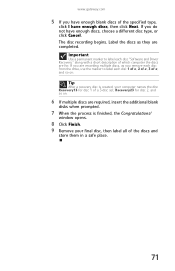
... "Software and Driver Recovery," along with a short description of which computer the discs are for. If you are recording multiple discs, as you remove each disc from the drive, use the marker to label each disc 1 of x, 2 of x, 3 of x, and so on.
Tip
After a recovery disc is created, your computer names the disc Recovery13 for disc 1 of a 3-disc set...
Gateway Notebook Reference Guide R2 for Windows Vista - Page 78
...recently reinstalled Windows or installed a new hard drive, and your Start menu does not contain Gateway Recovery Center as an option, you must recover your software and drivers using software and driver recovery discs you have created. For instructions, see "Recovering pre-installed software and drivers using recovery discs" on page 73.
2 To recover software that was pre-installed, click
Programs...
Gateway Notebook Reference Guide R2 for Windows Vista - Page 81
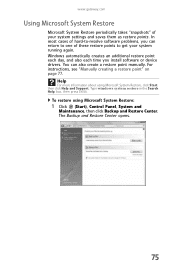
... you install software or device drivers. You can also create a restore point manually. For instructions, see "Manually creating a restore point" on page 77.
Help
For more information about using Microsoft System Restore, click Start, then click Help and Support. Type windows system restore in the Search Help box, then press ENTER.
To restore using Microsoft System Restore:
1 Click (Start), Control...
Gateway Notebook Reference Guide R2 for Windows Vista - Page 84
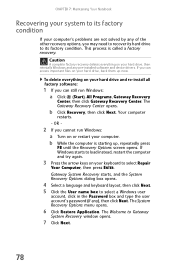
... pre-installed software and device drivers. If you can access important files on your hard drive, back them up now.
To delete everything on your hard drive and re-install all factory software:
1 If you can still run Windows: a Click (Start), All Programs, Gateway Recovery
Center, then click Gateway Recovery Center. The Gateway Recovery Center opens.
b Click Recovery, then click Next. Your computer...
Gateway Notebook Reference Guide R2 for Windows Vista - Page 85
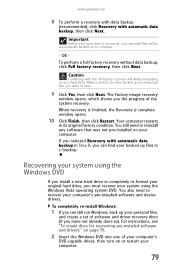
... system DVD. You also need to recover your computer's pre-installed software and device drivers.
To completely re-install Windows:
1 If you can still run Windows, back up your personal files,
and create a set of software and driver recovery discs (if you have not already done so). For instructions, see "To create discs for recovering pre-installed software and drivers:" on page 70.
2 Insert the...
Gateway Notebook Reference Guide R2 for Windows Vista - Page 86

... Press the arrow keys to select the drive containing the
Windows DVD, then press ENTER and follow the on-screen instructions.
5 After Windows is completely re-installed, use the
software and driver recovery discs you created to recover your computer's pre-installed software and device drivers. For instructions, see "Recovering pre-installed software and drivers using recovery discs" on page 73.
80
Gateway Notebook Reference Guide R2 for Windows Vista - Page 92
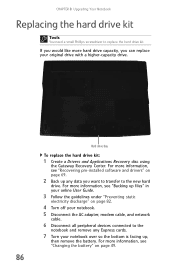
...Recovering pre-installed software and drivers" on page 69.
2 Back up any data you want to transfer to the new hard
drive. For more information, see "Backing up files" in your online User Guide.
3 Follow the guidelines under "Preventing static
electricity discharge" on page 82.
4 Turn off your notebook. 5 Disconnect the AC adapter, modem cable, and network
cable.
6 Disconnect all peripheral devices...
Gateway Notebook Reference Guide R2 for Windows Vista - Page 100
... powered speakers, make sure that they
are plugged in and turned on.
• Clean the disc. For more information, see "Cleaning CDs
or DVDs" on page 68.
• Your notebook may be experiencing some temporary
memory problems. Shut down and restart your notebook.
• Reinstall the audio device drivers. For more information,
see "Recovering pre-installed software and drivers...
Gateway Notebook Reference Guide R2 for Windows Vista - Page 138
... 45 printer default 112 inkjet 45 installing 41 laser 45 troubleshooting 112 USB port 7 programs closing unresponsive 22 opening 30 projector adding 42 color quality 43 port 8 screen resolution 43 using 27
R
radio approval authorities 59 radio frequency wireless
connections 59 RAM
See memory rebooting notebook 22 recalibrating battery 50 recharging battery 48 recovering
drivers 69 software 69...
Gateway Notebook Reference Guide R1 for Windows XP - Page 41
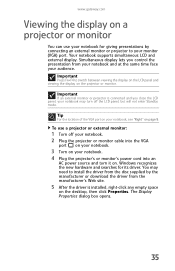
...:
1 Turn off your notebook. 2 Plug the projector or monitor cable into the VGA
port on your notebook.
3 Turn on your notebook. 4 Plug the projector's or monitor's power cord into an
AC power source and turn it on. Windows recognizes the new hardware and searches for its driver. You may need to install the driver from the disc supplied by the manufacturer...
Gateway Notebook Reference Guide R1 for Windows XP - Page 61
www.gateway.com
Additional tips
• If you plan to use several USB peripheral devices, take
a portable USB hub to provide additional USB ports.
• Take a network cable if you need to connect to a
network. Some hotels provide Internet connectivity only through their networks.
• If your notebook has been exposed to cold
temperatures, allow it to warm to room temperature before...
Gateway Notebook Reference Guide R1 for Windows XP - Page 74
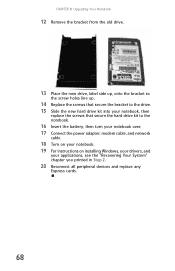
... your notebook, then
replace the screws that secure the hard drive kit to the notebook.
16 Insert the battery, then turn your notebook over. 17 Connect the power adapter, modem cable, and network
cable
18 Turn on your notebook. 19 For instructions on installing Windows, your drivers, and
your applications, see the "Recovering Your System" chapter you printed in Step 2.
20 Reconnect...