Gigabyte GS-R1233-RH driver and firmware
Drivers and firmware downloads for this Gigabyte item

Related Gigabyte GS-R1233-RH Manual Pages
Download the free PDF manual for Gigabyte GS-R1233-RH and other Gigabyte manuals at ManualOwl.com
Manual - Page 1
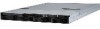
GS-R1233-RH 1U Rack Mount Server System Installation Guide
AMD Opteron™ Socket F Dual Processor Motherboard Rev. 1.0
Manual - Page 2
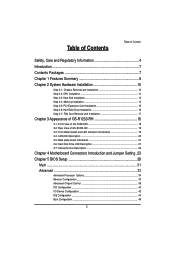
... 3-4: LAN LED Description 20 3-5: Back plane board Information 21 3-6: Hard Disk Drive LED Description 21 3-7: Connector Icon Description 22
Chapter 4 Motherboard Connectors Introduction and Jumper Setting . 23 Chapter 5 BIOS Setup 29
Main ...31 Advanced 33
Advanced Processor Options 34 Memory Configuration ...37 Advanced Chipset Control 38 PCI Configuration ...40 I/O Device Configuration...
Manual - Page 5
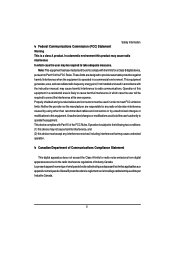
... for a Class B digital device,
pursuant to Part 15 of the FCC Rules. These limits are designed to provide reasonable protection against
harmful interference when the equipment is operated in a commercial environment. This equipment
generates, uses, and can radiate radio frequency energy and, if not installed and used in accordance with
the instruction manual, may cause...
Manual - Page 7
... GS-R1233-RH your system.
This installation guide will assist you in installing all the essential components for the sever system. For your protection, please read and undertand all of the safety and operating instructions regarding your Gigabyte Server and retain for future reference. The procedures in this guidebook assume that your are a system or network administrator experienced in installing...
Manual - Page 8
GS-R1233-RH Rack Mount Server
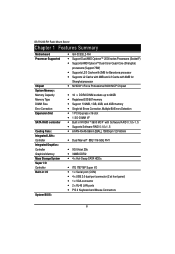
Chapter 1 Features Summary
Motherboard Processor Supported
Chipset System Memory: Memory Capacity Memory Type DIMM Size Error Correction: Expansion Slot
SATA RAID controller
Cooling Fans: Integrated LANs: Controller Integrated Graphics: Controller Graphics Memory Mass Storage System Super I/O Controller Built-in I/O
System BIOS:
y GA-3CESL2-RH y Support DualAMD ...
Manual - Page 10
GS-R1233-RH Rack Mount Server
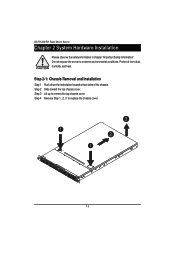
Chapter 2 System Hardware Installation
Please observe the safety information in chapter "Important Safety Information" Do not expose the server to extreme environmental conditions. Protect it from dust, humidity, and heat.
Step 2-1: Chassis Removal and Installation
Step 1 Push down the indentation located at two sides of the chassis. Step 2 Slide toward...
Manual - Page 11
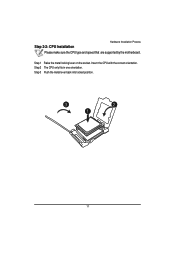
Step 2-2: CPU Installation
Hardware Installation Process
Please make sure the CPU type and speed that are supported by the motherboard.
Step 1 Raise the metal locking lever on the socket. Insert the CPU with the correct orientation. Step 2 The CPU only fits in one orientation. Step 3 Push the metal lever back into locked position.
3
2
1
11
Manual - Page 12
GS-R1233-RH Rack Mount Server
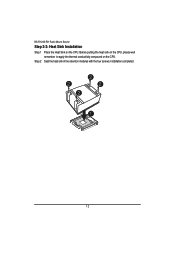
Step 2-3: Heat Sink Installation
Step 1 Place the Heat Sink on the CPU. Before putting the heat sink on the CPU, please well remember to apply the thermal conductivity compound on the CPU.
Step 2 Seat the heat sink in the retention modules with the four screws. Installation completed.
2 2
2 2
1
12
Manual - Page 13
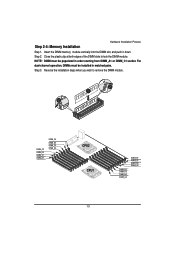
Step 2-4: Memory Installation
Hardware Installation Process
Step 1. Insert the DIMM memory module vertically into the DIMM slot, and push it down. Step 2. Close the plastic clip at both edges of the DIMM slots to lock the ...
Manual - Page 15
GS-R1233-RH Rack Mount Server
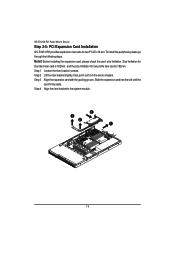
Step 2-5: PCI Expansion Card Installation
GS-R1231-RH provides expansion riser slots for two PCI-E x16 slot. To install the peripheral, please go through the following steps. Note!! Before installing the expansion card, please check the card size limitation. Size limitation for standard riser card is 182mm; and the size limitation for low profile riser card is 182mm. ...
Manual - Page 16
Hardware Installation Process
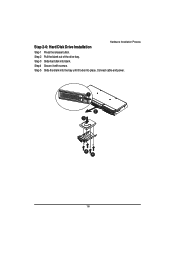
Step 2-6: Hard Disk Drive Installation
Step 1 Press the release button. Step 2 Pull the blank out of the drive bay. Step 3 Slide hard disk into blank. Step 4 Secure it with screws. Step 5 Slide the blank into the bay until it locks into place. Connect cable and power.
1 2
3
4 4
16
Manual - Page 17
GS-R1233-RH Rack Mount Server
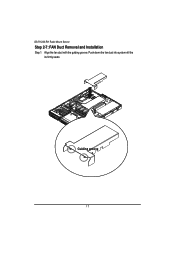
Step 2-7: FAN Duct Removal and Installation
Step 1 Align the fan duct with the guiding groove. Push down the fan duct into system ntil the its firmly seats.
Guiding groove
17
Manual - Page 24
... sure that all components and devices are properly installed. Align the power connector with its proper location on the motherboard and connect tightly. The ATX_12V power connector mainly supplies power to the CPU. If the ATX_12V power connector is not connected, the system will not start. Caution! Please use a power supply that is able to support the system voltage requirements...
Manual - Page 25
... device unable to work or even damage it. For optional front USB cable, please contact your local dealer.
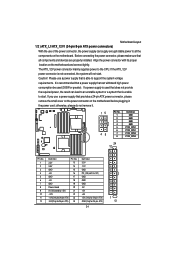
12 9 10
Pin No. 1 2 3 4 5 6 7 8 9 10
Definition Power Power USB DxUSB DyUSB Dx+ USB Dy+ GND GND No Pin NC
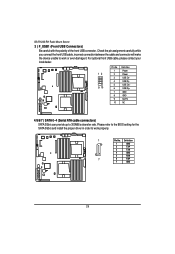
4/5/6/7 ) SATA 0~4 (Serial ATA cable connectors) SATA 3Gb/s can provide up to 300MB/s stransfer rate. Please refer to the BIOS setting for the SATA 3Gb/s and install the proper driver...
Manual - Page 30
GS-R1233-RH Rack Mount Server
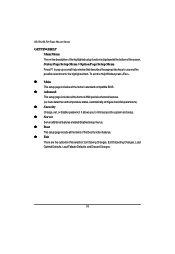
GETTINGHELP Main Menu The on-line description of the highlighted setup function is displayed at the bottom of the screen. Status Page Setup Menu / Option Page Setup Menu Press F1 to pop up a small help window that describes the appropriate keys to use and the possible selections for the highlighted item. To exit...
Manual - Page 35
GS-R1233-RH Rack Mount Server
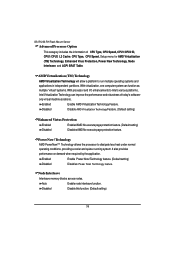
Advanced Processor Option
This category includes the information of CPU Type, CPU Speed, CPU1/CPU2 ID, CPU1/CPU2 L2 Cache, CPU Type, CPU Speed. Setup menu for AMD Virtualization (TM) Technology, Enhanced Virus Protection, Power Now Technology, Node Interleave, and ACPI SRAT Table.
AMD Virtualization (TM) Technology
AMD Virtualization Technology will allow a platform...
Manual - Page 38
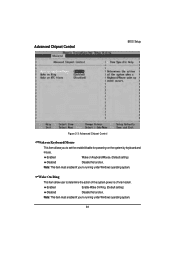
Advanced Chipset Control
BIOS Setup
Figure 2-3: Advanced Chipset Control
Wake on Keyboard/Mouse
This item allows you to set the enable/disable for powering-on the system by keyboard and
mouse.
Enabled
Wake on Keyboard/Mouse. (Default setting)
Disabled
Disable this function.
Note: This item must enabled if you're running under Windows operating system.
Wake On Ring
This item allow...
Manual - Page 43
GS-R1233-RH Rack Mount Server
PS/2 Mouse
Set this option 'Enabled' to allow BIOS support for a PS/2 - type mouse.
Enabled
'Enabled' forces the PS/2 mouse port to be enabled regardless if a mouse is present. (Default setting)
Disabled
'Disabled' prevents any installed PS/2 mouse from functioning, but frees up IRQ12.
USB Control
USB1.1
Enable the USB 1.1 device.
USB1.1+USB2
Enable the USB ...
Manual - Page 44
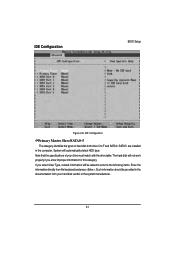
IDE Configuration
BIOS Setup
Figure 2-6: IDE Configuration
Primary Master, Slave/SATA0~5 The category identifies the types of hard disk from drive C to F and SATA 0~SATA 5 are installed in the computer. System will automatically detect HDD type. Note that the specifications of your drive must match with the drive table. The hard disk will not work properly if you enter improper information for...
Manual - Page 45
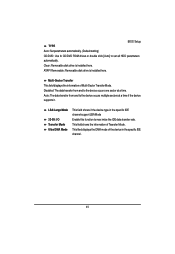
BIOS Setup TYPE Auto: Set parameters automatically. (Default setting) CD/DVD: Use fo CD/DVD ROM drives or double click [Auto] to set all HDD parameters automatically. Clear: Removable disk drive is installed here. ATAPI Removable: Removable disk drive is installed here.
Multi-Sector Transfer This field displays the information of Multi-Sector Transfer Mode. Disabled: The data transfer from and to...