Gigabyte GV-NX86T256D driver and firmware
Drivers and firmware downloads for this Gigabyte item


Related Gigabyte GV-NX86T256D Manual Pages
Download the free PDF manual for Gigabyte GV-NX86T256D and other Gigabyte manuals at ManualOwl.com
Manual - Page 4
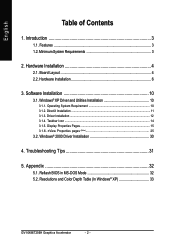

... 4
2.1. Board Layout 4 2.2. Hardware Installation 6
3. Software Installation 10
3.1. Windows® XP Driver and Utilities Installation 10
3.1.1. Operating System Requirement 10 3.1.2. DirectX Installation ...11 3.1.3. Driver Installation ...12 3.1.4. Taskbar Icon ...14 3.1.5. Display Properties Pages 15 3.1.6. nView Properties pages (Note 25
3.2. Windows® 2000 Driver Installation 30...
Manual - Page 5
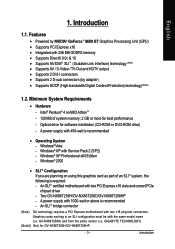

...174; XP with Service Pack 2 (SP2) - Windows® XP Professional x64 Edition - Windows® 2000
• SLITM Configuration If you are planning on using this graphics card as part of an SLITM system, the following is required: - An SLITM certified motherboard with two PCI Express x16 slots and correct PCIe chipset driver - Two GV-NX86T256H/GV-NX86T256D/GV-NX86T256HP - A power supply with 1000...
Manual - Page 9
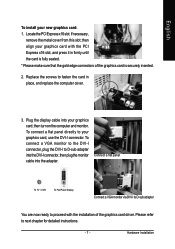

...display cable into your graphics card; then turn on the computer and monitor. To connect a flat panel directly to your graphics card, use the DVI-I connector. To connect a VGA monitor to the DVI-I connector, plug the DVI-I to D-sub adapter into the DVI-I connector, then plug the monitor cable into the adapter.
Connect a flat panel
To TV / VCR
To Flat Panel Display
Connect a VGA monitor via DVI...
Manual - Page 12

English
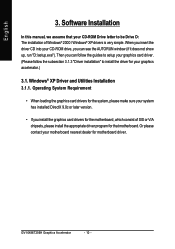
3. Software Installation
In this manual, we assume that your CD-ROM Drive letter to be Drive D: The installation of Windows® 2000 / Windows® XP drivers is very simple. When you insert the driver CD into your CD-ROM drive, you can see the AUTORUN window (if it does not show up, run "D:\setup.exe"). Then you can follow the guides to setup your graphics card driver. (Please follow...
Manual - Page 13
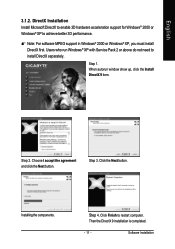

... Installation Install Microsoft DirectX to enable 3D hardware acceleration support for Windows® 2000 or Windows® XP to achieve better 3D performance.
0 Note: For software MPEG support in Windows® 2000 or Windows® XP, you must install DirectX first. Users who run Windows® XP with Service Pack 2 or above do not need to install DirectX separately.
Step 1. When autorun window...
Manual - Page 14
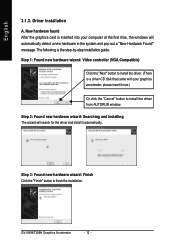

... inserted into your computer at the first time, the windows will automatically detect a new hardware in the system and pop out a "New Hardware Found" message. The following is the step-by-step installation guide.
Step 1: Found new hardware wizard: Video controller (VGA Compatible)
Click the "Next" button to install the driver. (There is a driver CD disk that came with your...
Manual - Page 15
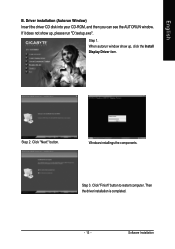

... Window) Insert the driver CD disk into your CD-ROM, and then you can see the AUTORUN window. If it does not show up, please run "D:\setup.exe".
Step 1. When autorun window show up, click the Install Display Driver item.
Step 2. Click "Next" button.
Windows installings the components.
Step 3. Click "Finish" button to restart computer. Then the driver installation is completed.
- 13 -
Software...
Manual - Page 16

English
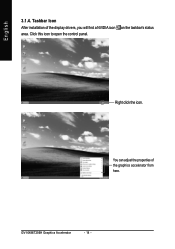
3.1.4. Taskbar Icon After installation of the display drivers, you will find a NVIDIA icon area. Click this icon to open the control panel.
on the taskbar's status
Right click the icon.
You can adjust the properties of the graphics accelerator from here.
GV-NX86T256H Graphics Accelerator
- 14 -
Manual - Page 17
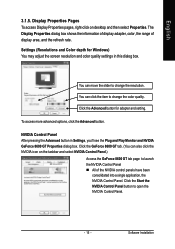

... Pages To access Display Properties pages, right-click on desktop and then select Properties. The Display Properties dialog box shows the information of display adapter, color, the range of display area, and the refresh rate.
Settings (Resolutions and Color depth for Windows) You may adjust the screen resolution and color quality settings in this dialog box.
You can move the slider...
Manual - Page 19
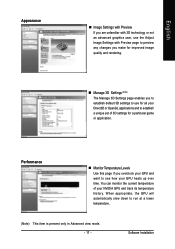

...image quality and rendering.
„ Manage 3D Settings (Note) The Manage 3D Settings page enables you to establish default 3D settings to use for all your Direct3D or OpenGL applications and to establish a unique set of 3D settings for a particular game or application.
Performance
&#...run at a lower temperature.
(Note) This item is present only in Advanced view mode. - 17 -
Software Installation
Manual - Page 21

English
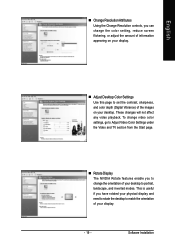
„ Change ResolutionAttributes Using the Change Resolution controls, you can change the color setting, reduce screen flickering, or adjust the amount of information appearing on your display.
„ Adjust Desktop Color Settings Use this page to set the contrast, sharpness, and color depth (Digital Vibrance) of the images on your desktop. These changes will not affect any video ...
Manual - Page 23

English
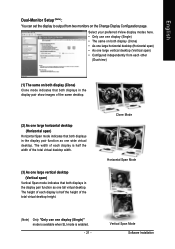
Dual-Monitor Setup (Note) :
You can set the display to output from two monitors on the Change Display Configuration page.
Select your preferred nView display modes here. • Only use one display (Single) • The same on both display (Clone) • As one large horizontal desktop (Horizontal span) • As one large vertical desktop (Vertical span) • Configured ...
Manual - Page 25
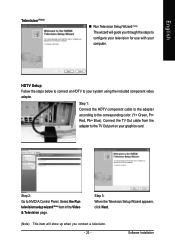

... color. (Y= Green, Pr= Red, Pb= Blue). Connect the TV Out cable from the adapter to the TV Out port on your graphics card.
Step 2: Go to NVIDIA Control Panel. Select the Run television setup wizard (Note) item in the Video & Television page.
Step 3: When the Television Setup Wizard appears, click Next.
(Note) This item will show up when you connect a television. - 23 -
Software Installation
Manual - Page 27
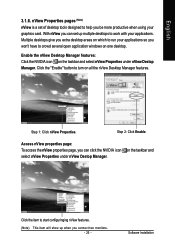

... graphics card. With nView you can set up multiple desktops to work with your applications. Multiple desktops give you extra desktop areas on which to run your applications so you won't have to crowd several open application windows on one desktop.
Enable the nView Desktop Manager features... nView features.
(Note) This item will show up when you connect two monitors. - 25 -
Software Installation
Manual - Page 28

...
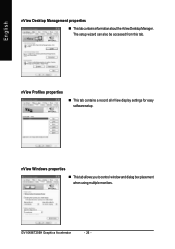
nView Desktop Management properties
„ ThistabcontainsinformationaboutthenViewDesktopManager. The setup wizard can also be accessed from this tab.
nView Profiles properties
„ This tab contains a record all nView display settings for easy software setup.
nView Windows properties
„ This tab allows you to control window and dialog box placement when using multiple monitors.
GV...
Manual - Page 29

English
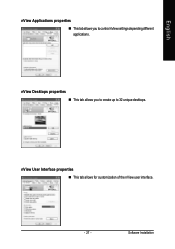
nView Applications properties „ This tab allows you to control nView settings depending different applications.
nView Desktops properties „ This tab allows you to create up to 32 unique desktops.
nView User Interface properties „ This tab allows for customization of the nView user interface.
- 27 -
Software Installation
Manual - Page 31
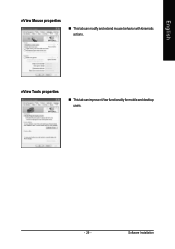

English
nView Mouse properties
„ This tab can modify and extend mouse behavior with kinematic actions.
nView Tools properties
„ This tab can improve nView functionality for mobile and desktop users.
- 29 -
Software Installation
Manual - Page 32
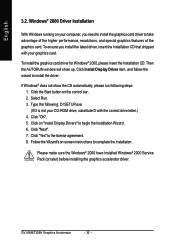

...up. Click Install Display Driver item, and follow the wizard to install the driver.
If Windows® does not show the CD automatically, please run following steps: 1. Click the Start button on the control bar. 2. Select Run. 3. Type the following: D:\SETUP.exe (If D is not your CD-ROM drive, substitute D with the correct drive letter.) 4. Click "OK". 5. Click on "Install Display Drivers" to begin...
Manual - Page 33

... power. „ If necessary, disable any built-in graphics capabilities on your motherboard. For
more information, consult your computer's manual or manufacturer. (NOTE: Some manufacturers do not allow the built-in graphics to be disabled or to become the secondary display.) „ Make sure you selected the appropriate display device and graphics card when you installed the graphics driver...
Manual - Page 34


...
1. Extract the downloaded Zip file to your hard disk(s) or floppy disk. This procedure assumes drive A. 2. Restart the computer in MS-DOS mode. (For Windows® 2000/XP, you need a startup disk to restart
the computer in MS-DOS mode.) 3. Change the command prompt to A:\>. 4. To back up the current BIOS, at the A:\> prompt, type[BIOS flash utility name]
-s [BIOS file name...
