Lexmark X852 driver and firmware

Related Lexmark X852 Manual Pages
Download the free PDF manual for Lexmark X852 and other Lexmark manuals at ManualOwl.com
User's Guide - Page 6
... Installing options 89
Accessing the MFP system board ...90 Installing a printer memory card ...92 Installing a flash memory or firmware card ...93 Installing an option card...support 126
Adjusting control panel brightness ...126 Restoring factory default settings ...126 Adjusting screen timeout ...127 Adjusting Power Saver ...127 Configuring the MFP ...127 Encrypting the hard disk ...133 Hard disk...
User's Guide - Page 11
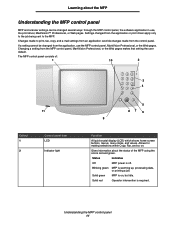
... be changed several ways: through the MFP control panel, the software application in use, the print driver, MarkVision™ Professional, or Web pages. Settings changed from the application or print driver apply only to the job being sent to the MFP.
Changes made to print, fax, copy, and e-mail settings from an application override changes made from the...
User's Guide - Page 40
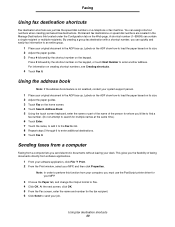
... load the paper based on its size. 2 Adjust the paper guides. 3 Touch Fax on the home screen. 4 Touch Search Address...faxing documents directly from software applications.
1 From your software application, click File Æ Print. 2 From the Print window, select your MFP, and then click Properties.
Note: In order to perform this function from your computer, you must use the PostScript printer driver...
User's Guide - Page 54
... or the
number of copies). 4 Click Properties or Setup to adjust MFP settings that were not available on the first screen, and then click OK. 5 Click OK or Print to send the job to the MFP.
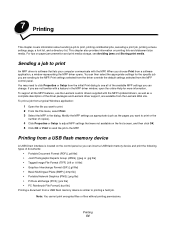
Printing from a USB flash memory device
A USB Direct interface is located on the control panel so you can insert a USB flash memory device and print the following...
User's Guide - Page 57
...-click Print Center or Printer Setup. 2 Double-click the MFP you are printing to. 3 In the printer window, select the print job you want to cancel, and then press Delete.
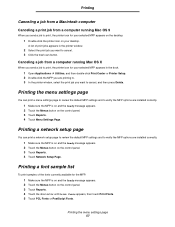
Printing the menu settings page
You can print a menu settings page to review the default MFP settings and to verify the MFP options are installed correctly. 1 Make sure...
User's Guide - Page 58
...USB flash memory device. When sending a job to the MFP, you can specify in the driver that you want the MFP to hold the job in memory. Once your job is stored in MFP memory, go to the MFP, and use the MFP control...Windows
1 From a word processor, spreadsheet, browser, or other application, select File Æ Print. 2 Click Properties. (If there is no Properties button, click Setup...driver instructions...
User's Guide - Page 60

...memory when the MFP requires extra memory to process additional held jobs.
Windows 1 From a word processor, spreadsheet, browser, or other application, select File Æ Print. 2 Click Properties. (If there is no Properties button, click Setup... Help, and see the topic Held Jobs or Print and Hold, then follow the driver instructions. 4 Select the type of held job you want, and then send your job ...
User's Guide - Page 61
... and Paper Size for help.
3 From the computer software application, set the paper type, size, and source according to the media you loaded. Windows
a From a word processor, spreadsheet, browser, or other application, select File Æ Print. b Click Properties (or Options, Printer, or Setup, depending on the application) to view the MFP driver settings. c Click the Paper tab.
A paper tray list...
User's Guide - Page 75
... and specialty media your MFP supports, see the Card Stock & Label Guide available on the Lexmark Web site at www.lexmark.com. We recommend that you...
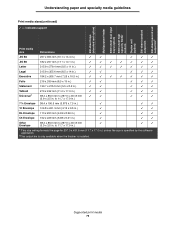
1 This size setting formats the page for 297.0 x 431.8 mm (11.7 x 17.0 in.) unless the size is specified by the software application.
2This output bin is only available when the finisher is installed.
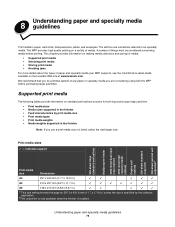
Understanding paper and specialty media ...
User's Guide - Page 76
...second exit output bin2
Understanding paper and specialty media guidelines
Print media sizes(continued) - indicates support
Print media size
Dimensions
JIS B4
257 x 364 mm (10.1 x 14.3 in.)
...setting formats the page for 297.0 x 431.8 mm (11.7 x 17.0 in.) unless the size is specified by the software application.
2This output bin is only available when the finisher is installed.
Supported...
User's Guide - Page 85
... using with the MFP before buying large quantities. See Loading the multipurpose feeder for instructions on loading envelopes. When printing on envelopes:
• To achieve the best possible print quality, use only high-quality envelopes that are designed for use in laser printers.
• Set the Paper Source in the Paper menu based on the...
User's Guide - Page 89
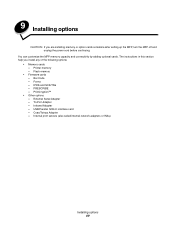
... options:
• Memory cards - Printer memory - Flash memory
• Firmware cards - Bar Code - Forms - IPDS and SCS/TNe - PRESCRIBE - PrintCryption™
• Other options - External Serial Adapter - Tri-Port Adapter - Infrared Adapter - USB/Parallel 1284-C interface card - Coax/Twinax Adapter - Internal print servers (also called internal network adapters or INAs)
Installing options 89
User's Guide - Page 91
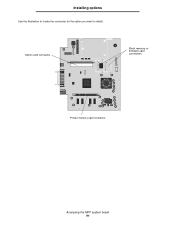
Installing options
Use the illustration to locate the connector for the option you want to install.
Option card connector
Flash memory or firmware card connectors
Printer memory card connector
Accessing the MFP system board 91
User's Guide - Page 93
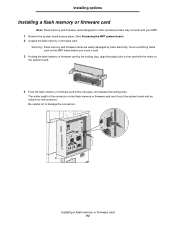
Installing options
Installing a flash memory or firmware card
Note: Flash memory and firmware cards designed for other Lexmark printers may not work with your MFP. 1 Remove the system board access panel. (See Accessing the MFP system board.) 2 Unpack the flash memory or firmware card.
Warning: Flash memory and firmware cards are easily damaged by static electricity. Touch something metal such as ...
User's Guide - Page 98
...Printer Settings Æ Finishing Menu
Duplex printing is available when you have a duplex unit. It lets you print on both sides of a sheet of paper.
Use your software application or MFP driver to send a Verify Print job.
Lets you examine the first copy of a multiple-copy... Photoconductor
Maintenance kit
80 Scheduled Maintenance appears on the display after 300,000 pages have printed to let you ...
User's Guide - Page 138
... for service.
The message USB
device unsupported appears when using a USB device.
The USB device you are using may not be supported or has an error. Only specific USB flash memory devices are supported.
For information regarding tested and approved USB flash memory devices, see Printing from a USB flash memory device.
Jobs do not print.
The MFP is not ready to Make sure Ready or Power Saver...
User's Guide - Page 141

... securely installed.
Flash memory
Make sure flash memory is securely connected to the MFP system board.
Internal print server
• Make sure the internal print server (also called an internal network adapter or INA) is securely connected to the MFP system board.
• Make sure you are using the correct cable, that it is securely connected, and the network software is correctly set...
User's Guide - Page 145
... service....settings in the Paper menu.
• Verify the correct print media is being used.
• Verify you are using the correct MFP drivers...setup cycle and clean the transfer roll.
Toner fog or background
• Check the toner cartridge to make sure it is installed correctly.
shading appears on the page. • The Toner Darkness setting may be too dark. Change the Toner Darkness setting...
User's Guide - Page 146
.... • Check the toner cartridge to be sure it is installed correctly. • The toner may be low. To utilize the...settings information.
• If you are using downloaded fonts, verify the fonts are supported by the MFP, the host computer, and the software application.
• Verify the print media type and print tray type settings match. • Verify you are using the correct MFP drivers...
User's Guide - Page 147
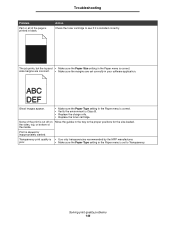
... Check the toner cartridge to see if it is installed correctly.
The job prints, but the top and • Make sure the Paper Size setting in the Paper menu is correct. side margins are incorrect. • Make sure the margins are set correctly in your software application.
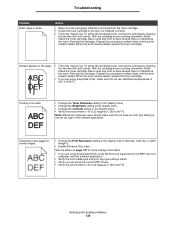
Ghost images appear.
• Make sure the...