Samsung DV36J4000EW/A3 driver and firmware
Drivers and firmware downloads for this Samsung item

Related Samsung DV36J4000EW/A3 Manual Pages
Download the free PDF manual for Samsung DV36J4000EW/A3 and other Samsung manuals at ManualOwl.com
User Manual - Page 2
... Location considerations 10 Alcove or closet installation 11 Mobile home installation 11 Exhausting 12 Gas requirements 13 Electrical requirements 13 Grounding 14 Electrical connections 15 Installation - General procedure 17 Final installation checklist 18 Dryer venting tips 19 Door reversal 20 Connecting the inlet hose
22 Overview of the control panel 24 Child lock 24 Sound Off...
User Manual - Page 3
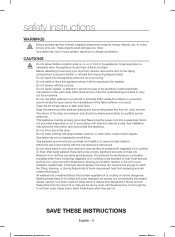
..., caution and care when installing, maintaining and operating your dryer. Because the following operating instructions cover various models, the characteristics of your dryer may differ slightly from those described in this manual and not all warning signs may be applicable. If you have any questions or concerns, contact your nearest service center or find help...
User Manual - Page 4
... moving. 8. Do not install or store this appliance where it will be exposed to the weather. 9. Do not tamper with internal controls. 10. Do not repair or replace any part of the appliance or attempt any service unless specifically recommended in the user-maintenance instructions or in published user repair instructions that you understand and...
User Manual - Page 5
...Control board and inlet valve are intentionally not grounded and may present a risk of electric shock only during servicing...must not be dried on a heat setting. Heated foam rubber materials can, ...phone. Follow the gas supplier's
instructions. • If you cannot reach your gas supplier, call the fire department. • Installation and service must be performed by a qualified installer, service...
User Manual - Page 6
... when the drum is moving. Do not install or store this appliance where it will be exposed to the weather. Do not tamper with the controls. Do not repair, replace, or attempt to service any part of the appliance unless specifically instructed to in the user-repair instructions and you have the understanding and skills...
User Manual - Page 7
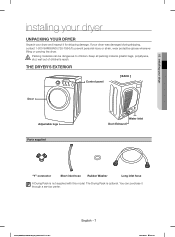
... damaged during shipping, contact 1-800-SAMSUNG (726-7864).To prevent personal injury or strain, wear protective gloves whenever lifting or carrying the dryer.
Packing materials can be dangerous to children. Keep all packing material (plastic bags, polystyrene, WARNING etc.) well out of children's reach.
THE DRYER'S EXTERIOR
Control panel
[ BACK ]
Door
Adjustable...
User Manual - Page 8
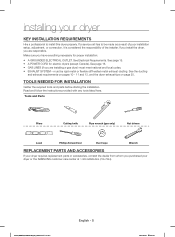
... properly. If a service call has to be made as a result of poor installation setup, adjustment, or connection, it is considered the responsibility of the installer. If you install the dryer, you are responsible. Make sure you have everything necessary for proper installation: • A GROUNDED ELECTRICAL OUTLET. See Electrical Requirements. See page 15. • A POWER CORD for electric...
User Manual - Page 9
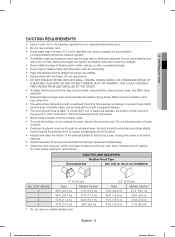
...hood opening should point down. • Never install a screen over the exhaust outlet. • To avoid lint buildup, do not exhaust the dryer directly into a window well. Do not exhaust under a house or...8226; Inspect and clean the interior of the exhaust system at least once a year. Unplug the power cord before cleaning. • Check frequently to be sure the exhaust hood damper opens and closes...
User Manual - Page 10
... the point where the exhaust duct connects to the dryer. A no-heat setting should be used. The dryer tumbler should be empty and the lint filter clean.
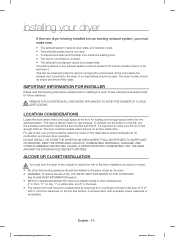
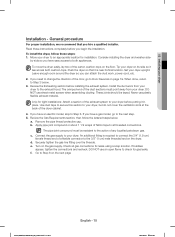
IMPORTANT INFORMATION FOR INSTALLER
Please read the following instructions carefully before installing the dryer. These instructions should be kept for future reference.
REMOVE THE DOOR FROM ALL DISCARDED...
User Manual - Page 11
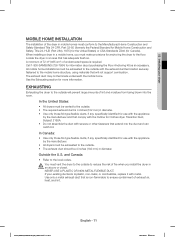
... unobstructed space is required. Call 1-800-SAMSUNG (726-7864) for information about purchasing the Floor Anchoring Kit as an accessory. All mobile home installations must be exhausted to the outside with the exhaust duct termination securely fastened to the mobile home structure, using materials that will not support combustion. The exhaust duct may not terminate...
User Manual - Page 12
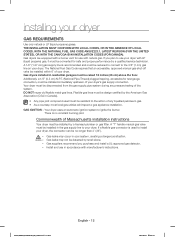
...service technician. A 1/2" (1.27 cm) gas supply line is recommended and must be reduced to connect to the 3/8" (1 cm) gas line on your dryer. The National Fuel Gas Code requires that an accessible, approved manual gas shut-off valve be installed... installation instructions
Your dryer must be installed by a licensed plumber or gas fitter. A "T" handle manual gas valve must be installed in...
User Manual - Page 13
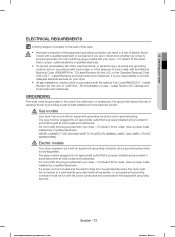
...Revisions and local codes and ordinances. It is your responsibility to provide adequate electrical services for your dryer.
All gas installations must be done in accordance with the national Fuel Code ANSI/Z2231 - Latest...your dryer - if it doesn't fit the outlet, have a proper outlet installed by a qualified electrician. If a power cord is not used and the electric dryer is to be permanently wired,...
User Manual - Page 14
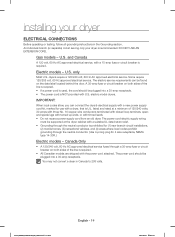
..., or with tinned leads. • Do not reuse a power supply cord from an old dryer. The power cord electric supply wiring
must be supported at the dryer cabinet with a suitable UL-listed strain relief. • Grounding through the neutral conductor is prohibited for (1) new branch-circuit installations,
(2) mobile homes, (3) recreational vehicles, and (4) areas where local...
User Manual - Page 15
... it lies across both cushion-tops. Push the dryer so that it is near its final location. Set your dryer upright. Leave enough room around the dryer so you can attach the duct work, power cord, etc.
2. If you need to change the direction of the door, go to Door Reversal on...
User Manual - Page 16
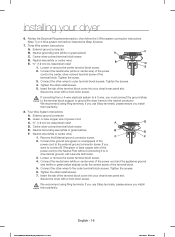
...support to ground the dryer frame to the neutral conductor.
We recommend using Ring terminals. If you use Strap terminals, please ensure you install them perfectly.
8. Four Wire System instructions: A. External ground connector B. Green or bare copper wire of power... wire of the power cord) to the Neutral Post without connecting it to A (the cabinet ground), call a service technician. 3. Loosen...
User Manual - Page 17
...instructions for 3- and 4-WIRE SYSTEM CONNECTIONS:
Remove the terminal block cover plate. Insert the power cord with a UL-listed strain relief through the hole provided in the cabinet near the terminal block.
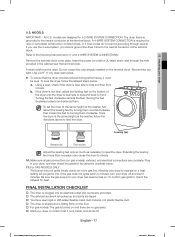
A strain relief must be used. Do not loosen the nuts already installed... Turning the feet clockwise loosens and extends them.
Level
To set the dryer to the same height as the washer, fully ...
User Manual - Page 18
...or non-metal flexible duct presents a potential fire hazard.
WARNING
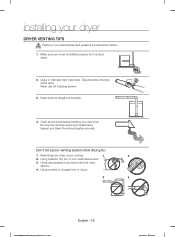
1. Make sure your dryer is installed properly so it vents air easily.
2. Use a 4" diameter rigid metal duct. Tape all... Never use lint-trapping screws.
3. Keep ducts as straight as possible.
4. Clean all old ducts before installing your new dryer. Be sure the vent flap opens and closes freely. Inspect and clean the exhaust system ...
User Manual - Page 19
02 installing your dryer
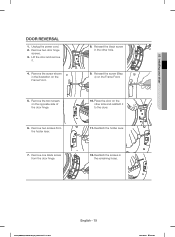
DOOR REVERSAL
1. Unplug the power cord. 2. Remove two door hinge
screws. 3. Lift the door and remove
it.
4. Remove the screw shown in the illustration on the Frame Front.
5. Remove the ...
User Manual - Page 20
installing your dryer
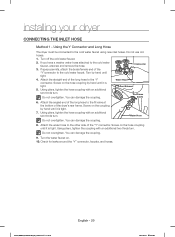
CONNECTING THE INLET HOSE
Method 1 - Using the Y Connector and Long Hose
The dryer must be connected to the cold water faucet using new ...
User Manual - Page 21
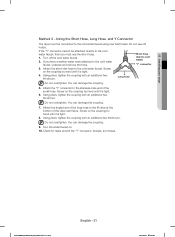
02 installing your dryer
Method 2 - Using the Short Hose, Long Hose, and Y Connector
The dryer must be connected to the cold water faucet using new inlet hoses. ...