Samsung DV52J8700EP/A2 driver and firmware
Drivers and firmware downloads for this Samsung item
Related Samsung DV52J8700EP/A2 Manual Pages
Download the free PDF manual for Samsung DV52J8700EP/A2 and other Samsung manuals at ManualOwl.com
User Manual - Page 2
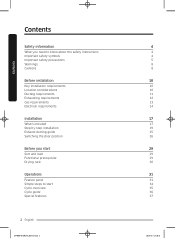
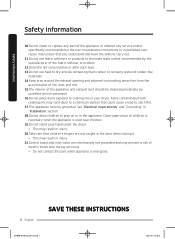
... safety instructions Important safety symbols Important safety precautions Warnings Cautions
Before installation
Key installation requirements Location considerations Ducting requirements Exhausting requirements Gas requirements Electrical requirements
Installation
What's included Step-by-step installation Exhaust ducting guide Switching the door position
Before you start
Sort and load Functional...
User Manual - Page 4
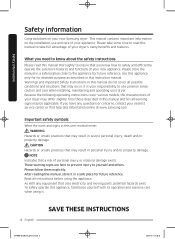
..., caution and care when installing, maintaining and operating your dryer. Because the following operating instructions cover various models, the characteristics of your dryer may differ slightly from those described in this manual and not all warning signs may be applicable. If you have any questions or concerns, contact your nearest service center or find help...
User Manual - Page 5
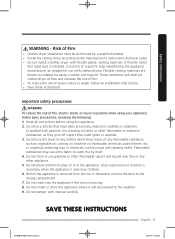
.... 6. Before the appliance is removed from service or discarded, remove the door to the drying compartment. 7. Do not reach into the appliance if the drum is moving. 8. Do not install or store this appliance where it will be exposed to the weather. 9. Do not tamper with internal controls.
SAVE THESE INSTRUCTIONS
English 5
%7+4@&/64JOEE
User Manual - Page 6
...attempt any service unless specifically recommended in the user-maintenance instructions or in published userrepair instructions that ... a load to catch fire. 17.This appliance must be grounded. See "Electrical requirements" and "Grounding" in
"Installation" section... 21.Control board and inlet valve are intentionally not grounded and may present a risk of
electric shock only during servicing. •...
User Manual - Page 7
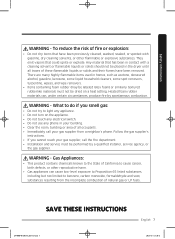
... foam) or similarly textured rubberlike materials must not be dried on a heat setting. Heated foam rubber materials can, under certain circumstances, produce fire by spontaneous...neighbor's phone. Follow the gas supplier's
instructions. • If you cannot reach your gas supplier, call the fire department. • Installation and service must be performed by a qualified installer, service agency,...
User Manual - Page 8
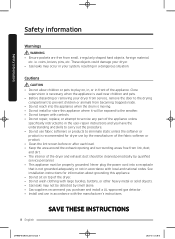
...install or store this appliance where it will be exposed to the weather. • Do not tamper with controls. • Do not repair, replace, or attempt to service any part of the appliance unless
specifically instructed to in the user-repair instructions... or product. • Clean the lint screen before or after each load. • Keep the area around the exhaust opening and surrounding areas free...
User Manual - Page 10
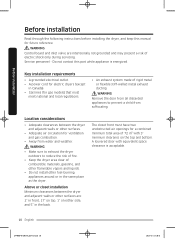
...the following instructions before installing the dryer, and keep this manual for future reference.
WARNING Control board and inlet valve are intentionally not grounded and may present a risk of electric shock only during servicing. Service personnel - Do not contact this part while appliance is energized.
Key installation requirements
• A grounded electrical outlet. • A power cord for...
User Manual - Page 11
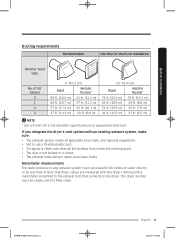
... requirements
Recommended
Use only for short-run installation
Weather hood type
No. of 90° elbows 0 1 2 3
4" (10.2 cm)
Rigid
Metallic flexible*
80 ft. (24.4 m) 41 ft. (12.4 m)
68 ft. (20.7 m) 37 ft. (11.2 m)
...
User Manual - Page 12
...required exhaust duct is 4 inches
(10.2 cm) in diameter. • See "Ducting requirements" in the
"Installation" section for the maximum duct length and number of bends that can be used. • The total length ...WARNING
• You must exhaust the dryer to the outside to reduce the risk of fire when you install the dryer in an alcove or closet.
• Do not use a plastic or non-metal flexible ...
User Manual - Page 13
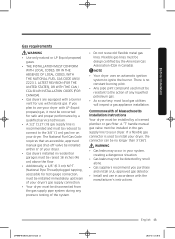
...liquid propane) gas, it must be converted for safe and proper performance by a qualified service technician.
• A 1/2" (1.27 cm) gas supply line is recommended and must... inspect a gas appliance installation.
Commonwealth of Massachusetts installation instructions Your dryer must be installed by a licensed plumber or gas fitter. A "T" handle manual gas valve must be installed in the gas supply ...
User Manual - Page 14

Before installation
Before installation
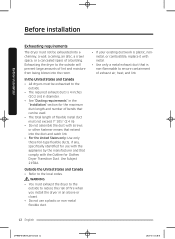
Electrical requirements
The wiring diagram is located on the plate under the control panel or rear frame.
WARNING
•... Revisions and local codes and ordinances. It is your responsibility to provide adequate electrical service for your dryer.
• All gas installations must be done in accordance with the national Fuel Code ANSI/Z2231 - Latest Revision...
User Manual - Page 15

... all grounding instructions in the ...service. Some require 120 / 208 volt, 60 Hz approved electrical service. The electric service...power supply cord from
an old dryer. The power cord electric supply wiring must be supported at the dryer cabinet by a suitable UL-listed strain relief. • Grounding through the neutral conductor is prohibited for (1) new branch-circuit installations, (2) mobile...
User Manual - Page 16
Before installation
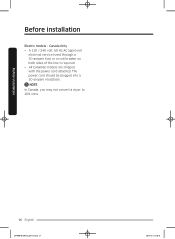
Electric models - Canada Only • A 120 / 240 volt, 60 Hz AC approved
electrical service fused through a 30-ampere fuse or circuit breaker on both sides of the line is required. • All Canadian models are shipped with the power cord attached. The power cord should be plugged into a 30-ampere receptacle. NOTE In...
User Manual - Page 17
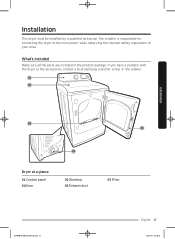
... main power while observing the relevant safety regulations of your area.
What's included
Make sure all the parts are included in the product package. If you have a problem with the dryer or the accessories, contact a local Samsung customer center or the retailer.
01
02
Installation
03 04
05
Dryer at a glance 01 Control panel...
User Manual - Page 18
Installation
Installation
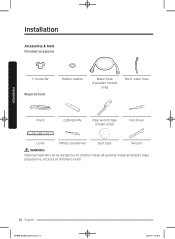
Accessories & tools Provided accessories
Y connector Required tools
Rubber washer
Water hose (Canadian models
only)
Short water hose
Pliers
Cutting knife
Pipe wrench (gas models only)
Nut driver
Level
Philips screwdriver
Duct tape
Wrench
WARNING Packing materials can be dangerous to children. Keep all packing materials (plastic bags, polystyrene, etc.) out ...
User Manual - Page 19
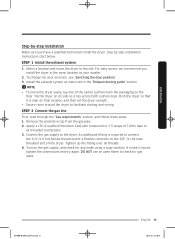
... the door position". 3. Install the exhaust system as instructed in the "Exhaust ducting guide" section.
NOTE •... To move the dryer easily, lay two of the carton cushion-from the packaging on the
floor. Tip the dryer on its side so it lies across both cushion-tops. Push the dryer so that it is near its final location, and then set...
User Manual - Page 20
Installation
Installation
STEP 3 Connect the electrical wiring
First, read through the "Electrical requirements" section, and follow these steps.
3-wire system
1. Loosen or remove the center terminal
C
block.
A
2. Connect the neutral wire (white or
center wire) of the power cable..., connect the ground strap to the terminal block support to ground the dryer frame to the neutral conductor...
User Manual - Page 21
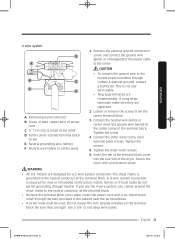
...) of the power cable to the screw.
CAUTION
• To connect the ground wire to the neutral position without through contact A (cabinet ground), contact a technician. This is not user serviceable.
• Ring... the terminal block. A 4-wire system connection is required for new or remodeled construction, mobile homes, or if local codes do not permit grounding through neutral. If you use the...
User Manual - Page 22
Installation
Installation
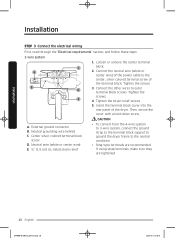
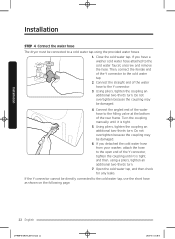
STEP 4 Connect the water hose
The dryer must be connected to a cold water tap using the provided water hoses. ....
4. Connect the angled end of the water hose to the filling valve at the bottom of the rear frame. Turn the coupling manually until it is tight.
5. Using pliers, tighten the coupling an additional two-thirds turn. Do not overtighten because the coupling may be...
User Manual - Page 38
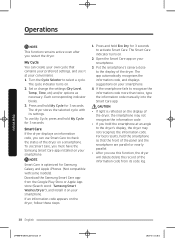
... cycle with its settings. To use My Cycle, press and hold My Cycle for 3 seconds.
Smart Care If the dryer displays an information code, you can use Smart Care to check the status of the dryer on a smartphone. To use Smart Care, you must have the Samsung Smart Care app installed on your smartphone...