Sony DSC-TX9 - Cyber-shot Digital Still Camera driver and firmware
Drivers and firmware downloads for this Sony item
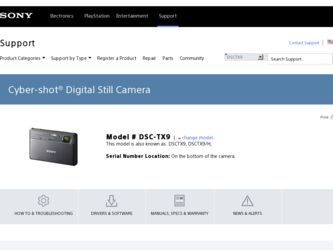
Related Sony DSC-TX9 Manual Pages
Download the free PDF manual for Sony DSC-TX9 and other Sony manuals at ManualOwl.com
How to take great birthday photos. - Page 1
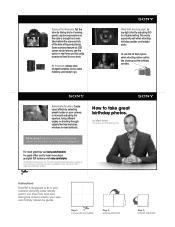
..., start by adjusting ISO to a higher setting.This works especially well when shooting birthday candles and twilight shots.
Or use the fill flash option when shooting indoor action like blowing out the birthday candles.
Add Artistic Touches. Create visual effects by selecting preset modes on your camera, or manually adjusting the aperture, trying different angles...
Cyber-shot® Handbook - Page 3

...Operation Search
MENU/Settings Search
Index
Notes on the types of memory cards that you can use (sold separately)
The following memory cards are compatible with this camera: "Memory Stick PRO Duo" media, "Memory Stick PRO-HG Duo"
media, "Memory Stick Duo" media, SD
memory card, SDHC memory card and
SDXC memory card.
MultiMediaCard cannot be used.
In this manual, the term "Memory Stick Duo...
Cyber-shot® Handbook - Page 4
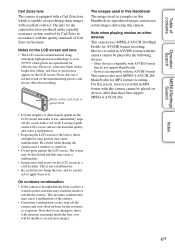
...shot using this camera.
Note when playing movies on other devices
This camera uses MPEG-4 AVC/H.264 High Profile for AVCHD format recording. Movies recorded in AVCHD format with this camera cannot be played by the following devices. - Other devices compatible with AVCHD format
that do not support High Profile - Devices.... Be careful when placing the camera near a window or outdoors.
• Do not...
Cyber-shot® Handbook - Page 7

Table of contents
Operation Search
MENU/Settings Search
TV
Viewing an image on a Standard Definition (SD) TV 146
Viewing an image on a High Definition (HD) TV 147
Viewing an image on a "BRAVIA" Sync-compatible TV 150
Computer
Using with your computer 152 Using the software 153 Connecting the camera to a computer 155 Uploading images to a media service 157 Creating a disc of movies...
Cyber-shot® Handbook - Page 92
... their audio.
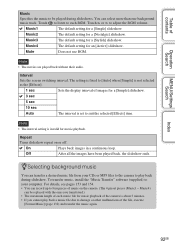
Interval
Sets the screen switching interval. The setting is fixed to [Auto] when [Simple] is not selected as the [Effects].
1 sec
Sets the display interval of...camera to play back during slideshow. To transfer music, install the "Music Transfer" software (supplied) to your computer. For details, see pages 153 and 154. • You can record up to four pieces of music on the camera...
Cyber-shot® Handbook - Page 129
...device using the USB cable.
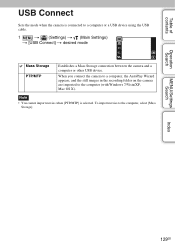
1
t (Settings) t (Main Settings)
t [USB Connect] t desired mode
Mass Storage PTP/MTP
Establishes a Mass Storage connection between the camera and a computer or other USB device.
When you connect the camera to a computer, the AutoPlay Wizard appears, and the still images in the recording folder on the camera are imported to the computer (with Windows 7/Vista/XP, Mac...
Cyber-shot® Handbook - Page 136
.... • If the (error) icon is displayed, eject and re-insert the Eye-Fi card, or turn the power of the camera
off and on again. If the (error) icon is still displayed, the Eye-Fi card may be corrupted. For details, contact Eye-Fi, Inc. • Wireless LAN communication may be interrupted by the other communication devices. If data reception is...
Cyber-shot® Handbook - Page 152
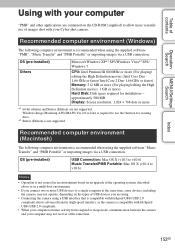
... CD-ROM (supplied) to allow more versatile use of images shot with your Cyber-shot camera.
Recommended computer environment (Windows)
The following computer environment is recommended when using the supplied software "PMB", "Music Transfer" and "PMB Portable" or importing images via a USB connection.
OS (pre-installed) Others
Microsoft Windows XP*1 SP3/Windows Vista*2 SP2/ Windows 7
CPU: Intel...
Cyber-shot® Handbook - Page 153
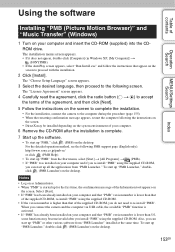
... the camera and the computer via USB cable, the available "PMB" function is activated. • If "PMB" has already been installed on your computer and that "PMB" version number is lower than 5.0, some functions may become invalid after you install "PMB" using the supplied CD-ROM. Also, you can start up "PMB" or other various software from "PMB Launcher" installed at...
Cyber-shot® Handbook - Page 154
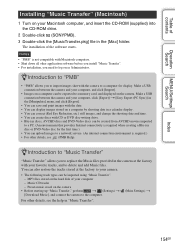
... software before you install "Music Transfer". • For installation, you need to log on as Administrator.
zIntroduction to "PMB"
• "PMB" allows you to import images shot with the camera to a computer for display. Make a USB connection between the camera and your computer, and click [Import].
• Images on a computer can be exported to a memory card, and displayed on the camera...
Cyber-shot® Handbook - Page 156
... is displayed.
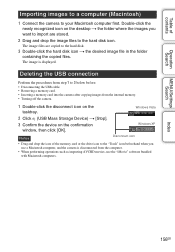
Deleting the USB connection
Perform the procedures from step 1 to 3 below before: • Disconnecting the USB cable. • Removing a memory card. • Inserting a memory card into the camera after copying images from the internal memory. • Turning off the camera.
1 Double-click the disconnect icon on the tasktray.
Windows Vista
2 Click (USB Mass Storage Device...
Cyber-shot® Handbook - Page 158

...; "PMB Portable" is not supported for AVCHD movies. • Set [LUN Settings] in [Main Settings] to [Multi]. • Always connect to a network when using "PMB Portable". • When uploading images over the Internet, the cache may remain in the computer being used depending
on the service provider. This is also true when this camera is used for this purpose...
Cyber-shot® Handbook - Page 159
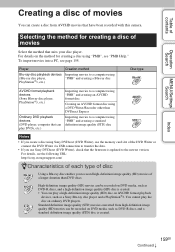
...) disc
Notes
• If you create a disc using Sony DVDirect (DVD Writer), use the memory card slot of the DVD Writer or connect the DVD Writer via USB connection to transfer the data.
• If you use Sony DVDirect (DVD Writer), check that the firmware is updated to the newest version. For details, see the following URL: http...
Cyber-shot® Handbook - Page 160
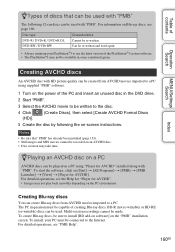
... instructions.
Notes
• Be sure that "PMB" has already been installed (page 153). • Still images and MP4 movies cannot be recorded on an AVCHD disc. • Disc creation may take time.
zPlaying an AVCHD disc on a PC
AVCHD discs can be played on a PC using "Player for AVCHD" installed along with "PMB". To start the software...
Cyber-shot® Handbook - Page 161
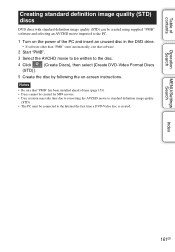
... unused disc in the DVD drive.
• If software other than "PMB" starts automatically, exit that software.
2 Start "PMB".
3 Select the AVCHD movie to be written to the disc.
4 Click (STD)].
(Create Discs), then select [Create DVD-Video Format Discs
5 Create the disc by following the on-screen instructions.
Notes
• Be sure that...
Cyber-shot® Handbook - Page 187
... Recommended environment 152 Windows computer 152 Connecting Computer 155 TV 146
Copy 142 Create REC.Folder 139 Creating a disc 159 CTRL FOR HDMI 126 Customize 23
D
Date & Time Setting 145 Defocus Effect 66 Delete 93 Delete REC.Folder 141 Demo Mode 123 Digital Zoom 114 Display Burst Group 102 Display color 122 Display Settings
Shooting 86 Viewing 107 Download Music 131 DPOF...
Cyber-shot® Handbook - Page 189
... Twilight Portrait 36
U
Underwater 37 Underwater iSweep Panorama 39 Underwater White Balance 76 Unsharp masking 99 USB Connect 129 USB jack 155 Using the camera abroad 176
V
VGA 67 View Mode 101 Viewing burst images 45 Volume Settings 106
W
Warning indicators and messages 171 White Balance 74 Wide Zoom 43 Windows computer 152
Z
Zoom 40
Index
189GB
Cyber-shot® Handbook - Page 190
... (in English) of "GPL", and "LGPL" software. To view the PDF, Adobe Reader is needed. If it is not installed on your computer, you can download it from the Adobe Systems web page: http://www.adobe.com/
On the license of "Music Transfer" in the CD-ROM (supplied)
MPEG Layer-3 audio coding technology and patents licensed from...
Instruction Manual - Page 11
... that other equipment will play back images recorded with the camera.
Importing AVCHD movies into a computer When importing movies recorded in AVCHD format into a computer, for Windows use the "PMB" software on the CD-ROM (supplied) or for Macintosh use the "iMovie" software bundled with Macintosh computers.
Notes when playing movies on other devices • This camera uses MPEG-4 AVC/H.264 High...
Instruction Manual - Page 24
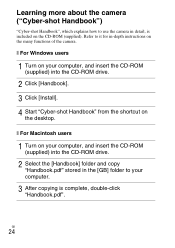
... instructions on the many functions of the camera.
x For Windows users
1 Turn on your computer, and insert the CD-ROM
(supplied) into the CD-ROM drive.
2 Click [Handbook]. 3 Click [Install]. 4 Start "Cyber-shot Handbook" from the shortcut on
the desktop.
x For Macintosh users
1 Turn on your computer, and insert the CD-ROM
(supplied) into the CD-ROM drive.
2 Select the [Handbook] folder and copy...