Sony NEX-5TL driver and firmware
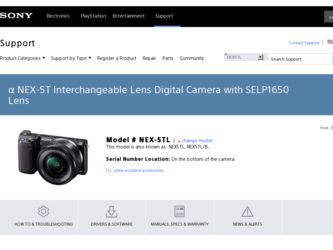
Related Sony NEX-5TL Manual Pages
Download the free PDF manual for Sony NEX-5TL and other Sony manuals at ManualOwl.com
Instruction Manual - Page 4
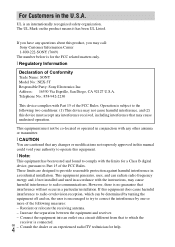
... any questions about this product, you may call: Sony Customer Information Center 1-800-222-SONY (7669)
The number below is for the FCC related matters only.
[ Regulatory Information
Declaration of Conformity Trade Name: SONY Model No.: NEX-5T Responsible Party: Sony Electronics Inc. Address: 16530 Via Esprillo, San Diego, CA 92127 U.S.A. Telephone No.: 858-942-2230
This device...
Instruction Manual - Page 8
...
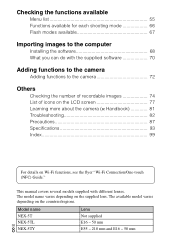
Menu list 55 Functions available for each shooting mode 66 Flash modes available 67
Importing images to the computer
Installing the software 68 What you can do with the supplied software 70
Adding functions to the camera
Adding functions to the camera 72
Others
Checking the number of recordable images 74 List of icons on the LCD screen...
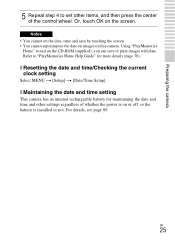
Instruction Manual - Page 9
... one that matches your country/region.
• Rechargeable battery pack NP-FW50 (1)
• Flash HVL-F7S (1)/Flash case (1)
• CD-ROM (1) - Application Software for α camera - α Handbook
• Instruction Manual (This manual) (1)
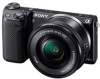
x NEX-5T
• Body cap (1) (attached to the camera)
• Micro USB cable (1)
x NEX-5TL
• E16 - 50 mm zoom lens (1) (attached to the...
Instruction Manual - Page 25
... Help Guide" for more details (page 70).
x Resetting the date and time/Checking the current clock setting
Select MENU t [Setup] t [Date/Time Setup].
x Maintaining the date and time setting
This camera has an internal rechargeable battery for maintaining the date and time and other settings regardless of whether the power is on or off, or the battery is installed...
Instruction Manual - Page 32
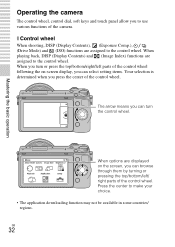
..., DISP (Display Contents), (Exposure Comp.), (Drive Mode) and (ISO) functions are assigned to the control wheel. When playing back, DISP (Display Contents) and (Image Index) functions are assigned to the control wheel. When you turn or press the top/bottom/right/left parts of the control wheel following the on-screen display, you can select setting items. Your...
Instruction Manual - Page 55
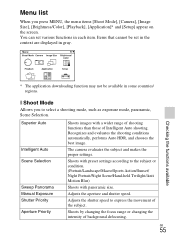
... you press MENU, the menu items [Shoot Mode], [Camera], [Image Size], [Brightness/Color], [Playback], [Application]* and [Setup] appear on the screen. You can set various functions in each item. Items that cannot be set in the context are displayed in gray.
Checking the functions available
* The application downloading function may not be available in some countries...
Instruction Manual - Page 60
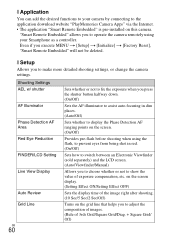
...Internet. • The application "Smart Remote Embedded" is pre-installed on this camera.
"Smart Remote Embedded" allows you to operate the camera remotely using your Smartphone as a controller. Even if you execute MENU t [Setup] t [Initialize] t [Factory Reset], "Smart Remote Embedded" will not be deleted.
x Setup
Allows you to make more detailed shooting settings, or change the camera settings...
Instruction Manual - Page 63
... the functions available
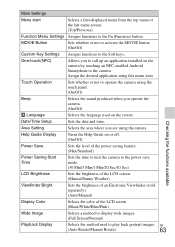
Date/Time Setup
Sets the date and time.
Area Setting
Selects the area where you are using the camera.
Help Guide Display
Turns the Help Guide on or off. (On/Off)
Power Save
Sets the level of the power saving feature. (Max/Standard)
Power Saving Start Time
Sets the time to turn the camera to the power save mode. (30 Min...
Instruction Manual - Page 68
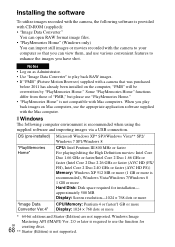
...or more is recommended), Windows Vista/Windows 7/Windows 8 1 GB or more Hard Disk: Disk space required for installation- approximately 500 MB Display: Screen resolution-1024 × 768 dots or more
"Image Data
CPU/Memory: Pentium 4 or faster/1 GB or more
Converter Ver.4" Display: 1024 × 768 dots or more
* 64-bit editions and Starter (Edition) are not supported. Windows Image
Mastering API...
Instruction Manual - Page 69
... Home Help Guide"
Importing images to the computer
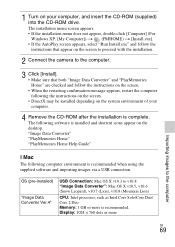
x Mac
The following computer environment is recommended when using the supplied software and importing images via a USB connection.
OS (pre-installed)
"Image Data Converter Ver.4"
USB Connection: Mac OS X v10.3 to v10.8 "Image Data Converter": Mac OS X v10.5, v10.6 (Snow Leopard), v10.7 (Lion), v10.8 (Mountain Lion)
CPU: Intel processor, such...
Instruction Manual - Page 70
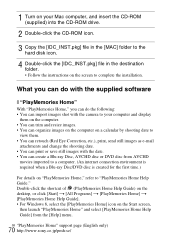
... Mac computer, and insert the CD-ROM (supplied) into the CD-ROM drive.
2 Double-click the CD-ROM icon.
3 Copy the [IDC_INST.pkg] file in the [MAC] folder to the hard disk icon.
4 Double-click the [IDC_INST.pkg] file in the destination folder. • Follow the instructions on the screen to complete the installation.
What you can do with the supplied software...
Instruction Manual - Page 71
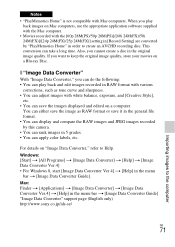
Notes
• "PlayMemories Home" is not compatible with Mac computers. When you play back images on Mac computers, use the appropriate application software supplied with the Mac computer.
• Movies recorded with the [60p 28M(PS)/50p 28M(PS)]/[60i 24M(FX)/50i 24M(FX)]/[24p 24M(FX)/25p 24M(FX)] setting in [Record Setting] are converted by "PlayMemories Home" in order...
Instruction Manual - Page 72
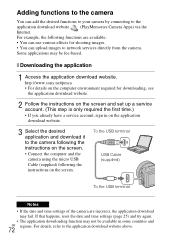
...a service account, sign in on the application download website.
3 Select the desired application and download it to the camera following the instructions on the screen.
• Connect the computer and the camera using the micro USB Cable (supplied) following the instructions on the screen.
To the USB terminal
USB Cable (supplied)
To the USB terminal
Notes
• If the date and time settings...
Instruction Manual - Page 73
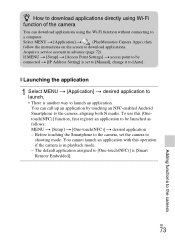
... using the Wi-Fi function without connecting to
a computer.
Select MENU t [Application] t
(PlayMemories Camera Apps), then
follow the instructions on the screen to download applications.
Acquire a service account in advance (page 72).
If MENU t [Setup] t [Access Point Settings] t access point to be
connected t [IP Address Setting] is set to [Manual], change it to [Auto].
x Launching the...
Instruction Manual - Page 81
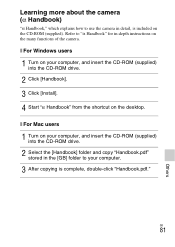
... instructions on the many functions of the camera.
x For Windows users
1 Turn on your computer, and insert the CD-ROM (supplied) into the CD-ROM drive.
2 Click [Handbook]. 3 Click [Install]. 4 Start "α Handbook" from the shortcut on the desktop.
x For Mac users
1 Turn on your computer, and insert the CD-ROM (supplied) into the CD-ROM drive.
2 Select the [Handbook] folder and copy "Handbook...
Instruction Manual - Page 82
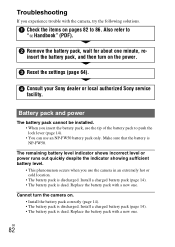
... experience trouble with the camera, try the following solutions.
1 Check the items on pages 82 to 86. Also refer to
"α Handbook" (PDF).
2 Remove the battery pack, wait for about one minute, re-
insert the battery pack, and then turn on the power.
3 Reset the settings (page 64).
4 Consult your Sony dealer or local authorized Sony service...
Instruction Manual - Page 89
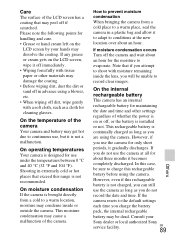
... remaining inside the lens, you will be unable to record clear images.
On the internal
rechargeable battery
This camera has an internal
rechargeable battery for maintaining
the date and time and other settings
regardless of whether the power is
on or off, or the battery is installed
or not. This rechargeable battery is
continually charged...
Instruction Manual - Page 91
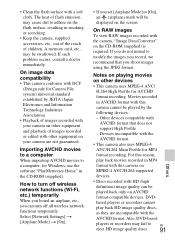
... on your camera are not guaranteed.
Importing AVCHD movies to a computer When importing AVCHD movies to a computer, for Windows, use the software "PlayMemories Home" in the CD-ROM (supplied).
How to turn off wireless network functions (Wi-Fi, etc.) temporarily When you board an airplane, etc., you can turn off all wireless network functions temporarily. Select [Network Settings] t [Airplane Mode...
Instruction Manual - Page 97
... or registered trademarks of Intel Corporation.
• Android is a registered trademark of Google Inc.
• Wi-Fi, the Wi-Fi logo, Wi-Fi PROTECTED SET-UP are trademarks or registered trademarks of the Wi-Fi Alliance.
• DLNA and DLNA CERTIFIED are trademarks of Digital Living Network Alliance.
• The N mark is a trademark or...
Instruction Manual - Page 101
... Panorama 46
T
Touch Operation 34, 63 Touch panel 34 Touch Shutter 27, 56 Tracking Focus 56
U
Upload Settings 65 USB Connection 64
V
Version 64 View mode 59 View on TV (HDMI cable
compatible TV 54 View on TV (Network compatible
TV 59 Viewfinder Bright 63 Volume Settings 59
W
White Balance 58 Wide Image 63 Wi-Fi 8, 65 Wind Noise Reduct 62...