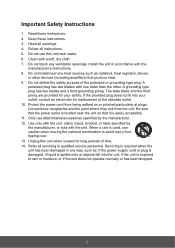
ViewSonic Pro8800WUL driver and firmware
Drivers and firmware downloads for this ViewSonic item
Related ViewSonic Pro8800WUL Manual Pages
Download the free PDF manual for ViewSonic Pro8800WUL and other ViewSonic manuals at ManualOwl.com
vController User Guide English - Page 3
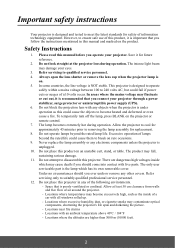
...1. Hardware settings
1.1 RS232C connections 1 1.2 Software installation 1
2. User interface
2.1 Start Up 2
2.1.1 Select Device 2 2.1.2 RS232 settings 3 2.1.3 Network settings 4 2.1.4 Start 5
2.2. Setting 7
2.2.1. Setting / Getting buttons 7 2.2.2 Monitor Setting 8 2.2.3 Projector Setting 14
2.3 Schedule 18
3. Command Mode 4. Language 5. About 6. Other Information
Customer Support 22
i
vController User Guide English - Page 4
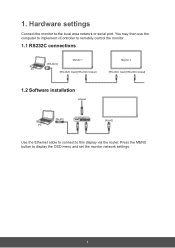
1. Hardware settings
Connect the monitor to the local area network or serial port. You may then use the computer to implement vController to remotely control the monitor.
1.1 RS232C connections
[RS-232C]
Monitor 1
Monitor 2
PC
[RS-232C Input] [RS-232C Output]
[RS-232C Input] [RS-232C Output]
1.2 Software installation
Internet
[RJ-45] PC
ROUTER
[RJ-45]
Use the Ethernet cable to connect ...
vController User Guide English - Page 9
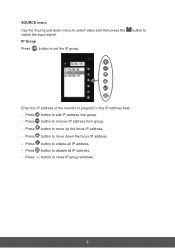
... then press the switch the input signal. IP Group
Press button to set the IP group.
button to
Enter the IP address of the monitor or projector in the IP address field. - Press button to add IP address into group. - Press button to remove IP address from group.
- Press button to move up the focus IP...
vController User Guide English - Page 21
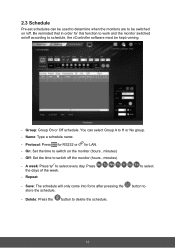
... software must be kept running.
- Group: Group On or Off schedule. You can select Group A to H or No group. - Name: Type a schedule name.
- Protocol: Press for RS232 or for LAN. - On: Set the... time to switch on the monitor (hours , minutes) - Off: Set the time to switch off the monitor (hours , minutes)
- A week:...
vController User Guide English - Page 24
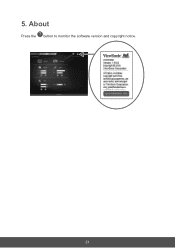
5. About
Press the button to monitor the software version and copyright notice.
21
PRO8800WUL User Guide English - Page 1
Pro8510L/Pro8520WL/Pro8530HDL/ Pro8800WUL DLP Projector
User Guide
IMPORTANT: Please read this User Guide to obtain important information on installing and using your product in a safe manner, as well as registering your product for future service. Warranty information contained in this User Guide will describe your limited coverage from ViewSonic Corporation, which is also found on our web site...
PRO8800WUL User Guide English - Page 2
... undesired operation. This equipment has been tested and found to comply with the limits for a Class B digital device, pursuant to part 15 of the FCC Rules. These limits are designed to provide reasonable protection against harmful interference in a residential installation. This equipment generates, uses, and can radiate radio frequency energy, and if not...
PRO8800WUL User Guide English - Page 3
... a soft, dry cloth. 7. Do not block any ventilation openings. Install the unit in accordance with the
manufacturer's instructions. 8. Do not install near any heat sources such as radiators, heat registers, stoves,
RU...outlet, consult an electrician for replacement of the obsolete outlet. 10. Protect the power cord from being walked on or pinched particularly at plugs. Convenience receptacles and the...
PRO8800WUL User Guide English - Page 5
... you for future customer service needs. Please print this user guide and fill the information in the "For Your Records" section. For additional information, please see the "Customer Support" section in this guide.
Product Name:
Model Number: Document Number:
Serial Number: Purchase Date:
For Your Records
Pro8510L/Pro8520WL/Pro8530HDL/Pro8800WUL ViewSonic DLP Projector VS16369/VS16370/ VS16371...
PRO8800WUL User Guide English - Page 6
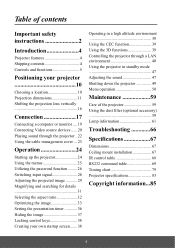
... safety instructions 2
Introduction 4
Projector features 4 Shipping contents 4 Controls and functions 5
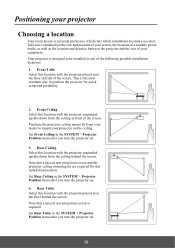
Positioning your projector 10
Choosing a location 10 Projection dimensions 11 Shifting the projection lens vertically 16
Connection 17
Connecting a computer or monitor .... 19 Connecting Video source devices ...... 20 Playing sound through the projector .. 22 Using the cable management...
PRO8800WUL User Guide English - Page 7
... your projector through a power stabilizer, surge protector or uninterruptible power supply (UPS). 6. Do not block the projection lens with any objects when the projector is under operation as this could cause the objects to become heated and deformed or even cause a fire. To temporarily turn off the lamp, press BLANK on the projector or remote control. 7. The...
PRO8800WUL User Guide English - Page 8
... become wet, disconnect it from the power supply's wall socket and call your local service center to have the projector serviced.
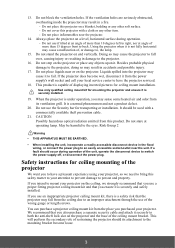
18. This product is capable of displaying inverted pictures for ceiling mount installation.
Use only qualified ceiling mount kit for mounting the projector and ensure it is securely installed.
19. When the projector is under operation, you may...
PRO8800WUL User Guide English - Page 12
...
modes.
the remote control, and the ...is
activated.
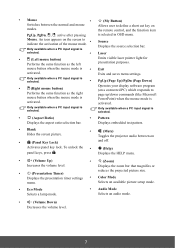
Operates your display software program (on a ...Displays the zoom bar that magnifies or
•
(Presentation Timer)
reduces the projected picture size.
Displays the presentation timer settings • Color Mode
menu.
Selects an available picture setup mode.
• Eco Mode Selects a lamp mode.
• Audio Mode Selects an audio...
PRO8800WUL User Guide English - Page 13
...switched to 8, the remote control can control every projector.
If different codes are set on the projector and remote control, there will be no response from the remote control. When that happens, a message will display to remind you to switch the code for the remote control.
Using the remote mouse control
The capability of operating your computer with the remote control gives you more flexibility...
PRO8800WUL User Guide English - Page 14
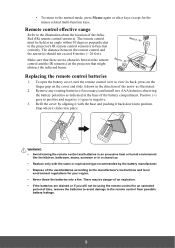
... range
Refer to the illustration about the location of the InfraRed (IR) remote control sensor(s). The remote control must be held at an angle within 30 degrees perpendicular to the projector's IR remote control sensor(s) to function correctly. The distance between the remote control and the sensor(s) should not exceed 8 meters (~ 26 feet).
Make sure that there are no...
PRO8800WUL User Guide English - Page 15
... ceiling behind the screen. Note that a special rear projection screen and the projector ceiling mounting kit are required for this installation location. Set Rear Ceiling in the SYSTEM > Projector Position menu after you turn the projector on. 4. Rear Table Select this location with the projector placed near the floor behind the screen. Note that a special rear...
PRO8800WUL User Guide English - Page 21
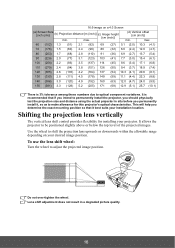
..., so as to make allowance for this projector's optical characteristics. This will help you determine the exact mounting position so that it best suits your installation location.
Shifting the projection lens vertically
The vertical lens shift control provides flexibility for installing your projector. It allows the projector to be positioned slightly above or below the top level...
PRO8800WUL User Guide English - Page 41
... have made all of the desired adjustments.
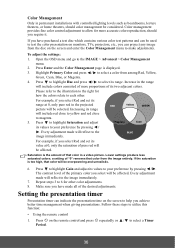
Setting the presentation timer
Presentation timer can indicate the presentation time on the screen to help you achieve better time management when giving presentations. Follow these steps to utilize this function:
• Using the remote control
1. Press on the remote control and press repeatedly or / to select a Timer...
PRO8800WUL User Guide English - Page 45
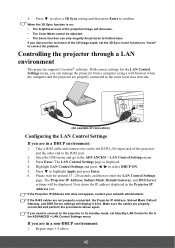
... a LAN environment
The projector supports Crestron® software. With correct settings for the LAN Control Settings menu, you can manage the projector from a computer using a web browser when the computer and the projector are properly connected to the same local area network.
(An example of connection)
Configuring the LAN Control Settings
If you are in a DHCP environment:
1. Take a RJ45 cable...
PRO8800WUL User Guide English - Page 51
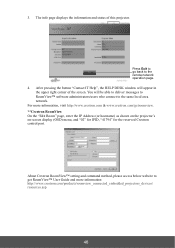
... same local area network. For more information, visit http://www.crestron.com & www.crestron.com/getroomview. **Crestron RoomView On the "Edit Room" page, enter the IP Address (or hostname) as shown on the projector's on-screen display (OSD) menu, and "02" for IPID, "41794" for the reserved Crestron control port.
About Crestron RoomView™ setting and command...