ASRock B550M Pro RS driver and firmware
Related ASRock B550M Pro RS Manual Pages
Download the free PDF manual for ASRock B550M Pro RS and other ASRock manuals at ManualOwl.com
User Manual - Page 3
... 2 Installation
10
2.1 Installing the CPU
11
2.2 Installing the CPU Fan and Heatsink
13
2.3 Installing Memory Modules (DIMM)
21
2.4 Connecting the Front Panel Header
25
2.5 Installing the Motherboard
26
2.6 Installing SATA Drives
27
2.7 Installing a Graphics Card
29
2.8 Connecting Peripheral Devices
32
2.9 Connecting the Power Connectors
33
2.10 Power On
34
2.11 Jumpers Setup...
User Manual - Page 4
... information about the model you are using. You may find the latest VGA cards and CPU support list on ASRock's website as well. ASRock website http://www.asrock.com.
1.1 Package Contents
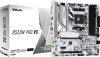
• ASRock B550M Pro RS Motherboard (Micro ATX Form Factor) • ASRock B550M Pro RS User Manual • 2 x Serial ATA (SATA) Data Cables (Optional) • 1 x Screw for M.2 Socket (Optional)
1
English
User Manual - Page 6
... and max. resolution up to 5K 120Hz
* Picasso supports HDCP 2.2 with HDMI 2.0 Port
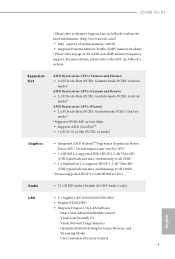
Audio
• 7.1 CH HD Audio (Realtek ALC897 Audio Codec)
LAN
• 2.5 Gigabit LAN 10/100/1000/2500 Mb/s • Dragon RTL8125BG • Supports Dragon 2.5G LAN Software
- Smart Auto Adjust Bandwidth Control - Visual User Friendly UI - Visual Network Usage Statistics - Optimized Default Setting for Game...
User Manual - Page 8
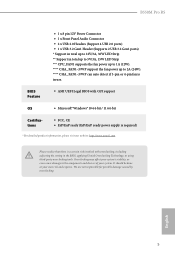
B550M Pro RS
• 1 x 8 pin 12V Power Connector • 1 x Front Panel Audio Connector • 2 x USB 2.0 Headers (Support 4 USB 2.0 ports) • 1 x USB 3.2 Gen1 Header (Supports 2 USB 3.2 Gen1 ports) * Support in total up to 12V/3A, 36W LED Strip ** Support in total up to 5V/3A, 15W LED Strip *** CPU_FAN1 supports the fan power up to 1A (12W). **** CHA_FAN1~3/WP support the fan power up ...
User Manual - Page 13
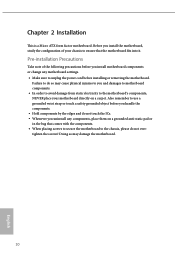
... ATX form factor motherboard. Before you install the motherboard, study the configuration of your chassis to ensure that the motherboard fits into it.
Pre-installation Precautions
Take note of the following precautions before you install motherboard components or change any motherboard settings. • Make sure to unplug the power cord before installing or removing the motherboard.
Failure to do...
User Manual - Page 14
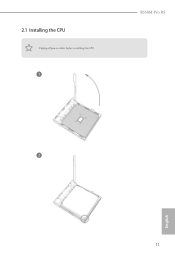
2.1 Installing the CPU
Unplug all power cables before installing the CPU.
1
B550M Pro RS
2
English
11
User Manual - Page 16
B550M Pro RS
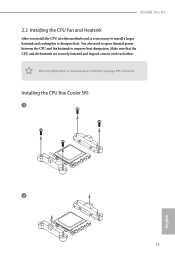
2.2 Installing the CPU Fan and Heatsink
After you install the CPU into this motherboard, it is necessary to install a larger heatsink and cooling fan to dissipate heat. You also need to spray thermal grease between the CPU and the heatsink to improve heat dissipation. Make sure that the CPU and the heatsink are securely fastened and in good contact...
User Manual - Page 18
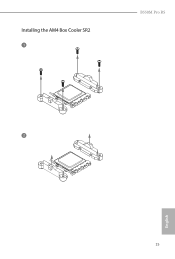
Installing the AM4 Box Cooler SR2
1
B550M Pro RS
2
English
15
User Manual - Page 21
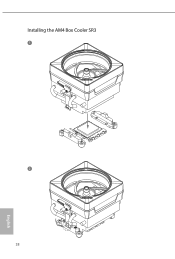
Installing the AM4 Box Cooler SR3
1
2 18
English
User Manual - Page 24
B550M Pro RS
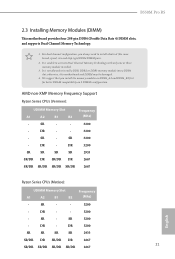
2.3 Installing Memory Modules (DIMM)
This motherboard provides four 288-pin DDR4 (Double Data Rate 4) DIMM slots, and supports Dual Channel Memory Technology.
1. For dual channel configuration, you always need to install identical (the same brand, speed, size and chip-type) DDR4 DIMM pairs.
2. It is unable to activate Dual Channel Memory Technology with only one or three memory ...
User Manual - Page 29
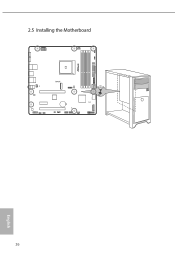
2.5 Installing the Motherboard
26
English
RAID Installation Guide - Page 1
AMD RAID Installation Guide
1. AMD BIOS RAID Installation Guide ...2 1.1 Introduction to RAID...2 1.2 RAID Configurations Precautions 4 1.3 Legacy RAID ROM Configuration 5 1.4 UEFI RAID Configuration ...11
2. AMD Windows RAID Installation Guide 20
1
RAID Installation Guide - Page 2
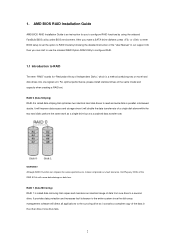
1. AMD BIOS RAID Installation Guide
AMD BIOS RAID Installation Guide is an instruction for you to configure RAID functions by using the onboard FastBuild BIOS utility under BIOS environment. After you make a SATA driver diskette, press or to enter BIOS setup to set the option to RAID mode by following the detailed instruction of the "User Manual" in our support CD, then you can start to use the ...
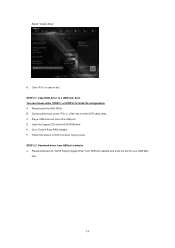
RAID Installation Guide - Page 8
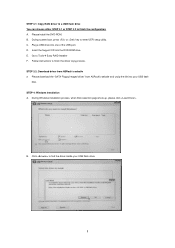
... UEFI setup utility. C. Plug a USB drive into one of the USB port. D. Insert the Support CD into the DVD-ROM drive. E. Go to Tools Easy RAID Installer F. Follow instructions to finish the driver copy process. STEP 3.2: Download driver from ASRock's website A. Please download the "SATA Floppy Imaged driver" from ASRock's website and unzip the file into your USB flash
disk. STEP 4: Windows...
RAID Installation Guide - Page 9
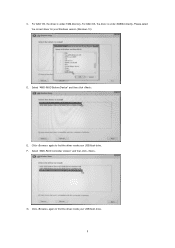
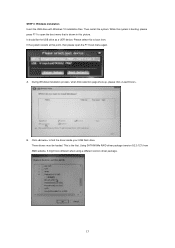
... the driver is under /I386 directory. For 64bit OS, the driver is under /AMD64 directly. Please select the correct driver for your Windows version (Windows 10).
D. Select "AMD-RAID Bottom Device" and then click .
E. Click again to find the driver inside your USB flash drive. F. Select "AMD-RAID Controller storport" and then click .
G. Click again to find the driver inside your USB flash drive.
9
RAID Installation Guide - Page 10
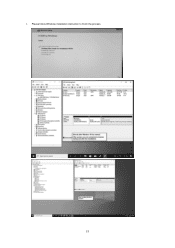
H. Select "AMD-RAID Config Device" and then click . I. After RAID driver is loaded, the RAID disk will show up. J. Please follow Windows installation instruction to finish the process.
10
RAID Installation Guide - Page 14
... key to enter UEFI setup utility. C. Plug a USB drive into one of the USB port. D. Insert the Support CD into the DVD-ROM drive. E. Go to Tools Easy RAID Installer F. Follow instructions to finish the driver copy process. STEP 2.2: Download driver from ASRock's website A. Please download the "SATA Floppy Imaged driver" from ASRock's website and unzip the file into your USB flash
disk.
14
RAID Installation Guide - Page 15
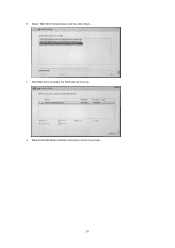
... the USB drive as a UEFI device. Please select this to boot from. If the system restarts at this point, then please open the F11 boot menu again.
A. During Windows installation process, when Disk selection page show up, please click .
B. Click to find the driver inside your USB flash drive. Three drivers must be loaded. This is the first. Using SATA/NVMe RAID driver package (version 9.2.0.127...
RAID Installation Guide - Page 18
I. Please follow Windows installation instruction to finish the process.
18
RAID Installation Guide - Page 20

2. AMD Windows RAID Installation Guide
Using RAIDXpert2 to Create RAID Array in Windows
1. Execute RAIDXpert2 in the Windows Programs menu.
20