ASRock H370M-HDV driver and firmware
Related ASRock H370M-HDV Manual Pages
Download the free PDF manual for ASRock H370M-HDV and other ASRock manuals at ManualOwl.com
User Manual - Page 4
... the CPU Fan and Heatsink
14
2.3 Installing Memory Modules (DIMM)
15
2.4 Expansion Slots (PCI Express Slots)
17
2.5 Onboard Headers and Connectors
18
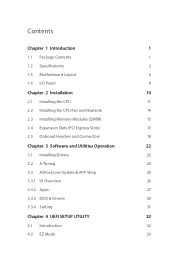
Chapter 3 Software and Utilities Operation
22
3.1 Installing Drivers
22
3.2 A-Tuning
23
3.3 ASRock Live Update & APP Shop
26
3.3.1 UI Overview
26
3.3.2 Apps
27
3.3.3 BIOS & Drivers
30
3.3.4 Setting
31
Chapter 4 UEFI SETUP...
User Manual - Page 6
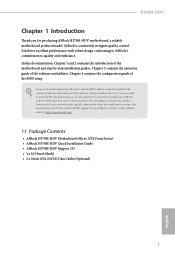
... you are using. You may find the latest VGA cards and CPU support list on ASRock's website as well. ASRock website http://www.asrock.com.
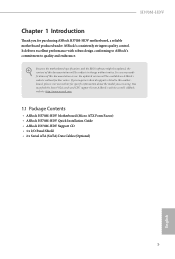
1.1 Package Contents
• ASRock H370M-HDV Motherboard (Micro ATX Form Factor) • ASRock H370M-HDV Quick Installation Guide • ASRock H370M-HDV Support CD • 1 x I/O Panel Shield • 2 x Serial ATA (SATA) Data Cables (Optional)
1
English
User Manual - Page 27
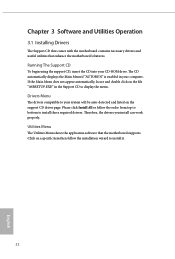
Chapter 3 Software and Utilities Operation
3.1 Installing Drivers
The Support CD that comes with the motherboard contains necessary drivers and useful utilities that enhance the motherboard's features.
Running The Support CD
To begin using the support CD, insert the CD into your CD-ROM drive. The CD automatically displays the Main Menu if "AUTORUN" is enabled in your computer. If the Main Menu ...
User Manual - Page 28
H370M-HDV
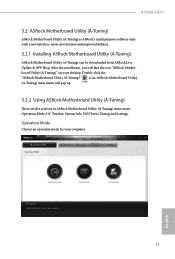
3.2 ASRock Motherboard Utility (A-Tuning)
ASRock Motherboard Utility (A-Tuning) is ASRock's multi purpose software suite with a new interface, more new features and improved utilities.
3.2.1 Installing ASRock Motherboard Utility (A-Tuning)
ASRock Motherboard Utility (A-Tuning) can be downloaded from ASRock Live Update & APP Shop. After the installation, you will find the icon "ASRock ...
User Manual - Page 31
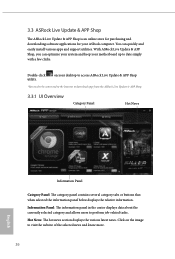
... and downloading software applications for your ASRock computer. You can quickly and easily install various apps and support utilities. With ASRock Live Update & APP Shop, you can optimize your system and keep your motherboard up to date simply with a few clicks.
Double-click utility.
on your desktop to access ASRock Live Update & APP Shop
*You need to be connected to the Internet to download...
User Manual - Page 32
H370M-HDV
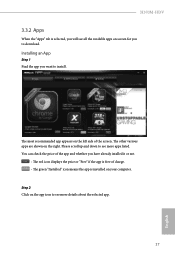
3.3.2 Apps
When the "Apps" tab is selected, you will see all the available apps on screen for you to download.
Installing an App
Step 1 Find the app you want to install.
The most recommended app appears ...it or not.
- The red icon displays the price or "Free" if the app is free of charge. - The green "Installed" icon means the app is installed on your computer. Step 2 Click on the app icon...
User Manual - Page 35
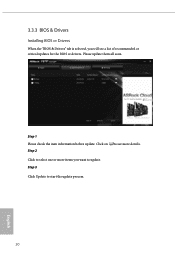
3.3.3 BIOS & Drivers
Installing BIOS or Drivers
When the "BIOS & Drivers" tab is selected, you will see a list of recommended or critical updates for the BIOS or drivers. Please update them all soon.
Step 1 Please check the item information before update. Click on Step 2
to see more details.
Click to select one or more items you want to update. Step 3
Click Update to start the update process...
User Manual - Page 37
...the UEFI SETUP UTILITY by pressing or right after you power on the computer, otherwise, the Power-On-Self-Test (POST) will continue with its test routines. If you wish to enter the UEFI SETUP UTILITY after... turning the system off and then back on.
Because the UEFI software is constantly being updated, the following UEFI setup screens and descriptions are for reference purpose only, and they may ...
User Manual - Page 42
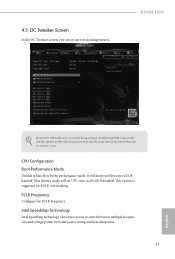
4.5 OC Tweaker Screen
In the OC Tweaker screen, you can set up overclocking features.
H370M-HDV
Because the UEFI software is constantly being updated, the following UEFI setup screens and descriptions are for reference purpose only, and they may not exactly match what you see on your screen.
CPU Configuration Boot Performance Mode
Default is Max Non-Turbo...
User Manual - Page 61

... driver from the support CD to your USB storage device. After copying the drivers please change the SATA mode to RAID, then you can start installing the operating system in RAID mode.
Instant Flash
Save UEFI files in your USB storage device and run Instant Flash to update your UEFI.
Internet Flash - DHCP (Auto IP), Auto
ASRock Internet Flash downloads and updates the latest UEFI firmware version...
Quick Installation Guide - Page 7
... you are using. You may find the latest VGA cards and CPU support list on ASRock's website as well. ASRock website http://www.asrock.com.
1.1 Package Contents
• ASRock H370M-HDV Motherboard (Micro ATX Form Factor) • ASRock H370M-HDV Quick Installation Guide • ASRock H370M-HDV Support CD • 1 x I/O Panel Shield • 2 x Serial ATA (SATA) Data Cables (Optional)
5
English
RAID Installation Guide - Page 7
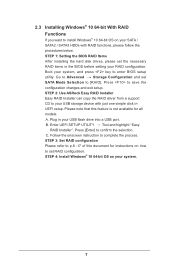
... Storage Configuration and set SATA Mode Selection to [RAID]. Press to save the configuration changes and exit setup. STEP 2: Use ASRock Easy RAID Installer Easy RAID Installer can copy the RAID driver from a support CD to your USB storage device with just one simple click in UEFI setup. Please note that this feature is not available for all models A. Plug in your USB flash drive into a USB port...
RAID Installation Guide - Page 23
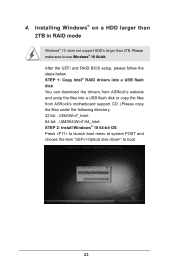
...and RAID BIOS setup, please follow the steps below. STEP 1: Copy Intel® RAID drivers into a USB flash disk You can download the drivers from ASRock's website and unzip the files into a USB flash disk or copy the files from ASRock's motherboard support CD. (Please copy the files under the following directory: 32 bit: ..\i386\Win7_Intel.. 64-bit: ..\AMD64\Win7-64_Intel.. STEP 2: Install Windows...
RAID Installation Guide - Page 24
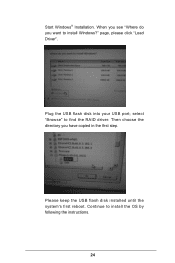
Start Windows® Installation. When you see "Where do you want to install Windows?" page, please click "Load Driver".
Plug the USB flash disk into your USB port; select "Browse" to find the RAID driver. Then choose the directory you have copied in the first step.
Please keep the USB flash disk installed until the system's first reboot. Continue to install the OS by following the instructions.
...
RAID Installation Guide - Page 25
... hard disk (ex. Disk volume > 2TB), it may take more time to boot into Windows® or install driver/utilities. If you encounter this problem, you will need to follow the instructions below to fix this problem. Windows® 10 64-bit: A. Please request the hotfix KB2505454 through this link:
http://support.microsoft.com/kb/2505454/ B. After installing Windows®...
Intel Rapid Storage Guide - Page 2
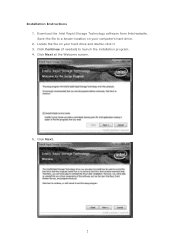
Installation Instructions 1. Download the Intel Rapid Storage Technology software from Intel website. Save the file to a known location on your computer's hard drive. 2. Locate the file on your hard drive and double-click it. 3. Click Continue (if needed) to launch the installation program. 4. Click Next at the Welcome screen.
5. Click Next.
2
Intel Rapid Storage Guide - Page 12
... to load the Intel® Rapid Storage Technology driver during operating system setup.
The F6 installation method is not required for Microsoft Windows 7 or Note
Microsoft Windows 8.
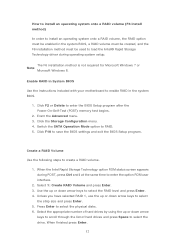
Enable RAID in System BIOS
Use the instructions included with your motherboard to enable RAID in the system BIOS.
1. Click F2 or Delete to enter the BIOS Setup program after the Power-On-Self-Test (POST) memory test...
Intel Rapid Storage Guide - Page 13
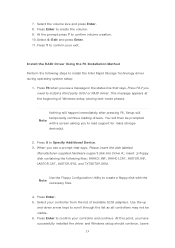
... F6 if you need to install a third party SCSI or RAID driver. This message appears at the beginning of Windows setup (during text-mode phase).
Nothing will happen immediately after pressing F6. Setup will temporarily continue loading drivers. You will then be prompted Note with a screen asking you to load support for mass storage device(s).
2. Press S to Specify Additional Device. 3. When you see...
Intel Rapid Storage Guide - Page 16
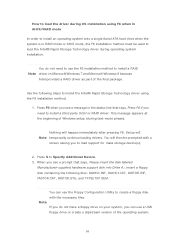
... system onto a single Serial ATA hard drive when the system is in RAID mode or AHCI mode, the F6 installation method must be used to load the Intel® Rapid Storage Technology driver during operating system installation.
You do not need to use the F6 installation method to install a RAID Note driver on Microsoft Windows 7 and Microsoft Windows 8 because
Intel provided a RAID driver as part of...
Intel Rapid Storage Guide - Page 17
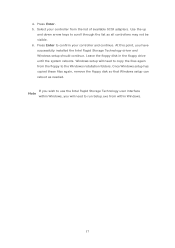
... available SCSI adapters. Use the up
and down arrow keys to scroll through the list as all controllers may not be visible. 6. Press Enter to confirm your controller and continue. At this point, you have successfully installed the Intel Rapid Storage Technology driver and Windows setup should continue. Leave the floppy disk in the floppy drive until the system reboots. Windows setup will...