ASRock Penryn1600SLI-110dB driver and firmware
Drivers and firmware downloads for this ASRock item
Related ASRock Penryn1600SLI-110dB Manual Pages
Download the free PDF manual for ASRock Penryn1600SLI-110dB and other ASRock manuals at ManualOwl.com
User Manual - Page 3
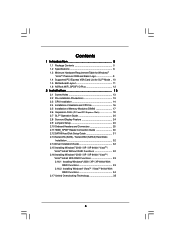
... Expansion Slots (PCI and PCI Express Slots 19 2.7 SLITM Operation Guide 20 2.8 Surround Display Feature 24 2.9 Jumpers Setup 24 2.10 Onboard Headers and Connectors 25 2.11 HDMI_SPDIF Header Connection Guide 30 2.12 SATAII Hard Disk Setup Guide 31 2.13 Serial ATA (SATA) / Serial ATAII (SATAII) Hard Disks
Installation 32 2.14 Driver Installation Guide 32 2.15 Installing Windows® 2000...
User Manual - Page 4
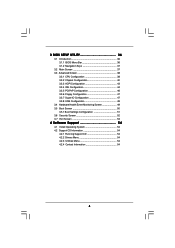
... Floppy Configuration 47 3.3.7 Super IO Configuration 47 3.3.8 USB Configuration 49 3.4 Hardware Health Event Monitoring Screen 49 3.5 Boot Screen 50 3.5.1 Boot Settings Configuration 51 3.6 Security Screen 52 3.7 Exit Screen 53
4 Software Support 54
4.1 Install Operating System 54 4.2 Support CD Information 54
4.2.1 Running Support CD 54 4.2.2 Drivers Menu 54 4.2.3 Utilities Menu...
User Manual - Page 5
...
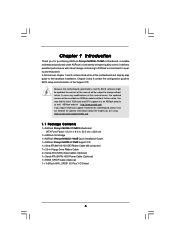
1 x ASRock Penryn1600SLI-110dB Motherboard (ATX Form Factor: 12.0-in x 9.0-in, 30.5 cm x 22.9 cm)
1 x ASRock SLI Bridge 1 x ASRock Penryn1600SLI-110dB Quick Installation Guide 1 x ASRock Penryn1600SLI-110dB Support CD 1 x Ultra ATA 66/100/133 IDE Ribbon Cable (80-conductor) 1 x 3.5-in Floppy Drive Ribbon Cable 4 x Serial ATA (SATA) Data Cables (Optional) 1 x Serial ATA (SATA) HDD Power Cable...
User Manual - Page 7
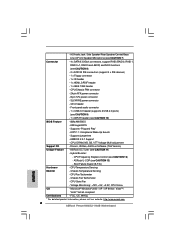
...audio connector
- 1 x USB 2.0 header (supports 2 USB 2.0 ports)
(see CAUTION 9)
- 1 x WiFi/E header (see CAUTION 10)
BIOS Feature
- 8Mb AMI BIOS
- AMI Legal BIOS
- Supports "Plug and Play"
- ACPI 1.1 Compliance Wake Up Events
- Supports jumperfree
- AMBIOS 2.3.1 Support
- CPU, DRAM, NB, SB, VTT Voltage Multi-adjustment
Support CD
- Drivers, Utilities, AntiVirus Software (Trial Version...
User Manual - Page 9
... and overclock your hardware devices to get the best system performance under Windows® environment. Please visit our website for the operation procedures of ASRock OC Tuner. ASRock website: http://www.asrock.com
12. Although this motherboard offers stepless control, it is not recommended to perform over-clocking. Frequencies other than the recommended CPU bus frequencies may cause the...
User Manual - Page 20
2.7 SLITM Operation Guide
This motherboard supports NVIDIA® SLITM (Scalable Link Interface) technology that allows you to install two identical NVIDIA® SLITM enabled PCI Express x16 graphics cards. Currently, NVIDIA® SLITM technology supports Windows® XP, XP 64-bit, VistaTM and VistaTM 64-bit OS. Please follow the installation procedures in this section.
SLITM Technology ...
User Manual - Page 21
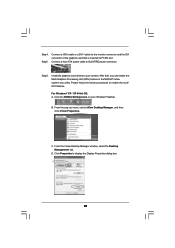
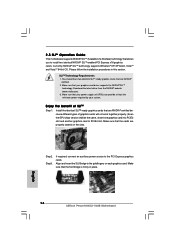
Step4. Step5.
Connect a VGA cable or a DVI-I cable to the monitor connector and the DVI connector of the graphics card that is inserted to PCIE2 slot. Connect a 4-pin ATX power cable to SLI/XFIRE power connector.
Step6.
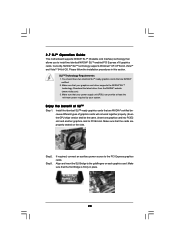
Install the graphics card drivers to your system. After that, you can enable the Multi-Graphics Processing Unit (GPU) feature in the NVIDIA® nView system tray...
User Manual - Page 31
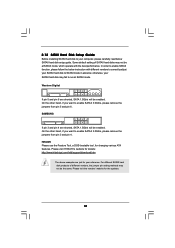
... Hard Disk Setup Guide
Before installing SATAII hard disk to your computer, please carefully read below SATAII hard disk setup guide. Some default setting of SATAII hard disks may not be at SATAII mode, which operate with the best performance. In order to enable SATAII function, please follow the below instruction with different vendors to correctly adjust your SATAII hard disk to SATAII...
User Manual - Page 32
... 430 chipset that supports Serial ATA (SATA) / Serial ATAII (SATAII) hard disks and RAID functions. You may install SATA / SATAII hard disks on this motherboard for internal storage devices. This section will guide you to install the SATA / SATAII hard disks.
STEP 1: Install the SATA / SATAII hard disks into the drive bays of your chassis. STEP 2: Connect the SATA power cable to the SATA / SATAII...
User Manual - Page 33
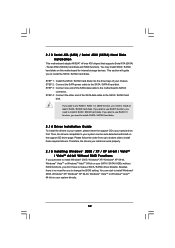
... RAID functions, please follow below steps.
STEP 1: Make a SATA / SATAII Driver Diskette.
A.
Insert the ASRock Support CD into your optical drive to boot your system.
B.
During POST at the beginning of system boot-up, press key, and
then a window for boot devices selection appears. Please select CD-ROM
as the boot device.
C.
When you see the message on the screen, "Generate Serial ATA...
User Manual - Page 34
... the BIOS RAID
installation guide part of the document in the following path in the Support CD:
.. \ RAID Installation Guide
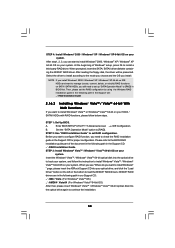
STEP 3: Install Windows® VistaTM / Windows® VistaTM 64-bit OS on your
system.
Insert the Windows® VistaTM / Windows® VistaTM 64-bit optical disk into the optical drive
to boot your system, and follow the instruction to install Windows® VistaTM...
User Manual - Page 36
...and then back on.
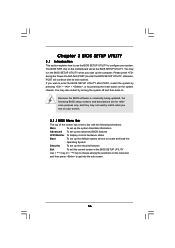
Because the BIOS software is constantly being updated, the following BIOS setup screens and descriptions are for reference...set up the advanced BIOS features
H/W Monitor To display current hardware status
Boot
To set up the default system device to locate and load the
Operating System
Security
To set up the security features
Exit
To exit the current screen or the BIOS SETUP...
User Manual - Page 40
... issue with some power supplies. Please set this item to [Disable] if above issue occurs.
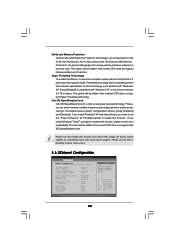
3.3.2Chipset Configuration
BIOS SETUP UTILITY Advanced
Chipset Configuration
DRAM Frequency Flexibility Option Memory Timings
Memory Remap Feature Primary Graphics Adapter
Hyper Transport Link Speed Onboard LAN OnBoard 1394
OnBoard HD Audio Front Panel
CPU Voltage DRAM Voltage Chipset Voltage VTT Voltage...
User Manual - Page 54
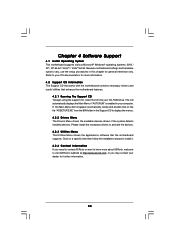
...-ROM drive. The CD automatically displays the Main Menu if "AUTORUN" is enabled in your computer. If the Main Menu did not appear automatically, locate and double click on the file "ASSETUP.EXE" from the BIN folder in the Support CD to display the menus. 4.2.2 Drivers Menu The Drivers Menu shows the available devices drivers if the system detects installed devices. Please install...
Quick Installation Guide - Page 4
...
1 x ASRock Penryn1600SLI-110dB Motherboard (ATX Form Factor: 12.0-in x 9.0-in, 30.5 cm x 22.9 cm)
1 x ASRock SLI Bridge 1 x ASRock Penryn1600SLI-110dB Quick Installation Guide 1 x ASRock Penryn1600SLI-110dB Support CD 1 x Ultra ATA 66/100/133 IDE Ribbon Cable (80-conductor) 1 x 3.5-in Floppy Drive Ribbon Cable 4 x Serial ATA (SATA) Data Cables (Optional) 1 x Serial ATA (SATA) HDD Power Cable...
Quick Installation Guide - Page 6
...audio connector
- 1 x USB 2.0 header (supports 2 USB 2.0 ports)
(see CAUTION 9)
- 1 x WiFi/E header (see CAUTION 10)
BIOS Feature
- 8Mb AMI BIOS
- AMI Legal BIOS
- Supports "Plug and Play"
- ACPI 1.1 Compliance Wake Up Events
- Supports jumperfree
- AMBIOS 2.3.1 Support
- CPU, DRAM, NB, SB, VTT Voltage Multi-adjustment
Support CD
- Drivers, Utilities, AntiVirus Software (Trial Version...
Quick Installation Guide - Page 8
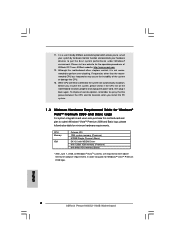
... Memory
VGA
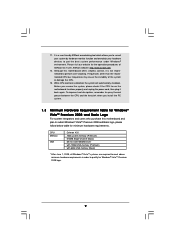
Celeron 420 1GB system memory (Premium) 512MB Single Channel (Basic) DX10.0 with WDDM Driver with 128bit VGA memory (Premium) with 64bit VGA memory (Basic)
* After June 1, 2008, all Windows® VistaTM systems are required to meet above minimum hardware requirements in order to qualify for Windows® VistaTM Premium 2008 logo.
English
8 ASRock Penryn1600SLI-110dB Motherboard
Quick Installation Guide - Page 16
... and another graphics card to PCIE4 slot. Make sure that the cards are properly seated on the slots.
Step2. Step3.
If required, connect an auxiliary power source to the PCI Express graphics cards. Align and insert the SLI Bridge to the goldfingers on each graphics card. Make sure that the SLI Bridge is firmly in place.
English
16 ASRock Penryn1600SLI-110dB Motherboard
Quick Installation Guide - Page 29
... RAID functions, please follow below steps.
STEP 1: Make a SATA / SATAII Driver Diskette.
A.
Insert the ASRock Support CD into your optical drive to boot your system.
B.
During POST at the beginning of system boot-up, press key, and
then a window for boot devices selection appears. Please select CD-ROM
as the boot device.
C.
When you see the message on the screen, "Generate Serial ATA...
RAID Installation Guide - Page 5
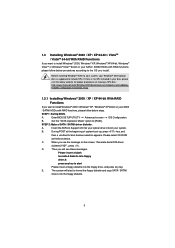
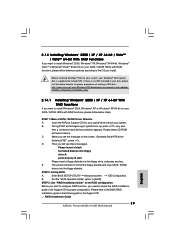
... to install Windows® 2000 / Windows® XP / Windows® XP 64-bit on your SATA
/ SATAII HDDs with RAID functions, please follow below steps.
STEP 1: Set Up BIOS.
A.
Enter BIOS SETUP UTILITY Advanced screen IDE Configuration.
B.
Set the "SATA Operation Mode" option to [RAID].
STEP 2: Make a SATA / SATAII driver diskette.
A.
Insert the ASRock Support CD into your optical drive to...