ASRock Q270 Pro BTC driver and firmware
Related ASRock Q270 Pro BTC Manual Pages
Download the free PDF manual for ASRock Q270 Pro BTC and other ASRock manuals at ManualOwl.com
User Manual - Page 3
... assistance please call ASRock Tel : +886-2-28965588 ext.123 (Standard International call charges apply)
The terms HDMI® and HDMI High-Definition Multimedia Interface, and the HDMI logo are trademarks or registered trademarks of HDMI Licensing LLC in the United States and other countries.
INTEL END USER SOFTWARE LICENSE AGREEMENT IMPORTANT - READ BEFORE COPYING, INSTALLING OR USING.
LICENSE...
User Manual - Page 5
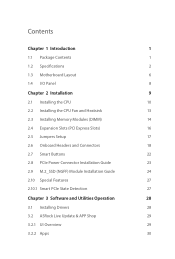
...2.4 Expansion Slots (PCI Express Slots)
16
2.5 Jumpers Setup
17
2.6 Onboard Headers and Connectors
18
2.7 Smart Buttons
22
2.8 PCIe Power Connector Installation Guide
23
2.9 M.2_SSD (NGFF) Module Installation Guide
24
2.10 Special Features
27
2.10.1 Smart PCIe State Detection
27
Chapter 3 Software and Utilities Operation
28
3.1 Installing Drivers
28
3.2 ASRock Live Update & APP...
User Manual - Page 6
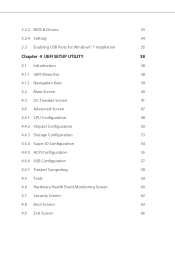
3.2.3 BIOS & Drivers
33
3.2.4 Setting
34
3.3 Enabling USB Ports for Windows® 7 Installation
35
Chapter 4 UEFI SETUP UTILITY
38
4.1 Introduction
38
4.1.1 UEFI Menu Bar
38
4.1.2 Navigation Keys
39
4.2 Main Screen
40
4.3 OC Tweaker Screen
41
4.4 Advanced Screen
47
4.4.1 CPU Configuration
48
4.4.2 Chipset Configuration
50
4.4.3 Storage Configuration
53
4.4.4 Super IO ...
User Manual - Page 7
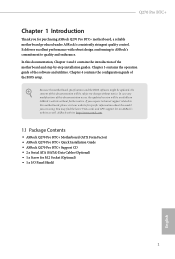
... using. You may find the latest VGA cards and CPU support list on ASRock's website as well. ASRock website http://www.asrock.com.
1.1 Package Contents
• ASRock Q270 Pro BTC+ Motherboard (ATX Form Factor) • ASRock Q270 Pro BTC+ Quick Installation Guide • ASRock Q270 Pro BTC+ Support CD • 2 x Serial ATA (SATA) Data Cables (Optional) • 1 x Screw for M.2 Socket (Optional...
User Manual - Page 10
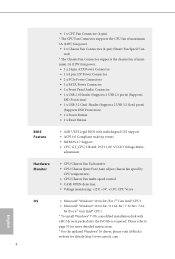
...8 pin 12V Power Connector • 2 x PCIe Power Connectors • 1 x SATA Power Connector • 1 x Front Panel Audio Connector • 1 x USB 2.0 Header (Supports 2 USB 2.0 ports) (Supports
ESD Protection) • 1 x USB 3.2 Gen1 Header (Supports 2 USB 3.2 Gen1 ports)
(Supports ESD Protection) • 1 x Power Button • 1 x Reset Button
BIOS Feature
• AMI UEFI Legal BIOS with...
User Manual - Page 34

Chapter 3 Software and Utilities Operation
3.1 Installing Drivers
The Support CD that comes with the motherboard contains necessary drivers and useful utilities that enhance the motherboard's features.
Running The Support CD
To begin using the support CD, insert the CD into your CD-ROM drive. The CD automatically displays the Main Menu if "AUTORUN" is enabled in your computer. If the Main Menu ...
User Manual - Page 35
Q270 Pro BTC+
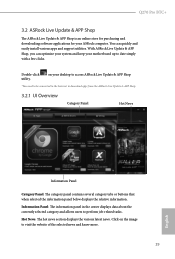
3.2 ASRock Live Update & APP Shop
The ASRock Live Update & APP Shop is an online store for purchasing and downloading software applications for your ASRock computer. You can quickly and easily install various apps and support utilities. With ASRock Live Update & APP Shop, you can optimize your system and keep your motherboard up to date simply with a few clicks.
Double-click ...
User Manual - Page 39
Q270 Pro BTC+
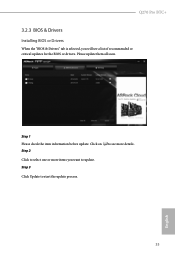
3.2.3 BIOS & Drivers
Installing BIOS or Drivers
When the "BIOS & Drivers" tab is selected, you will see a list of recommended or critical updates for the BIOS or drivers. Please update them all soon.
Step 1 Please check the item information before update. Click on Step 2
to see more details.
Click to select one or more items you want to update. Step 3
Click Update to start the ...
User Manual - Page 41
Q270 Pro BTC+
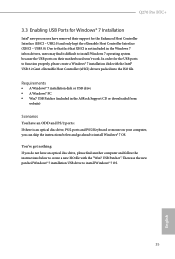
3.3 Enabling USB Ports for Windows® 7 Installation
Intel® new processors have removed their support for the Enhanced Host Controller Interface (EHCI - USB2.0) and only kept the eXtensible Host Controller Interface (XHCI - USB3.0). Due to that fact that XHCI is not included in the Windows 7 inbox drivers, users may find it difficult to install Windows 7 operating system ...
User Manual - Page 44
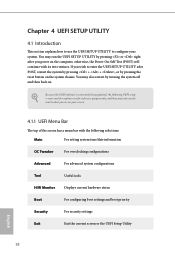
...UEFI software is constantly being updated, the following UEFI setup ...setting system time/date information
OC Tweaker
For overclocking configurations
Advanced
For advanced system configurations
Tool
Useful tools
H/W Monitor
Displays current hardware status
Boot
For configuring boot settings and boot priority
Security
For security settings
Exit
Exit the current screen or the UEFI Setup...
User Manual - Page 47
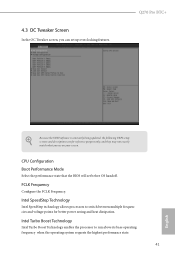
... screen, you can set up overclocking features.
Q270 Pro BTC+
Because the UEFI software is constantly being updated, the following UEFI setup screens and descriptions are for reference purpose only, and they may not exactly match what you see on your screen.
CPU Configuration Boot Performance Mode
Select the performance state that the BIOS will set before OS handoff.
FCLK...
User Manual - Page 63
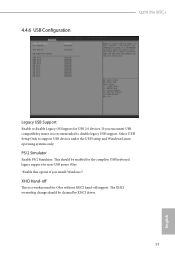
4.4.6 USB Configuration
Q270 Pro BTC+
Legacy USB Support
Enable or disable Legacy OS Support for USB 2.0 devices. If you encounter USB compatibility issues it is recommended to disable legacy USB support. Select UEFI Setup Only to support USB devices under the UEFI setup and Windows/Linux operating systems only.
PS/2 Simulator
Enable PS/2 Simulator. This should be enabled for the complete USB ...
User Manual - Page 65
...
Q270 Pro BTC+
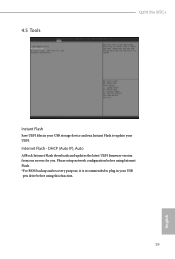
Instant Flash
Save UEFI files in your USB storage device and run Instant Flash to update your UEFI.
Internet Flash - DHCP (Auto IP), Auto
ASRock Internet Flash downloads and updates the latest UEFI firmware version from our servers for you. Please setup network configuration before using Internet Flash. *For BIOS backup and recovery purpose, it is recommended to plug in your USB...
RAID Installation Guide - Page 7
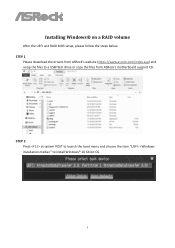
Installing Windows® on a RAID volume
After the UEFI and RAID BIOS setup, please follow the steps below. STEP 1
Please download the drivers from ASRock's website (https://www.asrock.com/index.asp) and unzip the files to a USB flash drive or copy the files from ASRock's motherboard support CD.
STEP 2 Press at system POST to launch the boot menu and choose the item "UEFI: " to install Windows&#...
RAID Installation Guide - Page 8
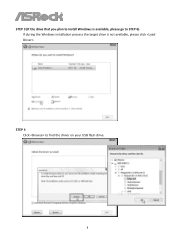
STEP 3 (If the drive that you plan to install Windows is available, please go to STEP 6) If during the Windows installation process the target drive is not available, please click .
STEP 4 Click to find the driver on your USB flash drive.
8
RAID Installation Guide - Page 10
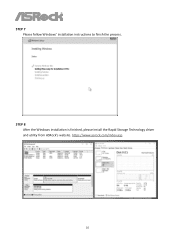
STEP 7 Please follow Windows' installation instructions to finish the process.
STEP 8 After the Windows installation is finished, please install the Rapid Storage Technology driver and utility from ASRock's website. https://www.asrock.com/index.asp
10
Intel Rapid Storage Guide - Page 2
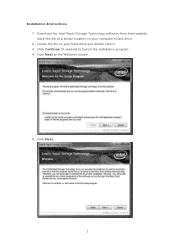
Installation Instructions 1. Download the Intel Rapid Storage Technology software from Intel website. Save the file to a known location on your computer's hard drive. 2. Locate the file on your hard drive and double-click it. 3. Click Continue (if needed) to launch the installation program. 4. Click Next at the Welcome screen.
5. Click Next.
2
Intel Rapid Storage Guide - Page 12
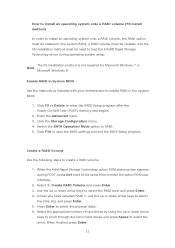
... to load the Intel® Rapid Storage Technology driver during operating system setup.
The F6 installation method is not required for Microsoft Windows 7 or Note
Microsoft Windows 8.
Enable RAID in System BIOS
Use the instructions included with your motherboard to enable RAID in the system BIOS.
1. Click F2 or Delete to enter the BIOS Setup program after the Power-On-Self-Test (POST) memory test...
Intel Rapid Storage Guide - Page 13
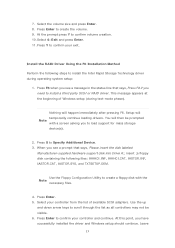
... F6 if you need to install a third party SCSI or RAID driver. This message appears at the beginning of Windows setup (during text-mode phase).
Nothing will happen immediately after pressing F6. Setup will temporarily continue loading drivers. You will then be prompted Note with a screen asking you to load support for mass storage device(s).
2. Press S to Specify Additional Device. 3. When you see...
Intel Rapid Storage Guide - Page 16
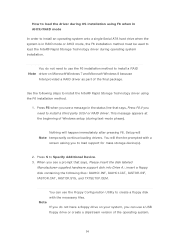
... F6 if you need to install a third party SCSI or RAID driver. This message appears at the beginning of Windows setup (during text-mode phase).
Nothing will happen immediately after pressing F6. Setup will Note temporarily continue loading drivers. You will then be prompted with a
screen asking you to load support for mass storage device(s).
2. Press S to Specify Additional Device. 3. When you see...