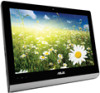
Asus ET2221AGTR driver and firmware

Related Asus ET2221AGTR Manual Pages
Download the free PDF manual for Asus ET2221AGTR and other Asus manuals at ManualOwl.com
User's Manual for English Edition - Page 2
... ASUS. ASUS ASSUMES NO RESPONSIBILITY OR LIABILITY FOR ANY ERRORS OR INACCURACIES THAT MAY APPEAR IN THIS MANUAL, INCLUDING THE PRODUCTS AND SOFTWARE DESCRIBED IN IT. Copyright © 2012 ASUSTeK COMPUTER INC. All Rights Reserved. LIMITATION OF LIABILITY Circumstances may arise where because of a default on ASUS' part or other liability, you are entitled to recover damages from ASUS...
User's Manual for English Edition - Page 3
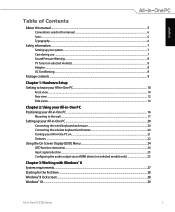
... and mouse 20 Connecting the wireless keyboard and mouse 20 Turning your All-in-One PC on...21 Gestures...22 Using the On Screen Display (OSD) Menu...24 OSD function instruction...24 Input signal selection...25 Configuring the audio output via an HDMI device (on selected models only 25
Chapter 3: Working with Windows® 8 System requirements...27...
User's Manual for English Edition - Page 4
... connection...42
Configuring a dynamic IP/PPPoE network connection 42 Configuring a static IP network connection...45
Chapter 5: Recovering your system Entering the BIOS Setup...46
Quickly enter the BIOS...46 Resetting your All-in-One PC...47 Recovering from a system image file...48
Creating a USB recovery drive...48 Removing everything and reinstalling Windows 49
Appendices Notices...50
All...
User's Manual for English Edition - Page 5
...; 8
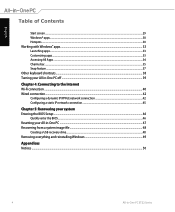
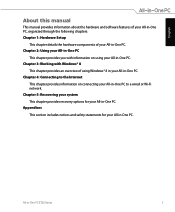
This chapter provides an overview of using Windows® 8 in your All-in-One PC. Chapter 4: Connecting to the Internet
This chapter provides information on connecting your All-in-One PC to a wired or Wi-Fi network. Chapter 5: Recovering your system
This chapter provides recovery options for your All-in-One PC. Appendices
This section...
User's Manual for English Edition - Page 6
... to your All-in-One PC's data and components.
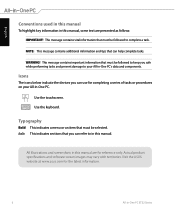
Icons
The icons below indicate the devices you can use for completing a series of tasks or procedures on your All-in-One PC...refer to in this manual.
All illustrations and screenshots in this manual are for reference only. Actual product specifications and software screen images may vary with territories. Visit the ASUS website at www.asus.com for the ...
User's Manual for English Edition - Page 8
... cause hearing damage or loss. Adjustment of the volume control as well as the equalizer to settings other than the center position may increase the earphones or headphones output voltage and the sound pressure level.
TV Tuner (on selected models)
Note to CATV System Installer-This reminder is provided to call the CATV systems...
User's Manual for English Edition - Page 15
... switched to HDMI-in and VGA-in, the All-in-One PC can be used as a standard desktop LCD monitor.
Menu lock Press to activate the MENU button on the front panel.
Optical Drive The built-in optical drive may support compact discs (CD), digital video discs (DVD), and/or Blu-ray discs (BD) and may have recordable (R) or re...
User's Manual for English Edition - Page 17
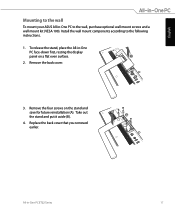
... the wall
To mount your ASUS All-in-One PC to the wall, purchase optional wall mount screws and a wall mount kit (VESA 100). Install the wall mount components according to the following instructions.
1. To release the stand, place the All-in-One
PC face-down first, resting the display
panel on a flat even...
User's Manual for English Edition - Page 19
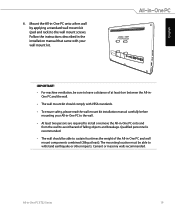
... applying a standard wall mount kit (pad and rack) to the wall mount screws. Follow the instructions described in the installation manual that came with your wall mount kit.
IMPORTANT! • For machine ventilation, be sure to... • To ensure safety, please read the wall mount kit installation manual carefully before
mounting your All-in-One PC to the wall. • At least two persons are...
User's Manual for English Edition - Page 20
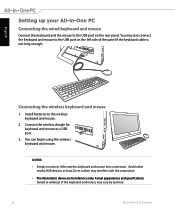
... if the keyboard cable is not long enough.
Connecting the wireless keyboard and mouse
1. Install batteries to the wireless keyboard and mouse.
2. Connect the wireless dongle for keyboard and mouse to a USB port.
3. You can begin using the wireless keyboard and mouse.
NOTES: • Simply reconnect if the wireless keyboard and mouse lose connection. Avoid other
nearby WiFi devices at least...
User's Manual for English Edition - Page 21
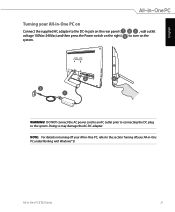
...to turn on the
WARNING! DO NOT connect the AC power cord to an AC outlet prior to connecting the DC plug to the system. Doing so may damage the AC-DC adapter.
NOTE: For details on turning off your All-in-...One PC, refer to the section Turning off your All-in-One PC under Working with Windows® 8.
All-in-One PC...
User's Manual for English Edition - Page 25
... a high-definition TV as an audio output device, connect it to the Home Theater PC and follow the steps below to configure the audio settings.
To configure the audio output via an HDMI device: 1. From the Start screen, click Desktop to launch the Desktop Mode.
NOTE: For more details, refer to the section Start screen under Working with Windows® 8.
All...
User's Manual for English Edition - Page 27
English
Chapter 3: Working with Windows® 8
System requirements
Processor RAM Hard disk space Graphics card Screen resolution
1GHz or faster 1GB (32-bit) or 2 GB (64-bit) 16 GB (32-bit) or 20 GB (64-bit) Microsoft DirectX9 graphics device with WDDM driver 1024 x 768 for Windows® apps 1366 x 768 for Snap feature
NOTE: For updates on these system requirements...
User's Manual for English Edition - Page 28
... time
When you start your computer for the first time, a series of screens appear to guide you in configuring the basic settings of your Windows® 8 operating system.
To start for the first time: 1. Press the power button on your All-in-One PC. Wait for a few minutes until the setup
screen appears. 2. Pick a language to...
User's Manual for English Edition - Page 29
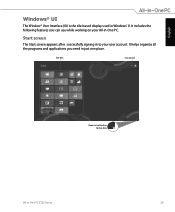
...; User Interface (UI) is the tile-based display used in Windows® 8. It includes the following features you can use while working on your All-in-One PC.
Start screen
The Start screen appears after successfully ...
User's Manual for English Edition - Page 30
... screen and displayed on tiled-format for easy access.
IMPORTANT! A screen resolution of 1024 x 768 pixels or higher is required to run Windows® apps.
NOTE: Some apps require signing in to your Microsoft account before they are fully launched.
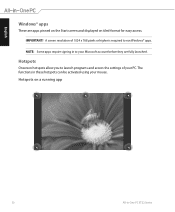
Hotspots
Onscreen hotspots allow you to launch programs and access the settings of your...
User's Manual for English Edition - Page 34
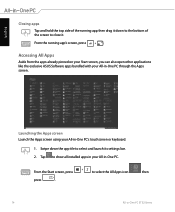
... like the exclusive ASUS Software apps bundled with your All-in-One PC through the Apps screen.
Launching the Apps screen Launch the Apps screen using your All-in-One PC's touchscreen or keyboard.
1. Swipe down the app tile to select and launch its settings bar. 2. Tap to show all installed apps in your...
User's Manual for English Edition - Page 46
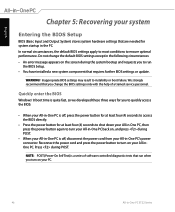
... bootup and requests you to run
the BIOS Setup. • You have installed a new system component that requires further BIOS settings or update.
WARNING! Inappropriate BIOS settings may result to instability or boot failure. We strongly recommend that you change the BIOS settings only with the help of a trained service personnel.
Quickly enter the BIOS
Windows® 8 boot time is quite fast, so...
User's Manual for English Edition - Page 47
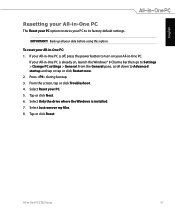
... then go to Settings > Change PC settings > General. From the General pane, scroll down to Advanced startup and tap or tap or click Restart now. 2. Press during bootup. 3. From the screen, tap or click Troubleshoot. 4. Select Reset your PC. 5. Tap or click Next. 6. Select Only the drive where the Windows is installed. 7. Select Just remove...
User's Manual for English Edition - Page 48
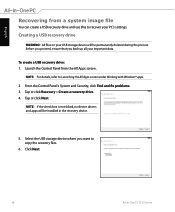
... recover your PC's settings.
Creating a USB recovery drive
WARNING! All files on your USB storage device will be permanently deleted during the process. Before you proceed, ensure that you back up all your important data.
To create a USB recovery drive: 1. Launch the Control Panel from the All Apps screen.
NOTE: For details, refer to Launching the All Apps screen under Working with Windows...