Asus G1-P7P55E driver and firmware

Related Asus G1-P7P55E Manual Pages
Download the free PDF manual for Asus G1-P7P55E and other Asus manuals at ManualOwl.com
User Manual - Page 2
... the express written permission of ASUSTeK Computer Inc. ("ASUS"). Product warranty or service will not be extended if: (1) the product is repaired, modified or altered, unless such repair, modification of alteration is authorized in writing by ASUS; or (2) the serial number of the product is defaced or missing. ASUS PROVIDES THIS MANUAL "AS IS" WITHOUT WARRANTY OF...
User Manual - Page 3
... 2.5.2 Memory configurations 2-10 2.5.3 Installing a DIMM 2-14 2.5.4 Removing a DIMM 2-14 2.6 Expansion slots 2-15 2.6.1 PCI slot 2-15 2.6.2 PCI Express x1 slot 2-15 2.6.3 PCI Express x16 slots 2-15 2.6.4 Installing an expansion card 2-16 2.6.5 Configuring an expansion card 2-16 2.7 Installing storage drives 2-17 2.7.1 Installing an optical drive 2-17 2.7.2 Installing a hard disk drive...
User Manual - Page 4

... 4-2 4.2 Motherboard layout 4-2 4.3 Jumpers 4-3 4.4 Connectors 4-4
Chapter 5: BIOS setup 5.1 Managing and updating your BIOS 5-2
5.1.1 ASUS Update utility 5-2 5.1.2 ASUS EZ Flash 2 utility 5-3 5.1.3 ASUS CrashFree BIOS 5-4 5.2 BIOS setup program 5-5 5.2.1 BIOS menu screen 5-6 5.2.2 Menu bar 5-6 5.2.3 Navigation keys 5-7 5.2.4 Menu items 5-7 5.2.5 Submenu items 5-7 5.2.7 Pop-up window...
User Manual - Page 6
... the chemical substances in our products at ASUS REACH website at http://green.asus.com/english/REACH.htm
Macrovision Corporation Product...power cables for the devices are unplugged before the signal cables are connected.
• If the power supply is broken, do not try to fix it by yourself. Contact a qualified service technician or your retailer.
Operation safety
• Before installing devices...
User Manual - Page 8
...chapter helps you power up the system and install drivers and utilities from the support DVD.
4. Chapter 4: Motherboard info This chapter gives information about the motherboard that comes with the system. This chapter includes the motherboard layout, jumper settings, and connector locations.
5. Chapter 5: BIOS setup This chapter tells how to change system settings through the BIOS Setup menus and...
User Manual - Page 18
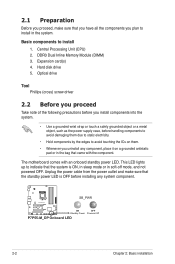
... to install 1. Central Processing Unit (CPU) 2. DDR3 Dual Inline Memory Module (DIMM) 3. Expansion card(s) 4. Hard disk drive 5. Optical drive
Tool Phillips (cross) screw driver
2.2 Before you proceed
Take note of the following precautions before you install components into the system.
• Use a grounded wrist strap or touch a safely grounded object or a metal object, such as the power supply...
User Manual - Page 26
... recommended to protect the CPU.
• Always install DIMMs with the same CAS latency. For optimum compatibility, it is recommended that you obtain memory modules from the same vendor.
• Due to the memory address limitation on 32-bit Windows® OS, when you install 4GB or more memory on the motherboard, the actual usable memory for the OS can...
User Manual - Page 32
... card
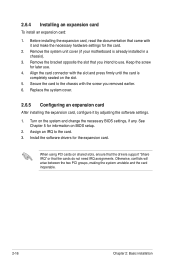
After installing the expansion card, configure it by adjusting the software settings.
1. Turn on the system and change the necessary BIOS settings, if any. See Chapter 5 for information on BIOS setup.
2. Assign an IRQ to the card. 3. Install the software drivers for the expansion card.
When using PCI cards on shared slots, ensure that the drivers support "Share IRQ" or that the cards...
User Manual - Page 35
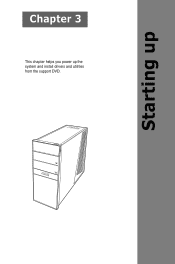
Starting up
Chapter 3
This chapter helps you power up the system and install drivers and utilities from the support DVD.
User Manual - Page 36
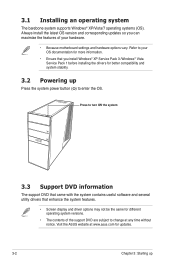
... OS version and corresponding updates so you can maximize the features of your hardware.
• Because motherboard settings and hardware options vary. Refer to your OS documentation for more information.
• Ensure that you install Windows® XP Service Pack 3 /Windows® Vista Service Pack 1 before installing the drivers for better compatibility and system stability.
3.2 Powering up...
User Manual - Page 37
...
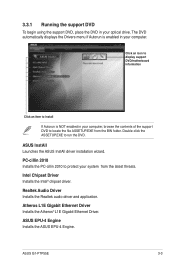
To begin using the support DVD, place the DVD in your optical drive. The DVD automatically displays the Drivers menu if Autorun is enabled in your computer.
Click an icon to display support DVD/motherboard information
Click an item to install
If Autorun is NOT enabled in your computer, browse the contents of the support DVD to locate the file ASSETUP.EXE...
User Manual - Page 38
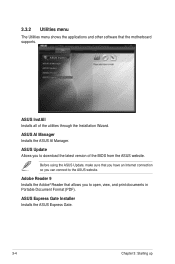
... Utilities menu shows the applications and other software that the motherboard supports.
ASUS InstAll Installs all of the utilities through the Installation Wizard.
ASUS AI Manager Installs the ASUS AI Manager.
ASUS Update Allows you to download the latest version of the BIOS from the ASUS website.
Before using the ASUS Update, make sure that you have an Internet connection so you can connect to...
User Manual - Page 45
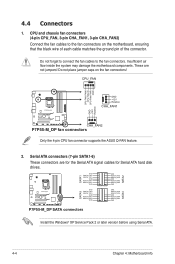
...
GND +12V Rotation
CHA_FAN1
Rotation
+12V
CHA_FAN2
P7P55-M_DP fan connectors
Only the 4-pin CPU fan connector supports the ASUS Q-FAN feature.
2. Serial ATA connectors (7-pin SATA1-6)
These connectors are for the Serial ATA signal cables for Serial ATA hard disk drives.
SATA2
SATA1
GND RSATA_TXN1 RSATA_TXP1
GND RSATA_RXN1 RSATA_RXP1
GND
GND RSATA_TXN2 RSATA_TXP2 GND RSATA_RXN2 RSATA_RXP2...
User Manual - Page 51
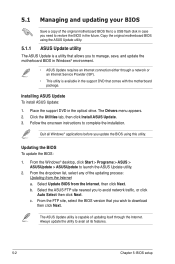
..., save, and update the motherboard BIOS in Windows® environment.
• ASUS Update requires an Internet connection either through a network or an Internet Service Provider (ISP).
• This utility is available in the support DVD that comes with the motherboard package.
Installing ASUS Update To install ASUS Update:
1. Place the support DVD in the optical drive. The Drivers menu appears...
User Manual - Page 52
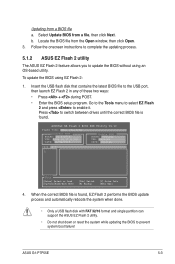
... ROM
BOARD: G1-P7P55E VER: 0306 (H;00 B:03) DATE: 12/04/2009
Update ROM BOARD: Unknown VER: Unknown DATE: Unknown
PATH: A:\
A:
Note
[Enter] Select or Load [Up/Down/Home/End] Move
[Tab] Switch [B] Backup
[V] Drive Info [ESC] Exit
4. When the correct BIOS file is found, EZ Flash 2 performs the BIOS update process and automatically reboots the system when done.
• Only a USB flash disk...
User Manual - Page 53
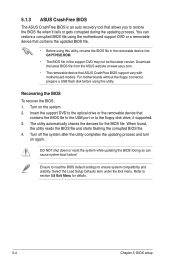
...be the latest version. Download the latest BIOS file from the ASUS website at www.asus.com.
• The removable device that ASUS CrashFree BIOS support vary with motherboard models. For motherboards without the floppy connector, prepare a USB flash disk before using this utility.
Recovering the BIOS
To recover the BIOS: 1. Turn on the system. 2. Insert the support DVD to the optical drive or the...
User Manual - Page 54
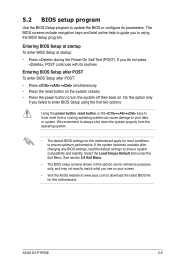
... and stability. Select the Load Setups Default item under the Exit Menu. See section 5.8 Exit Menu.
• The BIOS setup screens shown in this section are for reference purposes only, and may not exactly match what you see on your screen.
• Visit the ASUS website at www.asus.com to download the latest BIOS file for this motherboard.
ASUS G1-P7P55E
5-5
User Manual - Page 59
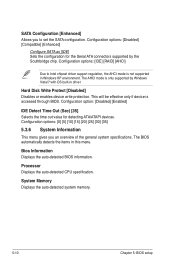
... SATA as [IDE] Sets the configuration for the Serial ATA connectors supported by the Southbridge chip. Configuration options: [IDE] [RAID] [AHCI]
Due to Intel chipset driver support regulation, the AHCI mode is not supported in Windows XP environment. The AHCI mode is only supported by Windows Vista/7 with OS built-in driver.
Hard Disk Write Protect [Disabled] Disables or enables device write...
User Manual - Page 70
... an item then press to display the sub-menu.
Main
Advanced
Power
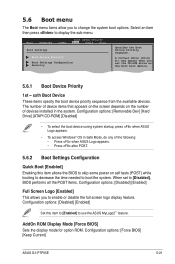
BIOS SETUP UTILITY Boot Tools Exit
Boot Settings
Boot Device Priority
Boot Settings Configuration Security
Specifies the Boot Device Priority sequence.
A virtual drive (Drive B:) may appear when you set the CD-ROM drive as the first boot device.
5.6.1 Boot Device Priority
1st ~ xxth Boot Device These items specify the boot...
User Manual - Page 73
... display the sub-menu.
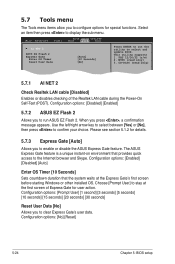
Main Advanced
Power
BIOS SETUP UTILITY Boot Tools Exit
AI NET 2
ASUS EZ Flash 2 Express Gate
Enter OS Timer Reset User Data
[Auto] [10 Seconds] [No]
Press ENTER to run the utility to select and update BIOS. This utility supports 1. FAT 12/16/32 (r/w) 2. MTFS (read only) 3. CD-DISC (read only)
5.7.1 AI NET 2
Check Realtek LAN cable...