Biostar M6TSU driver and firmware

Related Biostar M6TSU Manual Pages
Download the free PDF manual for Biostar M6TSU and other Biostar manuals at ManualOwl.com
M6TSU user's manual - Page 1
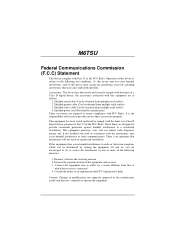
... comply with the limits of a Class B digital device, the accessories associated with this equipment are as follows:
1. Shielded serial cable (Can be obtained from multiple retail outlets) 2. Shielded printer cable (Can be obtained from multiple retail outlets) 3. Shielded video cable (Can be obtained from multiple retail outlets) 4. Shielded power cord (Provided by manufacturer) These accessories...
M6TSU user's manual - Page 2
... approval in writing.
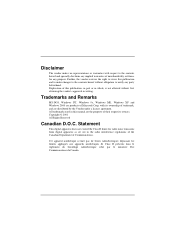
Trademarks and Remarks
MS-DOS, Windows NT, Windows 9x, Windows ME, Windows XP and Windows 2000 are products of Microsoft Corp, with its ownership...manual are the property of their respective owners. Copyright © 2001 All Rights Reserved
Canadian D.O.C. Statement
This digital apparatus does not exceed the Class B limits for radio noise emissions from digital apparatus as set...
M6TSU user's manual - Page 3
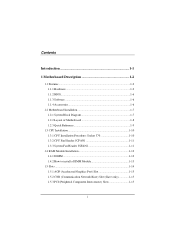
...1.1.1 Hardware 1-2 1.1.2 BIOS 1-6 1.1.3 Software 1-6 1.1.4 Accessories 1-6
1.2 Motherboard Installation 1-7 1.2.1 System Block Diagram 1-7 1.2.2 Layout of Motherboard 1-8 1.2.3 Quick Reference 1-9
1.3 CPU Installation 1-10 1.3.1 CPU Installation Procedure: Socket 370 1-10 1.3.2 CPU Fan Header: JCFAN1 1-11 1.3.3 System Fan Header: JSFAN2 1-11
1.4 RAM Module Installation 1-12 1.4.1 DIMM...
M6TSU user's manual - Page 5
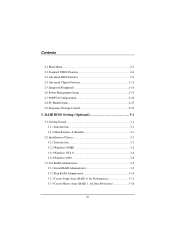
...Chipset Features 2-12 2.5 Integrated Peripherals 2-14 2.6 Power Management Setup 2-19 2.7 PnP/PCI Configurations 2-24 2.8 PC Health Status 2-27 2.9 Frequency/Voltage Control 2-29
3. RAID BIOS Setting (Optional 3-1
3.1 Getting Started 3-1 3.1.1 Introduction 3-1 3.1.2 Main Features & Benefits 3-1
3.2 Installation of Driver 3-2 3.2.1 Introduction 3-2 3.2.2 Windows 98/ME 3-2 3.2.3 Windows...
M6TSU user's manual - Page 7
... and hardware standards.
M6TSU Highlights:
8 Contains on board I/O facilities, which include two serial ports, a parallel port, a PS/2 mouse port, a PS/2 keyboard port, audio ports, USB ports and a game port.
8 Contains on board IDE facilities for IDE devices such as hard disks and CD-ROM Drives.
8 Supports the Intel Pentium®!!! (Socket 370) processor, a leading edge processor which brings to...
M6TSU user's manual - Page 9
... one AGP Bus slot.
Integrated IDE controller − Supports 4 IDE hard disk drives. − Supports PIO mode 5, Master Mode high performace hard disk drives. − Supprots Ultra DMA 33/ 66/ 100 Bus Master Mode. − Supports IDE interface with CD-ROM. − Supports high capacity hard disk drives. − Supports LBA mode. − Driver detected by BIOS.
Accelerated Graphics Port (AGP...
M6TSU user's manual - Page 12
...
Motherboard Description
1.1.2 BIOS
− AWARD BIOS. − ACPI Supported. − Supports APM1.2. − Setting the CPU Host and Memory clock frequency/Ratio.
1.1.3 Software
Operating Systems − Offers the highest performance for MS-DOS, Windows NT, Windows 2000, Windows 9x, Windows ME, Windows XP, Novell, LINUX(Red Hat 7.0), UNIX, SCO UNIX etc.
1.1.4 Accessories
− HDD Cable...
M6TSU user's manual - Page 13
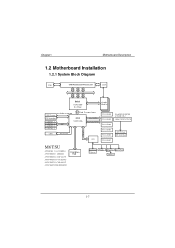
... 4
USB
82801BA
PCI ADDR/DATA
PCI CONN 6 PCI CONN 5 PCI CONN 4 PCI CONN 3
CNR
AC'97 Link
PCI CONN 2
LPC Bus
SIO
PCI CONN 1
UltraDMA/33/66/100 & RAID0/1/0+1 HIGH POINT HTP370
IDE Primary IDE Secondary
M6TSU
ATX(FSB: 133/100MHz) SUPPORTS 3 DIMMS SUPPORTS 1 AGP SLOT SUPPORTS 6 PCI SLOTS SUPPORTS 1 CNR SLOT SUPPORTS TELEPHONY
FirmWare Hub
Keyboard Mouse
Floppy
Parallel Game Port Serial...
M6TSU user's manual - Page 28
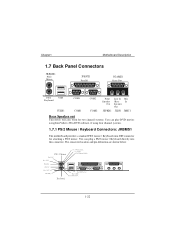
.../2
USB
Keyboard
JUSB1
COM1 COM1
COM2 COM2
Front Speaker
Out
Line In Mic /Rear In Speaker Out
JSPKR1 JLIN1 JMIC1
Rear Speaker out
This driver will also work for two channel systems. You can play DVD movies using InterVideo's Win DVD software, if using four channel systems.
1.7.1 PS/2 Mouse / Keyboard Connectors: JKBMS1
The motherboard...
M6TSU user's manual - Page 38
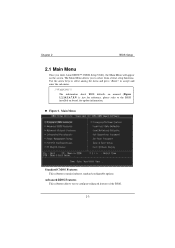
... Menu allows you to select from several setup functions. Use the arrow keys to select among the items and press to accept and enter the sub-menu.
!! WARNING !! The information about BIOS defaults on manual (Figure 1,2,3,4,5,6,7,8,9) is just for reference, please refer to the BIOS installed on board, for update information.
Figure 1. Main Menu
Standard CMOS Features...
M6TSU user's manual - Page 66

... high performance hard disk (3) Support up to 4 hard disks in connection (4) Support hot-swapping hard disks of mirror array (5) Support independent use of hard disk (6) Support such operating systems as Windows98/ME, Windows NT4.0
& Windows 2000 (7) Support GUI software for RAID management(compatible with BIOS) (8) Disk error alarm mechanism (9) Support spare disk to automatically rebuild mirror...
M6TSU user's manual - Page 67
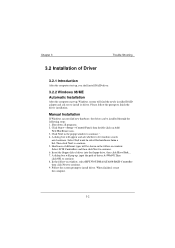
... 98/ME
Automatic Installation
After the computer start-up, Windows system will find the newly installed RAID adapter and ask you to install its driver. Please follow the prompt to finish the driver installation.
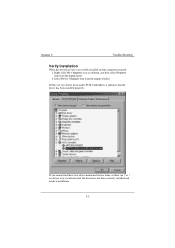
Manual Installation
If Windows can not find new hardware, the driver can be installed through the following steps : 1. Shut down all programs. 2. Click Start-->Setup-->Control Panel, then...
M6TSU user's manual - Page 68
Chapter 3
Trouble Shooting
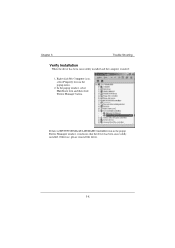
Verify Installation
When the driver has been successfully installed and the computer restarted: 1. Right-click My Computer icon on desktop, and then select Property item from the popup menu. 2. Select Device Manager item from the popup window.
If there are two device items under SCSI Controllers, it indicates that the driver has been installed properly.
If you cannot ...
M6TSU user's manual - Page 69
Chapter 3
Trouble Shooting
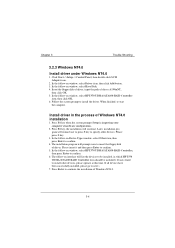
3.2.3 Windows NT4.0
Install driver under Windows NT4.0
1. Click Start-->Setup-->Control Panel, then double-click SCSI Adapter icon.
2. In the follow-on window, select Driver item. then click Add button. 3. In the follow-on window, select Have Disk. 4. Insert the floppy disk of driver, input the path of driver A:\WinNT,
then click OK. 5. In the follow-on window, select ...
M6TSU user's manual - Page 70
Chapter 3
Trouble Shooting
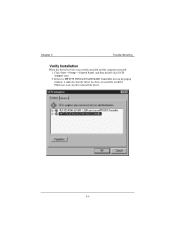
Verify Installation
When the driver has been successfully installed and the computer restarted: 1. Click Start-->Setup-->Control Panel, and then double-click SCSI Adapter item. 2. If there is HPT370 UDMA/ATA100 RAID Controller item in the popup window, it indicates that the driver has been successfully installed. Otherwise, users need to reinstall the driver.
3-5
M6TSU user's manual - Page 71
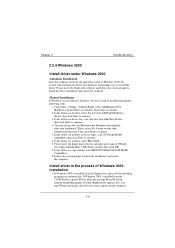
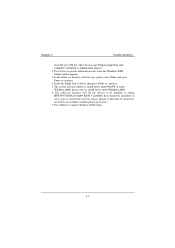
... automatically detect new hardware and prompt users to install the driver. Please insert the floppy disk of driver and follow the system prompt to finish the driver installation and restart the computer.
Manual Installation If Windows can not find new hardware, the driver shall be installed through the following steps :
1. Click Start-->Setup-->Control Panel, select Add/Remove New Hardware. In the...
M6TSU user's manual - Page 72
... when the message Setup is inspecting your computer's hardware configuration appears. 2. Press S key to specify additional devices when the Windows 2000 Setup window appears. 3. In the follow-on window of device type, please select Other and press Enter to continue. 4. Insert the floppy disk of driver, then press Enter to continue. 5. The system will ask whether to install driver under WinNT or...
M6TSU user's manual - Page 73
... 3
Trouble Shooting
Verify Installation
When the driver has been successfully installed and the computer restarted:
1. Right-click My Computer icon, select Property item in the popup menu.
2. In the popup window, select Hardware item and then click Device Manager button.
If there is HPT370 UDMA/ATA100 RAID Controller item in the popup Device Manager window, it indicates that the driver has...
M6TSU user's manual - Page 74
... 3
Trouble Shooting
3.3 Use RAID Administrator
3.3.1 Install RAID Administrator
Please take the following steps to install RAID Administrator: 1. Insert the installation CD into the CD-ROM drive. 2. Enter Windows Explorer, find and double-click the setup program file: Setup Program: Driver\Chipset\Hpoint\RAID\setup.exe 3. Click OK button, follow the program prompt to finish the installation...
M6TSU user's manual - Page 94
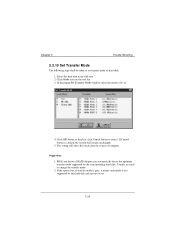
... button to cancel .If Cancel button is clicked, the system will remain unchanged.
5. The setting will take effect only after the restart of computer.
Suggestion: 1. BIOS and driver of RAID Adapter can automatically detect the optimum transfer mode supported by the corresponding hard disk. Usually no need to change the transfer mode. 2. If the option box of transfer...