Dell Alienware M17X R3 driver and firmware
Related Dell Alienware M17X R3 Manual Pages
Download the free PDF manual for Dell Alienware M17X R3 and other Dell manuals at ManualOwl.com
Mobile Manual - Page 6
...36
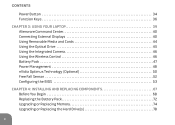
CHAPTER 3: USING YOUR LAPTOP 39 Alienware Command Center 40 Connecting External Displays 40 Using Removable Media and Cards 44 Using the Optical Drive 45 Using the Integrated Camera 46 Using the Wireless Control 46 Battery Pack 47 Power Management 48 nVidia Optimus Technology (Optional 50 Free Fall Sensor 52 Configuring the BIOS 53
CHAPTER 4: INSTALLING AND REPLACING COMPONENTS 67...
Mobile Manual - Page 7
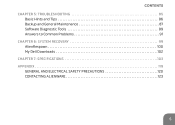
CONTENTS CHAPTER 5: TROUBLESHOOTING 85
Basic Hints and Tips 86 Backup and General Maintenance 87 Software Diagnostic Tools 89 Answers to Common Problems 91 CHAPTER 6: SYSTEM RECOVERY 99 AlienRespawn 100 My Dell Downloads 102 CHAPTER 7: SPECIFICATIONS 103 APPENDIX 119 GENERAL AND ELECTRICAL SAFETY PRECAUTIONS 120 CONTACTING ALIENWARE 123
5
Mobile Manual - Page 17

..., setting preferences, and setting up an Internet connection.
CAUTION: Do not interrupt the operating system's setup process. Doing so may render your computer unusable and you will need to reinstall the operating system. NOTE: For optimal performance of your computer, it is recommended that you download and install the latest BIOS and drivers for your computer available at support.dell.com...
Mobile Manual - Page 36
... the control panel of Microsoft Windows operating system. The power button is located in the center of the hinge cover. For the exact location, see "Computer Base and Keyboard Features" on page 30. The color of the AlienHead rim indicates the power status. The color indicating the power status can be changed using the AlienFX software.
34
Mobile Manual - Page 42
... can access Alienware Command Center by pressing on the media control keys. See "Media Control Keys" on page 33.
Connecting External Displays
If you want to enjoy your computing environment on a bigger scale visually, or extend your desktop area, you can connect an external display such as a standalone monitor, an LCD TV, or a projector.
Connecting a Display
Use the appropriate cable based...
Mobile Manual - Page 50
... idea for you to spend some time acquiring a basic understanding of the power management concept from your operating system. You can use the power options in your operating system to configure the power settings on your computer. The Microsoft Windows operating system installed on your computer provides three default options: •• Balanced - Offers full performance when you...
Mobile Manual - Page 52
...supported on computers that use nVidia 3D vision. Your Alienware M17x laptop is equipped with the nVidia Optimus technology. The Optimus technology is designed to maximize performance and user experience on your computer...application is launched, the video drivers check to see if the ...updated frequently by nVidia and is automatically downloaded to your computer when you are connected to the...
Mobile Manual - Page 57
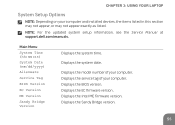
... your computer and installed devices, the items listed in this section may not appear, or may not appear exactly as listed.
NOTE: For the updated system setup information, see the Service Manual at support.dell.com/manuals.
Main Menu System Time (hh:mm:ss) System Date (mm/dd/yyyy) Alienware Service Tag BIOS Version EC Version ME Version Sandy Bridge Version
Displays the system time.
Displays the...
Mobile Manual - Page 70
...
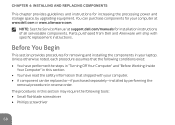
This chapter provides guidelines and instructions for increasing the processing power and storage space, by upgrading equipment. You can purchase components for your computer at www.dell.com or www.alienware.com.
NOTE: See the Service Manual at support.dell.com/manuals for installation instructions of all serviceable components. Parts purchased from Dell and Alienware will ship with specific...
Mobile Manual - Page 76
CHAPTER 4: INSTALLING AND REPLACING COMPONENTS
Upgrading or Replacing Memory
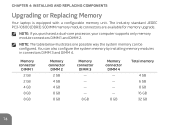
Your laptop is equipped with a configurable memory unit. The industry standard JEDEC PC3-10600 (DDR3) SODIMM memory module connectors are available for memory upgrade.
NOTE: If you purchased a dual-core processor, your computer supports only memory module connectors DIMM 1 and DIMM 2.
NOTE: The table below illustrates ...
Mobile Manual - Page 77
CHAPTER 4: INSTALLING AND REPLACING COMPONENTS
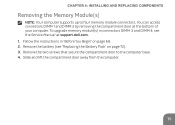
Removing the Memory Module(s)
NOTE: Your computer supports up to four memory module connectors. You can access connectors DIMM 1 and DIMM 2 by removing the compartment door at the bottom of your computer. To upgrade memory module(s) in connectors DIMM 3 and DIMM 4, see the Service Manual at support.dell.com. 1. Follow the instructions in "Before You ...
Mobile Manual - Page 80
CHAPTER 4: INSTALLING AND REPLACING COMPONENTS
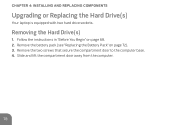
Upgrading or Replacing the Hard Drive(s)
Your laptop is equipped with two hard drive sockets.
Removing the Hard Drive(s)
1. Follow the instructions in "Before You Begin" on page 68. 2. Remove the battery pack (see "Replacing the Battery Pack" on page 72). 3. Remove the two screws that secure the compartment door to the computer base...
Mobile Manual - Page 91

... System Assessment (PSA) or Enhanced Pre-boot System Assessment (ePSA) pre-installed on your computer. The computer runs the PSA/ePSA, a series of initial tests of your system board, keyboard, display, memory, hard drive, etc. To invoke PSA/ePSA: 1. Turn on (or restart) your computer. 2. When the Alienware logo appears, press immediately. NOTE: If you wait too long and...
Mobile Manual - Page 94
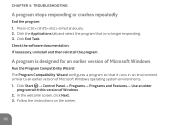
...Check the software documentation. If necessary, uninstall and then reinstall the program.
A program is designed for an earlier version of Microsoft Windows
Run the Program Compatibility Wizard: The Program Compatibility Wizard configures a program so that it runs in an environment similar to an earlier version of Microsoft Windows operating system environments. 1. Click Start → Control Panel...
Mobile Manual - Page 96
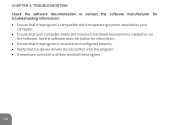
... program is compatible with the operating system installed on your
computer. •• Ensure that your computer meets the minimum hardware requirements needed to run
the software. See the software documentation for information. •• Ensure that the program is installed and configured properly. •• Verify that the device drivers do not conflict with the program. •...
Mobile Manual - Page 102
... factory image while preserving the data files:
1. Turn off your computer.
2. Disconnect all the devices connected to the computer (such as USB drive, printer, and so on) and remove any recently added internal hardware.
NOTE: Do not disconnect the AC adapter cable.
3. Turn on your computer.
4. When the Alienware logo appears, press several times to access the Advanced Boot Options...
Mobile Manual - Page 104
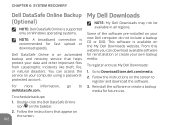
... the service on your computer using a passwordprotected account.
For more information, go to delldatasafe.com.
To schedule backups:
1. Double-click the Dell DataSafe Online icon on the taskbar.
2. Follow the instructions that appear on the screen.
102
My Dell Downloads
NOTE: My Dell Downloads may not be available in all regions.
Some of the software pre-installed on your new Dell computer...
Service Manual (English Only) - Page 102
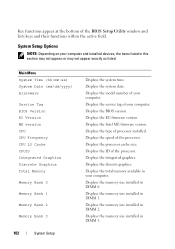
... Graphics Total Memory
Memory Bank 0
Memory Bank 1
Memory Bank 2
Memory Bank 3
102
System Setup
Displays the system time. Displays the system date. Displays the model number of your computer. Displays the service tag of your computer. Displays the BIOS version. Displays the EC firmware version. Displays the Intel ME firmware version. Displays the type of processor installed. Displays the speed...
Service Manual (English Only) - Page 109
25
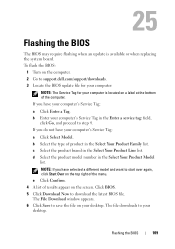
Flashing the BIOS
The BIOS may require flashing when an update is available or when replacing the system board. To flash the BIOS:
1 Turn on the computer. 2 Go to support.dell.com/support/downloads. 3 Locate the BIOS update file for your computer:
NOTE: The Service Tag for your computer is located on a label at the bottom of the computer. If you have your computer's Service Tag:
a Click Enter a...
Service Manual (English Only) - Page 110
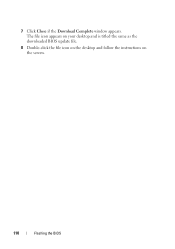
7 Click Close if the Download Complete window appears. The file icon appears on your desktop and is titled the same as the downloaded BIOS update file.
8 Double-click the file icon on the desktop and follow the instructions on the screen.
110
Flashing the BIOS