Dell Vostro 1550 driver and firmware
Related Dell Vostro 1550 Manual Pages
Download the free PDF manual for Dell Vostro 1550 and other Dell manuals at ManualOwl.com
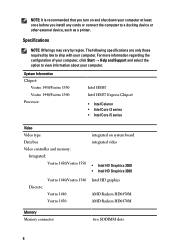
User Manual - Page 6
... Support and select the option to view information about your computer.
System Information Chipset:
Vostro 1450/Vostro 1550 Vostro 1440/Vostro 1540 Processor:
Intel HM67 Intel HM57 Express Chipset
• Intel Celeron • Intel Core i3 series • Intel Core i5 series
Video Video type Data bus Video controller and memory:
Integrated: Vostro 1450/Vostro 1550
integrated on system board...
User Manual - Page 9
...™ are trademarks of Advanced Micro Devices, Inc. Microsoft®, Windows®, MS-DOS®, Windows Vista®, the Windows Vista start button, and Office Outlook®...players. The Bluetooth® word mark is a registered trademark and owned by the Bluetooth® SIG, Inc. and any use of such mark by Dell Inc. is under license. Wi-Fi® is a registered trademark of Wireless Ethernet...
Owners Manual - Page 2
...™ are trademarks of Advanced Micro Devices, Inc. Microsoft®, Windows®, MS-DOS®, Windows Vista®, the Windows Vista start button, and Office Outlook®...players. The Bluetooth® word mark is a registered trademark and owned by the Bluetooth® SIG, Inc. and any use of such mark by Dell Inc. is under license. Wi-Fi® is a registered trademark of Wireless Ethernet...
Owners Manual - Page 3
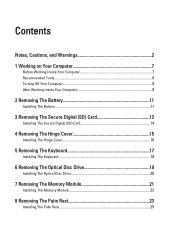
... Inside Your Computer 9
2 Removing The Battery 11
Installing The Battery...11
3 Removing The Secure Digital (SD) Card 13
Installing The Secure Digital (SD) Card 14
4 Removing The Hinge Cover 15
Installing The Hinge Cover 16
5 Removing The Keyboard 17
Installing The Keyboard 18
6 Removing The Optical Disc Drive 19
Installing The Optical Disc Drive 20
7 Removing The Memory Module 21...
Owners Manual - Page 4
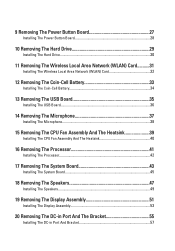
... Removing The Power Button Board 27
Installing The Power Button Board 28
10 Removing The Hard Drive 29
Installing The Hard Drive 30
11 Removing The Wireless Local Area Network (WLAN) Card...........31
Installing The Wireless Local Area Network (WLAN) Card 32
12 Removing The Coin-Cell Battery 33
Installing The Coin-Cell Battery 34
13 Removing The USB Board 35
Installing The USB Board 36
14...
Owners Manual - Page 7
...the online or telephone service and support team. Damage due to servicing that is not authorized by Dell is not covered by your warranty. Read and follow the safety instructions that came with ... computer.
CAUTION: Handle components and cards with care. Do not touch the components or contacts on a card. Hold a card by its edges or by its metal mounting bracket. Hold a component such as a processor ...
Owners Manual - Page 8
... cable from your computer and then unplug the cable from the network device. 4. Disconnect all network cables from the computer. 5. Disconnect your computer and all attached devices from their electrical outlets. 6. Close the display and turn the computer upside-down on a flat work surface.
NOTE: To avoid damaging the system board, you must remove the main battery before you service the computer...
Owners Manual - Page 9

... cables before turning on your computer.
CAUTION: To avoid damage to the computer, use only the battery designed for this particular Dell computer. Do not use batteries designed for other Dell computers. 1. Connect any external devices, such as a port replicator, battery slice, or media base, and replace any cards, such as an ExpressCard. 2. Connect any telephone or network cables to your computer...
Owners Manual - Page 11
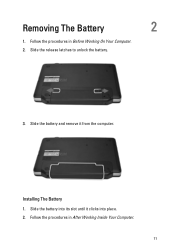
Removing The Battery
2
1. Follow the procedures in Before Working On Your Computer. 2. Slide the release latches to unlock the battery.
3. Slide the battery and remove it from the computer.
Installing The Battery 1. Slide the battery into its slot until it clicks into place. 2. Follow the procedures in After Working Inside Your Computer.
11
Owners Manual - Page 14
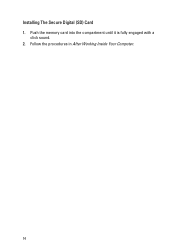
Installing The Secure Digital (SD) Card 1. Push the memory card into the compartment until it is fully engaged with a
click sound. 2. Follow the procedures in After Working Inside Your Computer.
14
Owners Manual - Page 16
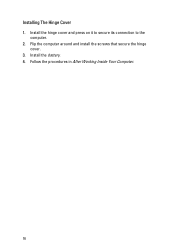
Installing The Hinge Cover 1. Install the hinge cover and press on it to secure its connection to the
computer. 2. Flip the computer around and install the screws that secure the hinge
cover. 3. Install the battery. 4. Follow the procedures in After Working Inside Your Computer.
16
Owners Manual - Page 18
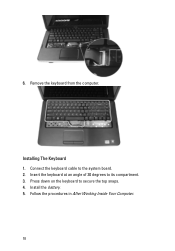
6. Remove the keyboard from the computer.
Installing The Keyboard 1. Connect the keyboard cable to the system board. 2. Insert the keyboard at an angle of 30 degrees to its compartment. 3. Press down on the keyboard to secure the top snaps. 4. Install the battery. 5. Follow the procedures in After Working Inside Your Computer.
18
Owners Manual - Page 20
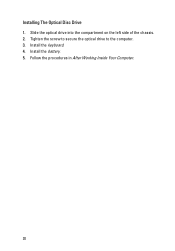
Installing The Optical Disc Drive 1. Slide the optical drive into the compartment on the left side of the chassis. 2. Tighten the screw to secure the optical drive to the computer. 3. Install the keyboard. 4. Install the battery. 5. Follow the procedures in After Working Inside Your Computer.
20
Owners Manual - Page 22
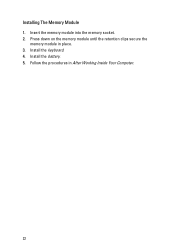
Installing The Memory Module 1. Insert the memory module into the memory socket. 2. Press down on the memory module until the retention clips secure the
memory module in place. 3. Install the keyboard. 4. Install the battery. 5. Follow the procedures in After Working Inside Your Computer.
22
Owners Manual - Page 25
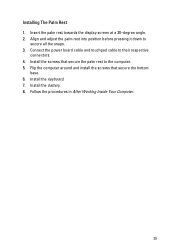
... palm rest towards the display screen at a 30-degree angle. 2. Align and adjust the palm rest into position before pressing it down to
secure all the snaps. 3. Connect the power board cable and touchpad cable to their respective
connectors. 4. Install the screws that secure the palm rest to the computer. 5. Flip the computer around and install the screws that...
Owners Manual - Page 28
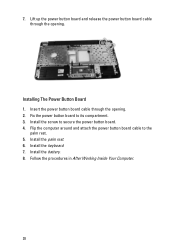
... up the power button board and release the power button board cable through the opening.
Installing The Power Button Board 1. Insert the power button board cable through the opening. 2. Fix the power button board to its compartment. 3. Install the screw to secure the power button board. 4. Flip the computer around and attach the power button board cable to the
palm rest. 5. Install the palm rest...
Owners Manual - Page 30
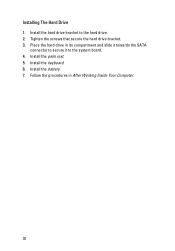
Installing The Hard Drive 1. Install the hard drive bracket to the hard drive. 2. Tighten the screws that secure the hard drive bracket. 3. Place the hard drive in its compartment and slide it towards the SATA
connector to secure it to the system board. 4. Install the palm rest. 5. Install the keyboard. 6. Install the battery. 7. Follow the procedures in After Working Inside Your Computer.
30
Owners Manual - Page 32
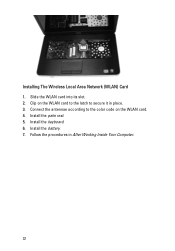
Installing The Wireless Local Area Network (WLAN) Card 1. Slide the WLAN card into its slot. 2. Clip on the WLAN card to the latch to secure it in place. 3. Connect the antennae according to the color code on the WLAN card. 4. Install the palm rest. 5. Install the keyboard. 6. Install the battery. 7. Follow the procedures in After Working Inside Your Computer.
32
Owners Manual - Page 71
... Windows desktop. Then, shut down your computer and try again.
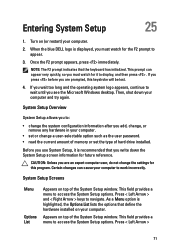
System Setup Overview
System Setup allows you to:
• change the system configuration information after you add, change, or remove any hardware in your computer.
• set or change a user-selectable option such as the user password. • read the current amount of memory or set the type of hard drive installed...
Owners Manual - Page 72
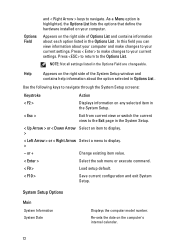
...the hardware installed on your computer. Appears...display. >
< Left Arrow > or < Right Arrow Select a menu to display. >
- or +
Change existing item value.
< Enter >
Select the sub menu or execute command.
< F9 >
Load setup default.
< F10 >
Save current configuration and exit System Setup.
System Setup Options
Main System Information System Date
Displays the computer model number. Re-sets...