Dell PowerEdge 650 driver and firmware

Related Dell PowerEdge 650 Manual Pages
Download the free PDF manual for Dell PowerEdge 650 and other Dell manuals at ManualOwl.com
Microprocessor
Upgrade Installation Guide - Page 3
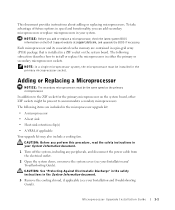
... replace a microprocessor, check the latest system BIOS information on the Dell Support website at support.dell.com, and upgrade the BIOS if necessary.
Each microprocessor and its associated cache memory are contained in a pin-grid array (PGA) package that is installed in a ZIF socket on the system board. The following subsection describes how to install or replace the microprocessor in either...
Microprocessor
Upgrade Installation Guide - Page 4
www.dell.com | support.dell.com
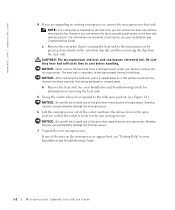
4 If you are upgrading an existing microprocessor, remove the microprocessor heat sink.
NOTE: If a cooling fan is mounted on the heat sink, you can ... microprocessor.
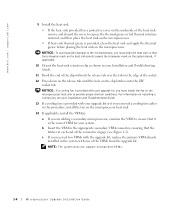
7 Unpack the new microprocessor.
If any of the pins on the microprocessor appear bent, see "Getting Help" in your Installation and Troubleshooting Guide.
1-2
Microprocessor Upgrade Installation Guide
Microprocessor
Upgrade Installation Guide - Page 5
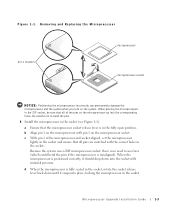
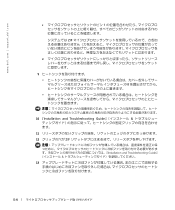
...Align pin 1 on the microprocessor with pin 1 on the microprocessor socket.
c With pin 1 of the microprocessor and socket aligned, set the microprocessor lightly in the socket and ensure that all pins are matched with the correct holes in the socket.
Because the system...lever back down until it snaps into place, locking the microprocessor in the socket.
Microprocessor Upgrade Installation Guide
1-3
Microprocessor
Upgrade Installation Guide - Page 6
....dell.com | support.dell.com
9 Install ...mark on the system board, if applicable.
10 Orient the heat-sink retention clip as shown in your Installation and Troubleshooting Guide.
11 Hook the ... upgrade kit, replace the primary VRM already installed in the system with one of the VRMs from the upgrade kit.
NOTE: The system does not support mismatched VRMs.
1-4
Microprocessor Upgrade Installation Guide
Microprocessor
Upgrade Installation Guide - Page 7
... stored in the system's nonvolatile random-access memory (NVRAM). To clear this message log, see your systems management software documentation.
18 Enter the System Setup program and ensure that the microprocessor categories match the new system configuration. For instructions about using the System Setup program, see your User's Guide.
19 Run the system diagnostics to verify...
Microprocessor
Upgrade Installation Guide - Page 34
www.dell.com | support.dell.com
2 Installation and Troubleshooting Guide
3 Installation and Troubleshooting Guide
4
Installation and Troubleshooting Guide
a
b Installation and Troubleshooting Guide
5 5-1
6
5-2
Microprocessor
Upgrade Installation Guide - Page 35
7
Installation and Troubleshooting Guide
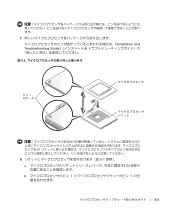
図 5-1
ピン 1
ZIF
8 5-1
a
b 1 1
5-3
Microprocessor
Upgrade Installation Guide - Page 36
www.dell.com | support.dell.com
c 1
ZIF
d
9
10 『Installation and Troubleshooting Guide
11
12 ZIF
Installation and Troubleshooting Guide
13
5-4
Microprocessor
Upgrade Installation Guide - Page 37
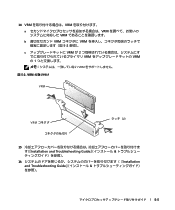
14 VRM VRM a VRM VRM b VRM VRM 5-2 c VRM が 2 VRM VRM の 1 VRM
図 5-2. VRM
VRM
VRM
ラッチ(2)
15 Installation and Troubleshooting Guide
16 Installation and Troubleshooting Guide
5-5
Microprocessor
Upgrade Installation Guide - Page 38
www.dell.com | support.dell.com
17
NVRAM RAM
18
19 Installation and Troubleshooting Guide
5-6
Updating the
Kernel for the Red Hat Linux 9 Operating System (.pdf) - Page 2
... and acronyms, see the Installation and Troubleshooting Guide.
Information in this document is subject to change without notice. © 2003 Dell Inc. All rights reserved. Reproduction in any manner whatsoever without the written permission of Dell Inc. is strictly forbidden. Trademarks used in this text: Dell, the DELL logo, and PowerEdge are trademarks of Dell Inc. Other trademarks...
Updating the
Kernel for the Red Hat Linux 9 Operating System (.pdf) - Page 3
...See "Replacing the Power Supply" in your Installation and Troubleshooting Guide. 10 If the hard-drive interface cables are routed through the backplane to a PCI controller card, disconnect these interface cables from the PCI controller card. 11 Remove all PCI expansion cards installed on the riser board. See "Removing an Expansion Card" in your Installation and Troubleshooting Guide. 12 Disconnect...
Updating the
Kernel for the Red Hat Linux 9 Operating System (.pdf) - Page 4
www.dell.com | support.dell.com
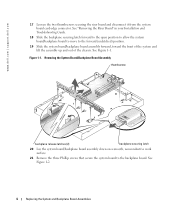
17 Loosen the two thumbscrews securing the riser board and disconnect it from the system board card-edge connector. See "Removing the Riser Board" in your Installation and Troubleshooting Guide.
18 Slide the backplane securing latch forward to the open position to allow the system board/backplane board to move to the forward (unlatched) position.
19...
Updating the
Kernel for the Red Hat Linux 9 Operating System (.pdf) - Page 5
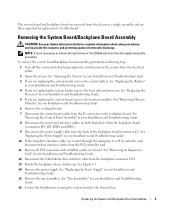
... System Information Guide for complete information about safety precautions, working inside the computer, and protecting against electrostatic discharge.
NOTE: It is not necessary to remove the hard drives or the CD/diskette drive from the system during this procedure.
To install the system board/backplane board assembly, perform the following steps: 1 Connect the four-conductor power cable to the...
Updating the
Kernel for the Red Hat Linux 9 Operating System (.pdf) - Page 6
www.dell.com | support.dell.com
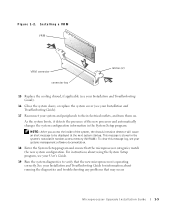
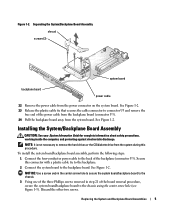
Figure 1-3. Joining the System/Backplane Board Assembly shroud
screw
center screw hole
system board
backplane board
power cable
4 Connect the free end of the four-conductor power cable that you installed on the back of the backplane (in step 1) to the power connector (CN2) on the system board.
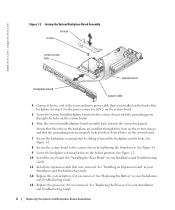
5 Lower the system board/backplane board into the system chassis ...
Updating the
Kernel for the Red Hat Linux 9 Operating System (.pdf) - Page 7
... Memory" in your Installation and Troubleshooting Guide.
16 Connect the control panel cable to the front of the backplane. See "Installing the Control Panel Assembly" in your Installation and Troubleshooting Guide.
17 Connect the hard-drive interface cables either to the backplane or through the backplane to the hard-drive controller card, if one is installed.
18 Connect the hard-drives power...