Dell Vostro 15 3565 driver and firmware
Related Dell Vostro 15 3565 Manual Pages
Download the free PDF manual for Dell Vostro 15 3565 and other Dell manuals at ManualOwl.com
Owners Manual - Page 3
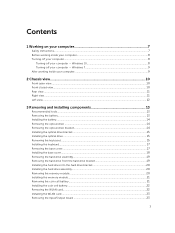
... the optical drive bracket...15 Installing the optical drive...15 Removing the keyboard...15 Installing the keyboard...17 Removing the base cover...17 Installing the base cover...18 Removing the hard drive assembly...19 Removing the hard drive from the hard drive bracket 19 Installing the hard drive into the hard drive bracket 20 Installing the hard drive assembly...20 Removing the memory module...
Owners Manual - Page 4
......36 Installing the display hinges...37
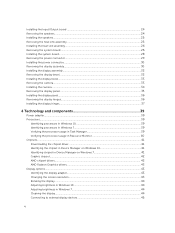
4 Technology and components 39
Power adapter...39 Processors...39
Identifying processors in Windows 10 39 Identifying processors in Windows 7 39 Verifying the processor usage in Task Manager 39 Verifying the processor usage in Resource Monitor 40 Chipsets...41 Downloading the chipset driver...41 Identifying the chipset in Device Manager on Windows 10...
Owners Manual - Page 5
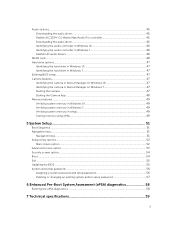
... Pro controller 45 Downloading the audio driver...45 Identifying the audio controller in Windows 10 46 Identifying the audio controller in Windows 7 46 Realtek HD audio drivers...46
WLAN card...46 Hard drive options...47
Identifying the hard drive in Windows 10 47 Identifying the hard drive in Windows 7 47 Entering BIOS setup...47 Camera features...47 Identifying the camera in Device Manager...
Owners Manual - Page 7
...the online or telephone service and support team. Damage due to servicing that is not authorized by Dell is not covered by your warranty. Read and follow the safety instructions that came with ... computer. CAUTION: Handle components and cards with care. Do not touch the components or contacts on a card. Hold a card by its edges or by its metal mounting bracket. Hold a component such as a processor ...
Owners Manual - Page 8
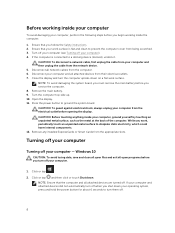
... cable from your computer and then unplug the cable from the network device. 5. Disconnect all network cables from the computer. 6. Disconnect your computer and all attached devices from their electrical outlets. 7. Close the display and turn the computer upside-down on a flat work surface.
NOTE: To avoid damaging the system board, you must remove the main battery before you service the computer...
Owners Manual - Page 9
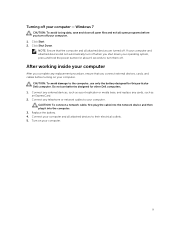
... the battery designed for this particular Dell computer. Do not use batteries designed for other Dell computers. 1. Connect any external devices, such as a port replicator or media base, and replace any cards, such as an ExpressCard. 2. Connect any telephone or network cables to your computer.
CAUTION: To connect a network cable, first plug the cable into the network device and then plug it into...
Owners Manual - Page 13
...
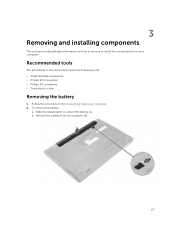
This section provides detailed information on how to remove or install the components from your computer.
Recommended tools
The procedures in this document require the following tools: • ... scribe
Removing the battery
1. Follow the procedure in Before working inside your computer. 2. To remove the battery:
a. Slide the release latch to unlock the battery [1]. b. Remove the battery from the...
Owners Manual - Page 14
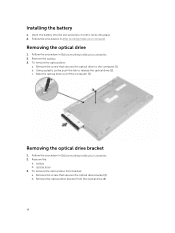
Installing the battery
1. Insert the battery into the slot and press it until it clicks into place. 2. Follow the procedures in After working inside your computer.
Removing the optical drive
1. Follow the procedure in Before working inside your computer. 2. Remove the battery. 3. To remove the optical drive:
a. Remove the screw that secures the optical drive to the computer [1]. b. Using a plastic...
Owners Manual - Page 15
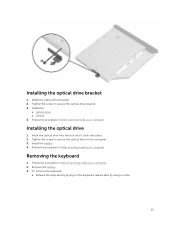
... place. 2. Tighten the screw to secure the optical drive to the computer. 3. Install the battery. 4. Follow the procedure in After working inside your computer.
Removing the keyboard
1. Follow the procedure in Before working inside your computer. 2. Remove the battery. 3. To remove the keyboard:
a. Release the keyboard by prying on the keyboard release tabs by using a scribe.
15
Owners Manual - Page 17
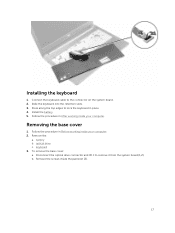
... keyboard cable to the connector on the system board. 2. Slide the keyboard into the retention slots. 3. Press along the top edges to lock the keyboard in place. 4. Install the battery. 5. Follow the procedure in After working inside your computer.
Removing the base cover
1. Follow the procedure in Before working inside your computer. 2. Remove the:
a. battery b. optical drive...
Owners Manual - Page 18
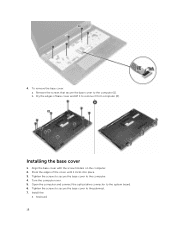
... it from computer [2].
Installing the base cover
1. Align the base cover with the screw holders on the computer. 2. Press the edges of the cover until it clicks into place. 3. Tighten the screws to secure the base cover to the computer. 4. Turn the computer over. 5. Open the computer and connect the optical drive connector to the system board. 6. Tighten the...
Owners Manual - Page 41
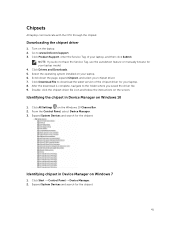
... File to download the latest version of the chipset driver for your laptop. 8. After the download is complete, navigate to the folder where you saved the driver file. 9. Double-click the chipset driver file icon and follow the instructions on the screen.
Identifying the chipset in Device Manager on Windows 10
1. Click All Settings on the Windows 10 Charms Bar. 2. From the Control Panel, select...
Owners Manual - Page 42
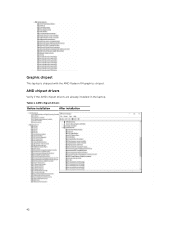
Graphic chipset
This laptop is shipped with the AMD Radeon R4 graphics chipset.
AMD chipset drivers
Verify if the AMD chipset drivers are already installed in the laptop.
Table 1. AMD chipset drivers
Before installation
After installation
42
Owners Manual - Page 43
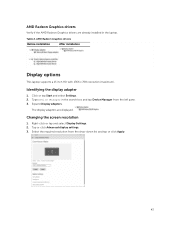
...AMD Radeon Graphics drivers
Before installation
After installation
Display options
This laptop supports a 15 inch HD with 1366 x 768 resolution (maximum).
Identifying the display adapter
1. Click or tap Start and select Settings. 2. Type Device Manager in the search box and tap Device Manager from the left pane. 3. Expand Display adapters.
The display adapters are displayed.
Changing the screen...
Owners Manual - Page 45
... the projector cable into a video port on your laptop. 2. Press the Windows logo + P key. 3. Select one of the following modes:
• PC screen only • Duplicate • Extend • Second Screen only
NOTE: For more information, see the document that shipped with your display device.
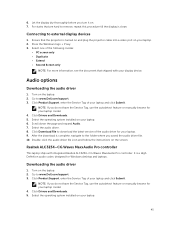
Audio options
Downloading the audio driver
1. Turn on the laptop. 2. Go to www.Dell.com/support. 3. Click...
Owners Manual - Page 46
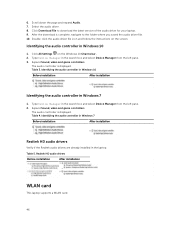
... driver. 8. Click Download File to download the latest version of the audio driver for your laptop. 9. After the download is complete, navigate to the folder where you saved the audio driver file. 10. Double-click the audio driver file icon and follow the instructions on the screen.
Identifying the audio controller in Windows 10
1. Click All Settings on the Windows 10 Charms bar. 2. Type Device...
Owners Manual - Page 47
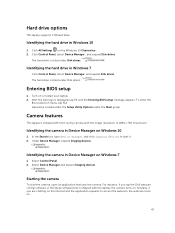
... Settings on the Windows 10 Charms bar. 2. Click Control Panel, select Device Manager , and expand Disk drives.
The hard drive is listed under Disk drives.
Identifying the hard drive in Windows 7
Click Control Panel, select Device Manager, and expand Disk drives. The hard drive is listed under Disk drives.
Entering BIOS setup
1. Turn on or restart your laptop. 2. After the Dell logo is displayed...
Owners Manual - Page 54
...: Adaptive
Advanced Battery You can enable or disable the Advanced Battery Charge Mode. Default: Disabled Charge Mode
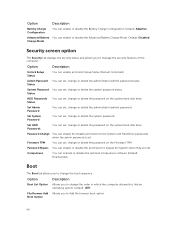
Security screen option
The Security tab displays the security status and allows you to manage the security features of the computer.
Option
Description
Unlock Setup Status
You can enable an Unlock Setup Status (Default: Unlocked).
Admin Password You can set...
Owners Manual - Page 55
... to Save Changes setting before exiting from Setup Utility.
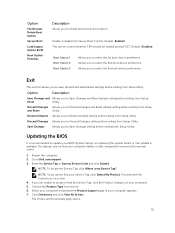
Updating the BIOS
It is recommended to update your BIOS (System Setup), on replacing the system board or if an update is available. For laptops, ensure that your computer battery is fully charged and connected to a power outlet
1. Restart the computer. 2. Go to Dell.com/support. 3. Enter the Service Tag or Express Service Code and click...
Owners Manual - Page 56
... Click Run to install the updated BIOS settings on your computer. Follow the instructions on the screen.
NOTE: It is recommended not to update the BIOS version for more than 3 revisions. For example: If you want to update the BIOS from 1.0 to 7.0, then install version 4.0 first and then install version 7.0.
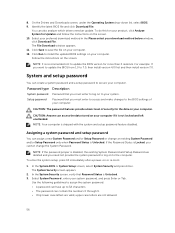
System and setup password
You can create a system password and a setup password to secure...