Epson ELP-7100 - PowerLite 7000 XGA LCD Projector driver and firmware

Related Epson ELP-7100 Manual Pages
Download the free PDF manual for Epson ELP-7100 and other Epson manuals at ManualOwl.com
Technical Brief (Multimedia Projectors) - Page 1
...controls M ELP Link IV software M Flexible installation M EasyMP and EasyMP.net
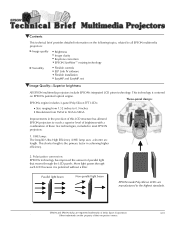
Image Quality-Superior brightness
All EPSON multimedia projectors include EPSON's integrated LCD prism technology. This technology is centered
on EPSON's patented optical engine.
Three-panel design:
EPSON's engine includes 3-panel Poly-Silicon TFT LCD's:
LL
Size ranging from 1.32 inches to 0.9 inches Resolutions...
Technical Brief (Multimedia Projectors) - Page 5
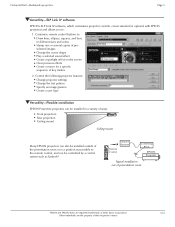
...Change projector settings Change the test pattern Specify an image gamma Create a user logo
Versatility-Flexible installation
EPSON PowerLite projectors can be installed in a variety of ways:
Front projection Rear projection Ceiling mount
Ceiling mount
LL L L
LLL
Many EPSON projectors can also be installed outside of the presentation room or in a position inaccessible to the remote control, and...
Technical Brief (Multimedia Projectors) - Page 6
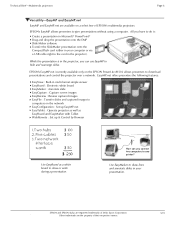
... presentation onto the CompactFlash card (either in your computer or via a USB cable right to the card in the projector.)
While the presentation is in the projector, you can use EasyMP to hide and rearrange slides.
EPSON's EasyMP.net (currently available only on the EPSON PowerLite 8150i) allows presenters to download presentations and control the projector over a network. EasyMP.net offers...
Product Support Bulletin(s) - Page 1
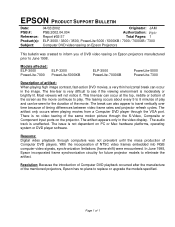
... from a Computer DVD player through the VGA port. There is no video tearing of the same motion picture through the S-Video, Composite or Component input ports on the projector. The artifact appears only in the video display. The audio track is unaffected. The issue is not dependent on PC or Mac hardware platforms, operating system or DVD player software.
Reasons: Digital video...
User Manual - Page 7
4 Using the ELP Link II Software
59
Installing the Software 60
Connecting Needed Cables 60
Installing the Software from Windows 3.x 60
Installing the Software from Windows 95 62
Installing the Software from Macintosh OS
System 7 63
Launching the Software 64
Using the Software 64
Customizing the Remote Control Effects Buttons 64
Controlling Projector Features 72
5 Maintenance
...
User Manual - Page 12
... simple projector settings using the remote control or the operation panel.
Chapter 3, "Using the Projector Menus," describes how to use the menus to adjust the color and image settings, change the display of the projected image, and modify audio settings such as bass and treble.
Chapter 4, "Using the ELP Link II Software," describes how to use the ELP Link II software to control the computer...
User Manual - Page 15
... support and service through a network of authorized EPSON Customer Care Centers. Dial (800) 922-8911 for the nearest location or the following services:
q Fax-on-Demand access to EPSON's technical information library q Literature on current and new products q The location of your nearest Authorized EPSON Reseller or
Customer Care Center q Technical information on installation, configuration...
User Manual - Page 16

... Support Services
You can access helpful tips, specifications, DIP switch or jumper settings, drivers, Frequently Asked Questions (FAQs), sample files, application notes, and EPSON product bulletins 24 hours a day, 7 days a week, using a modem and one of the on-line services below.
World Wide Web
From the Internet, you can reach EPSON's Home Page at
http://www.epson.com
EPSON Download Service...
User Manual - Page 19

... all these components:
q Projector q Lens cover q Remote control q 2 AA batteries q Power cord q Video cable q Audio cable q Audio/visual (A/V) cable q Macintosh adapter set
Macintosh desktop adapter q ELP Link II Kit
Main cable Mouse cable for PS/2 Mouse cable for Serial Mouse cable for Macintosh
Macintosh monitor adapter
PC serial cable Macintosh serial cable Diskette for Windows Diskette for...
User Manual - Page 27
... the remote control, connect one end of the serial cable to the serial terminal on the square end of the main cable.
f. Connect the other end of the serial cable to the serial port on the back of your computer. Note: You will not be able to use ELP Link II software if your system has only one serial port that is being used to support a serial...
User Manual - Page 31
... the remote control, connect one end of the serial cable to the serial terminal on the square end of the main cable.
f. Connect the other end of the serial cable to the serial port on the back of your computer.
Note: You will not be able to use ELP Link II software if your laptop has only one serial port that is being used to support a serial mouse...
User Manual - Page 35

... cable connects the mouse cable (needed to use the remote control as a mouse) and serial cable (needed to use the ELP Link II software) from your Macintosh to the projector.
MAC mouse cable
MAC serial cable
s s s s s s
18
main cable
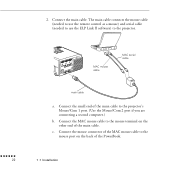
a. Connect the small end of the main cable to the projector's Mouse/Com 1 port. (Use the Mouse/Com 2 to connect a second computer.)
b. Connect the MAC mouse cable...
User Manual - Page 39
... cable. The main cable connects the mouse cable (needed to use the remote control as a mouse) and serial cable (needed to use the ELP Link II software) to the projector.
s s s s s s
22
MAC mouse cable
MAC serial cable
main cable
a. Connect the small end of the main cable to the projector's Mouse/Com 1 port. (Use the Mouse/Com 2 port if you are connecting a second computer.)
b. Connect the MAC...
User Manual - Page 75
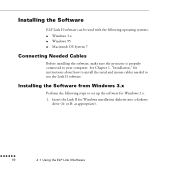
... computer. See Chapter 1, "Installation," for instructions about how to install the serial and mouse cables needed to use the Link II software.
Installing the Software from Windows 3.x
Perform the following steps to set up the software for Windows 3.x. 1. Insert the Link II for Windows installation diskette into a diskette
drive (A: or B: as appropriate).
s s s s s s
60
4 • Using the ELP...
User Manual - Page 76
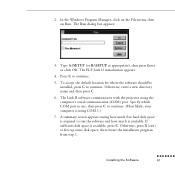
... Type A:\SETUP (or B:\SETUP as appropriate), then press Enter or click OK. The ELP Link II introduction appears.
4. Press C to continue.
5. To accept the default location for where the software should be installed, press C to continue. Otherwise, enter a new directory name and then press C.
6. The Link II software communicates with the projector using the computer's serial communication (COM) port...
User Manual - Page 77
... 5. Press Y (yes).
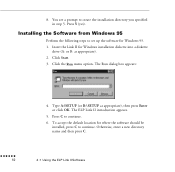
Installing the Software from Windows 95
Perform the following steps to set up the software for Windows 95. 1. Insert the Link II for Windows installation diskette into a diskette
drive (A: or B: as appropriate). 2. Click Start. 3. Click the Run menu option. The Run dialog box appears:
4. Type A:\SETUP (or B:\SETUP as appropriate), then press Enter or click OK. The ELP Link II...
User Manual - Page 78
... (yes).
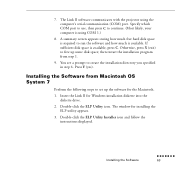
Installing the Software from Macintosh OS System 7
Perform the following steps to set up the software for the Macintosh.
1. Insert the Link II for Windows installation diskette into the diskette drive.
2. Double-click the ELP Utility icon. The window for installing the ELP utility appears.
3. Double-click the ELP Utility Installer icon and follow the instructions displayed.
Installing the...
User Manual - Page 79
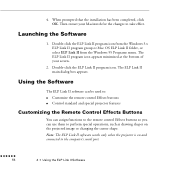
... the Windows 95 Programs menu. The ELP Link II program icon appears minimized at the bottom of your screen.
2. Double-click the ELP Link II program icon. The ELP Link II main dialog box appears.
Using the Software
The ELP Link II software can be used to: q Customize the remote control Effects buttons q Control standard and special projector features
Customizing the Remote Control...
User Manual - Page 87
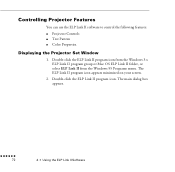
... Features
You can use the ELP Link II software to control the following features:
q Projector Controls q Test Pattern q Color Properties.
Displaying the Projector Set Window
1. Double-click the ELP Link II program icon from the Windows 3.x ELP Link II program group or Mac OS ELP Link II folder, or select ELP Link II from the Windows 95 Programs menu. The ELP Link II program icon appears minimized...
User Manual - Page 88
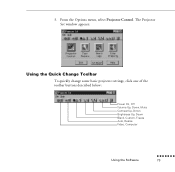
3. From the Options menu, select Projector Control. The Projector Set window appears:
Using the Quick Change Toolbar
To quickly change some basic projector settings, click one of the toolbar buttons described below:
Power On, Off Volume Up, Down, Mute Contrast Up, Down Brightness Up, Down Blank, Custom, Freeze Auto, Resize Video, Computer
Using the Software
s s s s s s s
73